What You'll Need (General Supplies)
I've been working on DIY projects all year, and I rounded up my favorites — plus the ones you guys loved most. Some are dead simple, others take a bit more skill. Either way, I'm sharing exactly how I made each one, what it cost, and where I got the materials.
Let's get into it.
- DIY paint (various colors)
- Clear wax and white wax
- Hot glue gun and glue sticks
- E6000 adhesive
- Painter's tape
- Box cutter
- Spray paint (white, gold)
- Wood glue
- Clamps
- Sandpaper
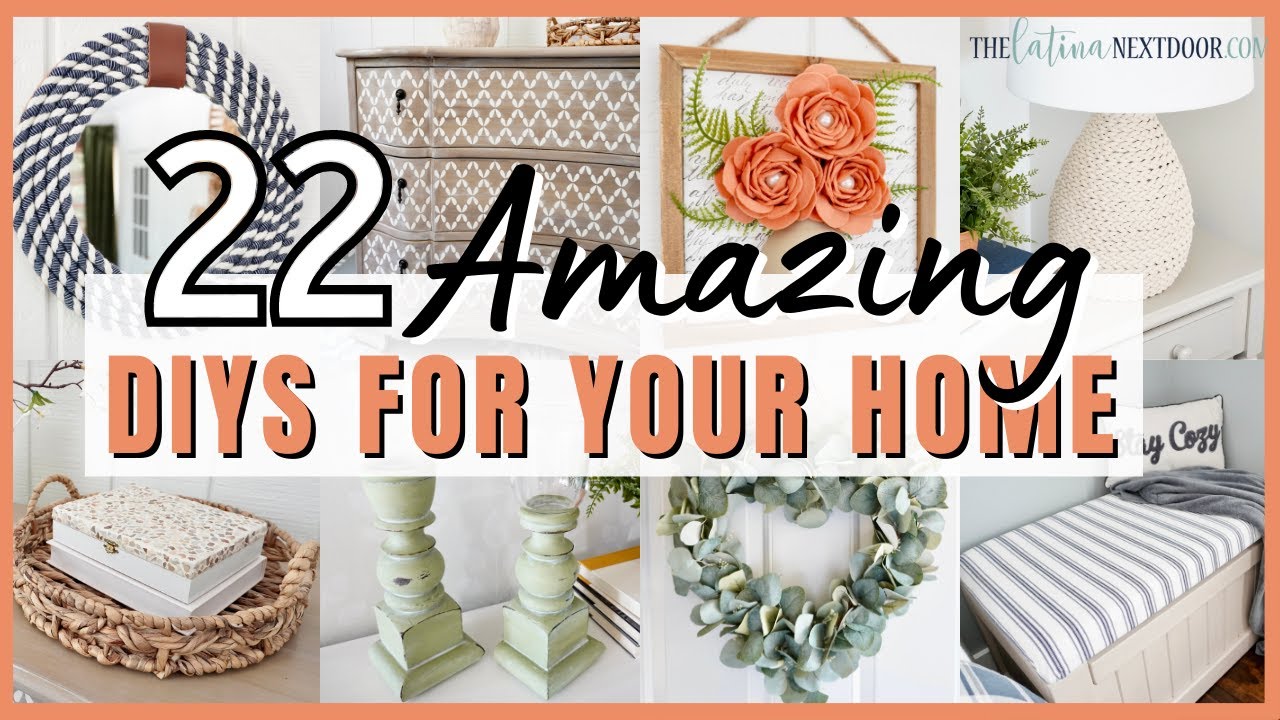
1. Thrifted Glass Candlesticks
I found these glass pieces at a thrift store for 50 cents each. Loved the shape but had no idea what to do with them — until I saw someone selling old newel posts on Facebook Marketplace for $10 each.
What I did: I used only the top piece of the newel posts. My husband cut them at different heights and removed the screws at the bottom. I had hoops in my stash (different sizes since the posts were cut at different heights), and I attached them with wood glue, putting paint cans on top to weigh them down while drying.
After cleaning everything, I painted them with DIY Paint in Gypsy Green. Once dry, I applied clear wax, then while still tacky, sprinkled on decrepit dust for an aged look. I added white wax in the crevices to make details pop, then wiped off excess with a damp cloth. I varied pressure to let some of the original wood show through for extra distressing.
The glass pieces went on top with E6000. I used a level to make sure they were straight.
2. Serena & Lily Marina Lamp Dupe
The original Marina table lamp? $598. No thanks.
What I did: I found a lamp for $8.99 — not the exact shape but close enough. At Hobby Lobby, I found ribbon in the floral section that matched the rope on the original. I bought three at half off.
I primed the base first because the lamp was blue and I didn't want any color peeking through the rope. Once dry, I removed the tape and started wrapping rope at the bottom back, right next to the cord. Hot glue as I went, keeping the rope tight against the row below it. The front needed to be perfectly straight and parallel — the back is where you can be looser.
When I needed a new spool, I cut the seam at the exact same spot on the back. At the top, I hot glued the end piece and tucked it into the coiled rope so you couldn't see the end. Added a shade I already had.
3. Bookends from Those Newel Posts
Remember those newel posts? This is the second DIY from them.
What I did: My husband cut off the top, then sliced it right down the center. We used scrap wood for the bookend bases, ripped to size. I glued them together, then used a nail gun to secure them further. Clamps while drying.
Attached the sliced piece to the bookends with clamps. Filled gaps with wood putty. Painted everything in DIY Paint's Sandy Blonde — two coats because the finial piece was dark. Applied clear wax, then decrepit dust and white wax in the crevices. The effect makes it look like ancient stone.
4. Winter Yarn Wreath
I shared this in January as a winter-after-Christmas door decor piece.
What I did: Used two wire wreath forms I had — one fit inside the other. Joined them with small zip ties, cut off the excess. Spray painted the whole thing white.
Got thick yarn from Hobby Lobby (30% off, under $5). Cut three pieces, taped them down, braided them. To measure: wrap around the wreath, then add about a quarter more length because braiding shrinks it.
Laid the braid on the wreath starting from the outside, working inward. Hot glue on small sections of the wire form, press the yarn down. When I reached the end, I hot glued it close to the other end, cut excess, and tucked the ends inward.
I alternated braid directions for texture — outer going one way, next going opposite, inner going same as outer. Three braids covered the whole form, used one roll of yarn.
Added winter greenery picks from Hobby Lobby's after-Christmas clearance. Laid them out first, then hot glued. Cut the stems down with wire cutters. Used ribbon I had left over from spring — made a burlap bow for the back since I didn't have enough for a big one. Attached with hot glue. The wire on the back is already there for hanging.
5. Grandin Road Leafy Heart Wreath Dupe
This was $99 at Grandin Road. I made it for under $20.
What I did: Couldn't find heart-shaped wire wreaths at Dollar Tree, so I used foam board. Traced a wooden heart cutout I had, made the form about 1.5-2 inches wide. Cut it out with a box cutter.
Reinforced the foam by wrapping jute string around the whole thing — gave it strength and covered the foam.
Got eucalyptus bushes from Walmart for under a dollar each. I used two different colors for contrast. Took them apart individually with wire cutters, then glued each one on. Started at the bottom point of the heart, working outward and downward. Alternated colors. The fullness is up to you, but mine came out fuller than the original.
Added ribbon to the back with hot glue.
6. DIY Canvas Art (Kirkland's Dupe)
My son's bathroom needed something on the wall. Kirkland's had a painting for $105 on sale. I figured I could try.
What I did: Grabbed paints from my stash — acrylics, chalk paints, whatever I had. I'm not an artist, but I challenged myself to copy what I saw. Applied paint in similar hues and shapes. Used a plastic spatula I found somewhere as a tool.
I painted two canvases to create a larger landscape piece. Should have put them side by side and painted across both at the same time — would have been easier to match. Did my "happy trees" after the background was done. Applied a clear coat to protect it.
Side by side: original $104 (left), mine $10 in supplies (right).
7. Mystery Box 3D Art
I got a self-watering plant globe in a mystery box challenge and had to make decor out of it.
What I did: Removed the plaque from a frame that came in the same box. Used my wood burning kit to cut the stem off the globe, then sliced the bubble part in half along the natural seam.
Cut poster board to fit the frame. Used an Iron Orchid Design stamp with black ink on the paper. Applied with a glue stick once dry.
Cleaned up the edges of the plastic piece, painted it in Sandy Blonde (same as the bookends). While that dried, I cut felt into 1-inch, 1.25-inch, and 1.5-inch squares using a Fiskars rotary blade. Rounded the edges with fabric scissors, cut a slit, and glued one side over the other to create little cups. Hot glued these petals onto Dollar Tree pearls, starting with the smallest and working outward.
Made three flowers total. Hot glued them and fern pieces onto the frame, arranging it to look like they were coming out of a vase.
8. Updated Gold Chargers
If you still have those gold chargers from years ago, here's a way to update them.
What I did: Painted over them with DIY Paint in White Swan. Needed a couple coats to cover the dark color. Used Iron Orchid Designs transfer sheets in English Toile pattern. Peeled the backing, placed it on the surface, rubbed with the spatula until the transfer came off. Removed the plastic cover.
Sealed with Big Top After Show for a satin sheen. Important if you're using these for food — protects against staining.
9. Kirkland's Beaded Mirror Dupe
The original was $85. I had a similar mirror in my stash from years ago for about $25.
What I did: Applied painter's tape to protect the mirror, getting it under the lip. Placed 25mm half-round wooden beads (from Amazon) along the border — dry fit first to get spacing right before gluing. Hot glued them down.
Applied Dark & Decrepit (stain/sealer combo) to the beads with a brush. Painted the rest of the frame white. Yes, I glued the beads before painting — I wanted them stuck to the frame, not the paint. You can do it either way.
After two coats dry, wet distressed with a damp cloth — rubbed on edges and high points to remove some white paint. Applied clear wax, then white wax around the base of the beads for a distressed look. Spread the white wax onto the beads, removed excess with a cloth.
Removed the tape. Total cost: $36 (including the original mirror and beads).
10. Ballard Designs Green Fern Art Dupe
These range from $220 to $449 depending on size.
What I did: Used smart vinyl with my Cricut and silhouette PNGs. But you can use any stencil from a craft store, paint it freehand, or cut green cardstock.
Had two 16x20 frames from Michael's I'd never used. Taped them off to create a gold border. Applied Rub 'n Buff to the inner portion. Once dry, removed the green tape, applied blue tape over the painted areas, then painted the rest of the frame black.
Got poster board from Dollar Tree, used the matte side. Folded in half to make two pieces. Used the leaves as a template for sizing. Did the old school fold-and-tear for ripped edges to match the original. Applied the vinyl, put it in the frame.
Side by side: original $440 for a pair, mine $32.
11. Coastal Furniture Makeover
Found this piece on Facebook Marketplace for $50. Loved the shape, hated the floral design on the front.
What I did: Removed hardware, cleaned everything. Mixed DIY Paint in Cake Batter and Layered Chocolate to get a coastal wood color. Applied with long strokes in the same direction. Needed two coats to cover the floral pattern. Changed the hue slightly for the second coat for variation. Left some streaking on purpose to look like real wood.
Created my own stencil with the Cricut. Used wall spackle instead of paint — applied it over the stencil with my fingers (worked better than a spatula). The pink spackle turns white when dry so I knew when it was ready. Let dry overnight.
Sealed with clear wax, applied in the same direction as the brush strokes. Then added white wax throughout the piece — a little at a time, then removed some. Wanted it to look like an old beach piece. Let dry 24 hours, buffed the surface, added the original hardware back.
12. Coastal Tobacco Box
Had a tobacco box from Porto Rico that wasn't my style but had potential.
What I did: Taped off the hardware with painter's tape and used drying gum (art supply for protecting small areas) on the tiny spots. Spray painted the whole thing white for a smooth, even finish with built-in protection.
Used crushed mother of pearl vase filler I had from other coastal projects. Applied spackle to the lid in small sections, then added the pearl pieces one by one. Worked my way around the top and edges. Once the first layer dried, added more spackle between the pieces like grout. Wiped excess off the pearls with a damp cloth.
Removed the gum and tape. Applied a top coat over the shell area for extra protection.
13. Serena & Lily Brighton Floor Lamp Dupe
$898 for the original. Found a floor lamp at Goodwill for $13.
What I did: Removed the shade, used a hair dryer to remove the price sticker. Taped off areas I didn't want painted. Used white gloss spray paint — needed a couple coats over the dark surface. Let dry outside.
The original shade attachment didn't have a harp, so I found a kit on Amazon with adjustable notches — never seen that before, super useful. Got a seagrass lampshade from HomeGoods for $40 (more than I usually spend, but worth it). Adjusted the harp height, found a finial that matched the shade.
Side by side: original $898, mine $75.
14. Faux Leather Basket Weave Box
Had a box in my son's bathroom for extra toilet paper rolls. Was tired of the green and white pattern.
What I did: Used Dollar Tree faux leather sheets. Cut 1-inch strips along the long side with a cutting mat, straight edge, and box cutter. Had to glue end pieces together to get long enough strips. Cut shorter strips at the height of the box.
Created a basket weave pattern — long strips horizontal, short strips vertical. Placed the seams behind the weave so they wouldn't show. Hot glued the pieces together. The first vertical strip is the trickiest, then it's easy to continue.
Covered the bottom with another piece of faux leather so no old pattern showed. Cut the corners and glued to the sides. Cut off the handles — too complicated to work around. Placed the weave pattern on the front, hot glued in small sections.
Folded the leftover vertical strip ends over and into the box. Added a strip of faux leather over the top edge for a clean look, and a smaller one around the bottom perimeter.
15. Red X Door Cabinet Makeover
$20 for this cabinet. The red color and knobs weren't my style.
What I did: Removed the inner shelf. Used DIY Paint in Letterpress Gray (a rich industrial gray). Applied paint in different directions for a textured look. Painted everything — top, sides, legs, inside. Two coats to cover all the red.
For the doors, I went darker. Lightly sanded to smooth imperfections, then added bits of the darker color along the edges with a small artist brush for a distressed look. Couldn't sand to distress because the red would show through.
Sealed with clear wax. Buffed the next day with a lint-free cloth. Spray painted extra doorknobs I had to look copper and hammered, added them to the doors.
16. Serena & Lily Bone Inlay Tray Dupe
$698 for the original Portland bone inlay tray. Found a red tray at a thrift store for $3.99 — from Crate and Barrel.
What I did: Sanded areas where the paint was thick and uneven. Mixed Sandy Blonde and White Swan to get a bone color. Needed multiple coats over the red.
Created my own pattern from scratch to match the original. Used old contact paper to make the stencil. This was the hardest pattern to transfer — the tape didn't want to come off. Used washi tape on the sides to get the exterior pattern right.
Mixed blue paint to match the original color. Started with a stencil brush, switched to a regular artist brush. Once dry, removed every piece of the stencil. It pulled up some of the base paint, so I touched up with a fine brush as I went.
Sealed with clear wax.
17. Toy Bench Makeover for My Son's Room
Found a real wood toy bench on Facebook Marketplace for $50.
What I did: Used DIY Paint's Salvation Solution as primer (no odor, easy cleanup with soap and water). Got into all the nooks and crevices. Painted with Faded Burlap — two coats. Nice contrast against my son's dark furniture. Didn't paint the top because it would be covered.
Sealed with clear wax. Bought upholstery foam from Hobby Lobby — doubled it up for thickness (cheaper than buying one thick roll). Added batting I had on hand. Used navy and white striped fabric. Upholstered while the top was still attached, then removed it, finished stapling upside down on the floor, cut off extra fabric, reattached.
18. Rope Mirror
Used a round mirror from IKEA (you can find these at Dollar Tree too).
What I did: Tied a pencil to baker's twine, pinned it to the center of foam board to draw a circle. Made it too big at first — had to cut it down. Cut the circle out with a box cutter. Traced a smaller circle where the mirror would sit, making sure it was centered.
Secured the mirror with E6000 and hot glue. Got rope from Hobby Lobby's floral section ($7.99, half off so $4). Glued it close to the mirror's edge so no foam showed. Went around, cut when I reached the end instead of continuing. Kept each row tight and even, seams meeting at the same spot.
Got five rows from one spool. Cut the foam board close to the last rope before adding the final row. The final rope overlaps the foam edge so you can't see it. Added rope to the underside to cover the exposed foam edge.
Covered the front seam with a piece of leather I had left over. Wrapped it over the top edge, cut off excess, pressed down. Used a flame to burn off loose rope fibers. Added jute string to the back for hanging.
19. Tomato Cage Raffia Christmas Trees
Found tomato cages at Dollar Tree. Made three different designs at different skill levels.
Design 1 (most complex): Wrapped every wire with raffia ribbon. Then wrapped raffia around three vertical pieces at a time to create a triangle pattern. Went to the top, started back at the bottom, did the same pattern between the other three wires. From underneath, it creates a Star of David pattern — didn't realize that until I was done. Wrapped the top to hide the wire, brought it down the cone.
Design 2 (medium): Instead of wrapping every wire, placed raffia on the front of each wire and slid it down to cover. Wrapped raffia down following the wire pattern, hot gluing in sections. To cover the wire piece wrapped around the cone, braided raffia and hot glued it over the remaining wire and bottom base.
Design 3 (simplest): Started at the top, wrapped raffia ribbon down tight and close together so no gaps showed. Took it all the way to the bottom, covering the bottom wire.
20. Parents' Bathroom Makeover
We moved into my parents' house while transitioning to Tennessee. They went on vacation, and I decided to surprise them by making over the bathroom I used as a teenager.
What I did: Cleaned out the cabinets, removed expired stuff, added new contact paper to protect and update the surface. My husband removed the large builder-grade mirror.
The bathroom had no windows and was painted fuchsia — made it feel like a dark cave. Chose a light, neutral color — not too warm, not too cool. Painted all the walls (husband rolled, I did trim), then baseboards and door molding.
Primed the cabinet, then primed the floors too — old linoleum that was stained and yellowed. Painted the floors after the cabinet.
Spray painted wicker pieces back to brown (they'd been white for years). Used peel-and-stick wallpaper on the wall where the mirror would go — easy to apply and removable if they want to change it later.
Installed a new light fixture. Then came the floors — the biggest part. Used a stencil to create a faux tile finish. Took several days. Sealed with three coats of polycrylic, applied with a brush to prevent bubbles.
Added the accessories back. My mom did a little happy dance when she saw it.
21. Faux Leather Wall Organizer
Inspired by a Target piece, cheaper to make.
What I did: Created the pattern (available for free on my website). Used one sheet of faux leather for the main piece, a second sheet for the interior lining to make it look higher-end.
Cut the shape using a straight edge and box cutter. Cut a rectangle to fit inside the envelope when the flaps are folded in. Cut four 1-inch by 4-inch pieces.
Assembled: Glued the interior rectangle inside the envelope with E6000. Folded the bottom flap, glued the edges, pulled in the side flaps. Added thumbtacks for detail — removed the pins with wire cutters, glued them flat to the center.
Made two of the small pieces into loops by folding and gluing the ends. Glued the other two to the back and inside of the envelope so it sits in the hoop. Spaced everything evenly for the dowels.
Spray painted clear Command hooks gold. Added command strips to the back. Added S-hooks (linked in description).
22. Pottery Barn Berry Cluster Cone Trees Dupe
Small ones are $79, large $159. I made two for $34.
What I did: Used metal cages from Dollar Tree's garden section (couldn't find them this year, so I used party section containers instead). Needed a ton of berry sprigs — note: they now come with 4 sprigs instead of 5 for $1.25, so factor that in.
Removed the tinsel from the trees. Wanted one taller than the other, so I melted half a stick of hot glue between two forms to extend one. Cut the berry heads off with wire cutters.
Wrapped yarn around the cone's teeth to give more surface area for the berries to stick to. Started at the top, worked down, cutting berry bundles smaller as I went. Filled in gaps after the main berries were on.
Painted all the berries with Santa Red to cover white spots from cutting. Applied glossy Mod Podge for shine. Adhered to the buckets (or leave them without — I like them without).
Two original small ones: $158. Mine: $34 for berries, tree forms, and buckets.