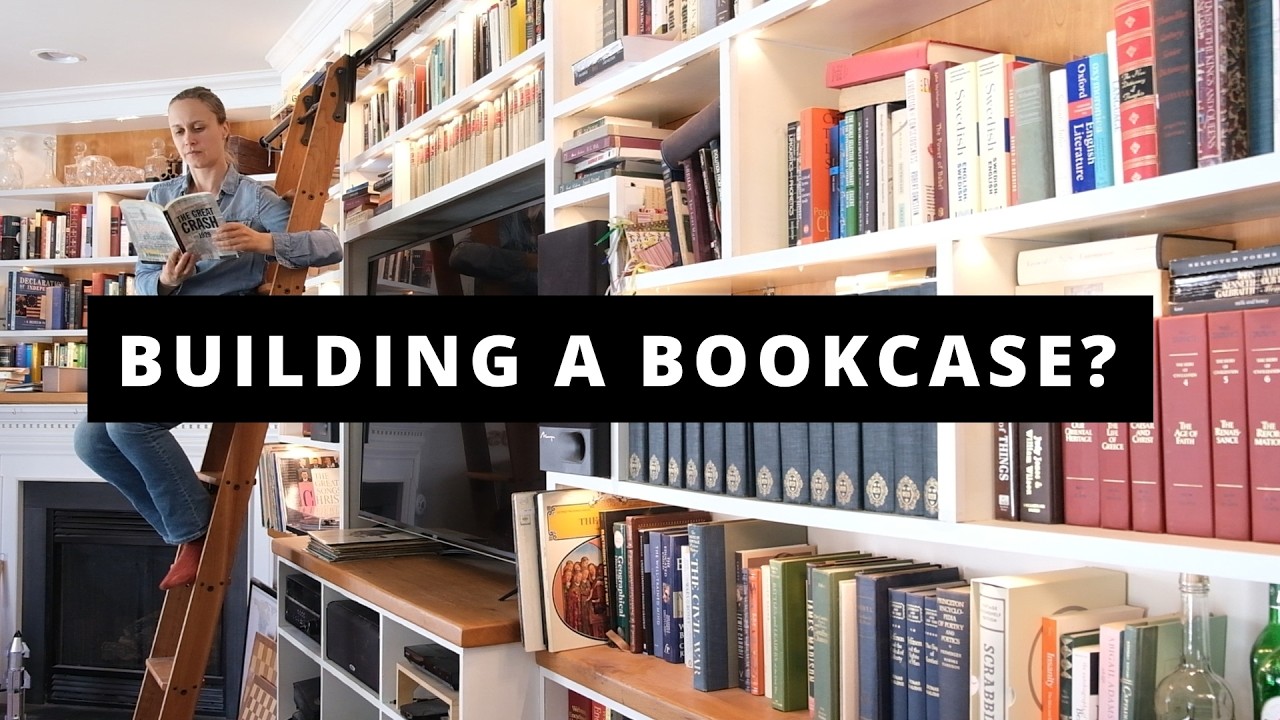
What Kind of Bookcase?
If your book collection is growing like mine, you're probably running out of space. You could grab a cheap store-bought case, but they never quite fit right, they waste space, and a lot of them sag. Building your own saves money, gets you exactly what you need, and lets you fit more books.
Some projects make more sense to DIY than others. Kitchen chairs? Eh. Bookcases? Definitely.
First, decide what style you're building:
Freestanding — Great if you're renting or want to move things around. Can be a half-height piece or full size.
Built-in — If you have a space that screams for a built-in, go for it. In terms of material and effort, it's very similar to a freestanding unit.
Wall unit — I think these are underused. Perfect for weird spaces, small spaces, anywhere you wouldn't think you could put a bookcase.
Construction Methods
Let's assume we're doing a traditional style that starts with a box.
Securing the Sides to the Top and Bottom
Easiest way: Glue and screw. Make sure the wood is untreated before gluing. Use clamps or support, then screw together.
Slightly more advanced: Locking dado joint. Cut the joint about half the thickness of the wood on both pieces, making sure they line up. Quick to do on the table saw.
Attaching the Shelves
Screws — Either regular screws from the outside in or pocket screws from the inside. Is this strong enough? In my experience, yes. I've had no issues using screws with shelves holding a lot of books. To help line things up, mark the position, clamp a piece of scrap wood, and lean your shelf on the support while securing it.
Dados — Mark and cut dados on the sides the same thickness as your shelves. Using 3/4" plywood? Cut with a 3/4" dado stack on the table saw. One tip: keep the two side pieces as one, cut the dados, then cut the piece in half. That way both sides line up perfectly. Glue and clamp while drying. Once both sides are glued in place, the shelves are locked in and can handle a ton of weight.
Dowels — A little more difficult to line up, so maybe not the best for a really large build. But for something smaller, dowels through the sides into the shelves can become a visual feature. Pre-drill holes before assembly, glue together, then finish with dowels from the back and sides.
Shelf Depth Matters
If you look at bookcases in the store, most are 10 to 12 inches deep. If your goal is to fit a lot of books, you can be smarter about this.
I have a bookcase that's only 6.5 inches deep with the face frame. It won't hold all your books, but for paperbacks and smaller books it works great. It's in a high-traffic area, so I didn't want something sticking out too far.
Making specific bookcases for different books is more efficient. I have a narrow one for paperbacks and a deeper one for cookbooks — a little over 10 inches. For one built-in unit, I used three different depths: 10 inches for the top, 11 inches for the lower section, and 18 inches in the middle for stereo equipment. It also breaks up the flow on a wide unit.
Same goes for height. Store-bought bookcases are generous with shelf spacing — fine for decorative objects, but you can be more efficient. My shelves with about 10 inches of space work fine unless you have textbooks or coffee table books.
Building a Built-In
A built-in is really just a freestanding unit raised on a platform and capped with molding. If your base trim is 4 inches high (common size), I like the platform to be 4 inches too.
Don't build a bookcase the exact height of your floor-to-ceiling space. You won't be able to get it in the house and stand it up straight. Also, shelves starting at the floor look worse than bringing them up a bit.
Measure your space. If you have base trim and ceiling molding already, work from those numbers. If you don't have molding, create some for this built-in — it'll hide any weird gaps.
For a large unit, I created three structures in the shop: one base and two top structures. Then I used loose shelves to connect the two top ones together with pocket screws. Once everything's in place with trim and molding, it looks like one piece.
Know where your studs are. Even with a built-in, secure it to the wall. I like to create a nailing strip area designed ahead of time.
Weird scenario: What if you can only find one stud in the space? Create two nailing strips and nail into that one stud in two different locations on your shelf.
What Material to Use
For most of my bookcases I've used plywood. Basic plywood that you paint works fine. Fancier plywood with a nice veneer looks like cherry or walnut for less money than hardwood. Sometimes I've used solid wood like pine.
I've also glued scrap wood panels together to create solid pieces — like a cutting board. Worked great for the shelves and back piece on our latest project.
Dealing with Plywood Edges
You don't want to see those plywood edges (unless you're using Baltic birch and it's part of the design). You can use edge banding on a roll — it's fine and affordable, but can peel over time and is hard to get a clean look.
My favorite: use hardwood for capping. Cut pieces however thick you want (1/2" or 3/4") and secure them to the edges. This adds structural support over longer distances and gives a solid wood look.
Backing
The backing can be a visual element. I have white shelves with cherry plywood backing that offsets nicely. Backing is important to prevent racking and keep everything stable.
Assuming your back panel cuts are square, putting the backing on is also a good way to square up your unit if it's a little off — just squeeze everything in place as you nail.
I've used beadboard on some builds. For backing, use whatever you have on hand, even glue scraps together if you want solid wood from leftovers. I did this so I could attach things like a Raspberry Pi to the back.
Preventing Sag
Books are heavy. Here's what works:
Add blocking in the middle of shelves. I stagger the pieces so I can secure them from top and bottom, which also looks nice. Make sure spans aren't too long and every shelf has blocking.
If you need to avoid blocking in a section, add brackets going into studs. Not as secure, but helps.
Add a cleat in the back under each shelf for the shelf to rest on.
Avoid 1/2" material — the thinner your material, the more it'll sag. Go with 3/4".
For heavy loads: Use thicker plywood in the back and add dados there too. If a shelf is held in place from the side and the back with grooves and dados, it has a ton of support.
Adding Lighting
A custom bookcase is a great opportunity for lighting. Before it's there, you don't realize how much it's needed — without lights, a bookcase just looks like a big black hole.
Plan for lighting ahead of time if possible. Source lights with good quality — these are 90 CRI. Be mindful of color temperature: 4000K gives a nice natural white that works well with wood elements. For a white case, I might go slightly warmer.
Make sure your lights are dimmable. Sometimes you don't want too much light.
A great way to make LEDs go further and distribute light better is to cut them in sections, solder together with wire, and attach. Add grooves in your wood so the lights sit inset instead of protruding — do this before assembly.
When gluing on the strips, I take off the paper, put spots of polyurethane glue, then hot glue. The hot glue immediately clamps it in place while the polyurethane sets.
I added a little box for the dimmer attached with metal and magnets so you can take it off if you want.
Finishing
Ever had a book get stuck to a painted surface? Annoying. To avoid this, use flat paint on the shelf, then finish with water-based polyurethane or acrylic. No books stuck to that.
For solid hardwood, I just sand and use wax polish for a smooth look.
If your wood is rough (like scrap wood panels), use epoxy to seal and finish.
Making the Most of Space
If you have an outlet where you're putting a bookcase, don't just cover it. Either cut a hole and run an extension outlet through it (attached to the back so you still have access from the front), or cut an exact hole for the outlet to fit through.
One of my favorite builds is a built-in desk/bookcase. It has a lid that comes down as a desk and closes up when not needed. If you're looking for multi-function, I highly recommend this concept.
Got a corner you don't know what to do with? A small corner shelf design connected with screws adds a nice visual feature.
How Much Weight Can These Hold?
I loaded a shelf with the complete Oxford English Dictionary — 78.4 pounds. No problem.
I'm always looking for where to put more bookcases in our house. Let me know your tips in the comments.