What You'll Need (The Basics)
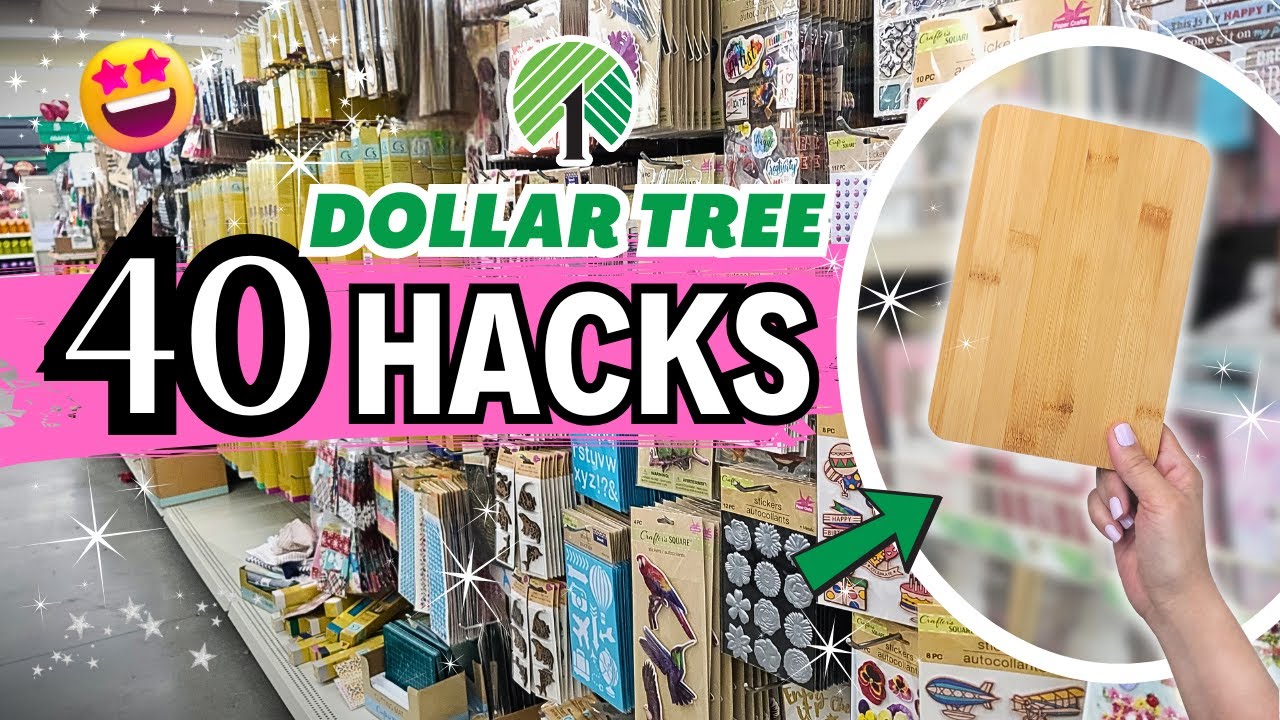
I've been hoarding Dollar Tree supplies for a while now, and I finally put together my favorite projects from the past year. These are all budget-friendly, most take under an hour, and none of them look like they came from a dollar store.
Most of these projects use the same core supplies:
- Dollar Tree bamboo cutting boards, wood planks, frames, and baskets
- Acrylic paint (Apple Barrel, FolkArt, or Waverly chalk paint)
- Tight Bond quick & thick multi-surface glue
- E6000 for permanent holds
- Hot glue gun
- Sandpaper
- Clear wax or polyacrylic sealer
- Paintbrushes and sponge brushes
1. Shabby Chic Wall Hook
Materials: 2 bamboo cutting boards, metallic wall hook from Dollar Tree
Glue the two cutting boards together with Tight Bond to make one thick piece. Clamp and let dry overnight.
Place the hook where you want it, mark the screw holes, and drill pilot holes (wrap tape on the bit to know how deep to go). Screw in the hook, then dab a little white paint over the screws so they blend in.
Flip it over and add triangle hangers on the back. Use a carpenter square to mark where the nails go so they're even.
That's it. You've got a solid, vintage-looking wall hook that can actually hold things.
2. Stenciled Wood Tray
Materials: Wood board, water-based stain (Special Walnut), stencil, white chalk paint
Apply the stain with a cloth, then wipe off the excess. Tape your stencil in the center. Dip your brush in paint, dab off most of it on a paper towel (this is the secret to no bleeding), and pounce in circular motions. Remove the stencil before it dries.
For the legs, grab those wooden angel ornaments from Dollar Tree. Glue one on each corner with wood glue. Use a small wood block to make sure the distance from the edge is even. Flip it over and put some weight on top while it dries.
Seal with clear wax.
3. Wood Block Lantern
Materials: 36 tumbling tower blocks, acrylic paint (territorial beige + khaki)
Thin the paint with water, brush it on, wipe it off immediately. Leave the ends unpainted — that's where the glue goes.
Form a square with 4 blocks. Make two of these squares. Then glue 5 blocks together end-to-end for the vertical posts. Attach those to the unpainted ends of your squares.
Use a small square dowel to make sure everything stays at 90 degrees, or you'll end up with a crooked lantern.
The Dollar Tree glass plate candle holder fits perfectly inside.
4. Three-Tier Tray from Stoneware Dishes
Materials: Dinner plate, side plate, bowl (turquoise swirl stoneware), glass taper candle holders
For permanent assembly, use E6000. For temporary, hot glue works.
Paint the candle holders with FolkArt Linen. Use a round sponge brush to minimize streaks. Seal with Krylon spray.
Glue a candle holder in the center of the dinner plate. Add the side plate on top. Add another candle holder, then the bowl on top.
You can also just stack the pieces without glue for a jewelry stand — bowl upside down with a side plate on top works great.
5. Peel & Stick Wallpaper Tray
Materials: Large fall tray from Dollar Tree Plus, peel & stick wallpaper
The wallpaper was about 1/4 inch short on the width, so I painted the tray edges with a custom color match (white + gray + beige) to hide the original fall design.
Peel back a few inches of the wallpaper backing, line it up on one side, and slowly peel while smoothing down. Crease the excess on the end and trim with a craft knife.
The best part? You can peel it off and change the pattern whenever you want.
6. Frame Shelf with Blocks
Materials: 8x10 white frame, 9 tumbling tower blocks, wood plank
Remove the backing and glass from the frame. Trim the plank to the width of the frame.
Glue blocks horizontally on the bottom edge of the plank, then stack more vertically on top. Paint everything white.
Trim giant craft sticks to fit in the back of the frame where the backing normally sits. Stain them with Walnut gel stain for contrast. Hot glue them to the back of the frame (use E6000 if you want it permanent).
Glue the block-and-plank assembly to the front of the frame. Add flowers or greenery.
7. Braided Raffia Basket Tray
Materials: Raffia grass skirt, wood round, hot glue
Pull the raffia strands out of the skirt (there's a knot in the center of each — just pull the ends). Braid three strands together loosely.
Mark the center of the wood round. Start gluing the braid in a spiral from the center out. Leave about an inch of wood exposed at the edge.
For handles, braid four strands tighter. Glue one end to the wood, determine the handle length, glue the other end. Do the same on the opposite side.
Wrap extra raffia around the edge to build up sides. Stack layers until you've gone around four times.
8. Painted Metallic Sticker Tray
Materials: Wooden tray, metallic sticker pack, Deco Art paint in Seaside Blue
Place a sticker on the long side of the tray. Paint right over it with Seaside Blue — but don't go so thick that you fill in the details. Use a small brush to remove excess paint from the grooves. Layer the paint, letting it dry between coats.
Once dry, sand the edges and corners. Apply antique wax with a damp cloth, then wipe with a dry cloth. Use a small brush to get wax into the sticker details.
Add wood piece legs (from those snowman ornaments) with a little antique wax on them too.
9. Rustic Wood Coasters
Materials: Wood slices, acrylic paint, vinyl stencil (or Dollar Tree stencils)
Mix territorial beige and khaki with water. Apply with a cloth like a stain, wipe off excess.
Cut a stencil with your Cricut (I used a tree design from Canva) or use Dollar Tree stencils. Remove the J-hanger from the wood slice first. Center the stencil, pounce on black chalk paint.
Seal with Minwax polyacrylic — several layers for moisture protection. Add adhesive cork on the bottom so it doesn't scratch surfaces.
10. Simple Wood Cross Base for Baskets
Materials: 12" 1x2 wood, small woven basket
Cut one piece at 4 3/4 inches and two pieces at 1 3/4 inches. Mark the center of the long piece, glue the smaller pieces on to form a cross.
Stain with khaki and territorial beige thinned with water. Apply with a brush, wipe off excess. Lightly sand the ends so they don't soak up too much color.
Glue the basket on top. That's the whole project.
11. Large Vintage Wooden Sign
Materials: Large wood plank, metallic stickers, chalk paint (oyster), antique wax
Place metallic corner stickers on the wood, pressing firmly. Add a decorative sticker at the top center.
Paint everything with chalk paint, including over the stickers. Use a small brush for the detailed areas.
Lightly sand the edges. Apply antique wax with a damp cloth, buff with a dry cloth. Use a small brush to work wax into the sticker details — this makes them pop.
Apply a large decal from Dollar Tree, or skip it if you like the look as-is. Seal with Mod Podge or spray sealer.
12. Rustic Wood Riser
Materials: Rectangle wood slice, 1" square dowel, 4 wooden cubes
Cut the dowel to just over 3 inches. Remove the J-hanger from the wood slice.
Glue the dowel pieces close to the edges on the bottom. Glue the cubes on top of the dowels for extra height. Let dry with weight on top.
Stain with Special Walnut water-based stain. Wipe on, wipe off.
13. Four-Frame Wall Decor
Materials: 4 gold frames, folk art metallic paint (antique gold), wallpaper
Remove backing and glass. Paint the frames with antique gold to cover scratches and tone down the color.
Glue the frames together in a square. Use hot glue to clamp while E6000 dries.
Apply wallpaper to the glass pieces. Cut them to size, peel backing slowly, smooth with a plastic scraper.
Glue bamboo sticks on the back joints for support. Reinstall the glass and backing.
14. Stenciled Floral Riser
Materials: Bamboo cutting board, Waverly chalk paint (Sandstone), wood peg dolls
Paint the cutting board Sandstone. Light sand the edges and random areas for a distressed look.
Cut a floral stencil with your Cricut or use Dollar Tree stencils. Pounce white paint over the stencil — apply lightly in some areas for a faded look.
Stain the peg doll legs with gel stain. Glue them on the corners.
Seal with clear wax. Let stenciled areas dry overnight before waxing.
15. Plate and Bowl Display with Wood Base
Materials: Decorative plate and bowl, 1x2 wood, hexagon wood piece
Cut three 1x2 pieces — one at 10 inches, two at 4 5/8 inches. Glue them into a cross shape.
Glue smaller upright pieces on the ends of the cross. Add a hexagon wood piece on top for elevation.
For the bowl base, glue four tumbling tower blocks equally spaced around a 5-inch round pinewood piece.
Stain everything with Walnut gel stain. Apply in small sections, wipe off immediately.
The plate and bowl aren't glued down, so you can swap them out.
16. Wall Pocket from Circle Signs
Materials: Hanging wooden circle signs, bamboo circle, wallpaper
Cut one circle sign in half by scoring with a utility knife. Glue the bamboo circle on the uncut sign.
Cover the half-round with wallpaper. Glue it on top of the circle, positioning it to cover the hanging holes.
String rope through for hanging. Fill with flowers or stems.
17. Snowflake Stenciled Shelf
Materials: Long rectangle hanging wall shelf, stencil, white chalk paint
Stencil snowflakes in the center of the MDF board. Dab excess paint off the brush first.
Trim a paint stir stick to the height of the board. Paint it white. Paint four craft cubes white.
Lightly distress everything with sandpaper. Glue the paint sticks on the ends, cubes on the bottom corners.
Cut nautical rope for handles. Wrap the ends with jute string and run through a candle lighter to seal. Hot glue handles on each end.
18. "Home" Sign with Metallic Sticker
Materials: Thick wood block, metallic sticker, "home" wood sign
Press the metallic sticker on the wood. Paint everything with white chalk paint, covering the sticker. Use a small brush for details.
Paint the "home" sign black. Sand the edges of both pieces.
Apply antique wax with a damp cloth. Use a small brush to work wax into the sticker details.
Glue the "home" sign on top.
19. Frame Lantern
Materials: 4 brown 4x6 frames, wood blocks
Remove backing and glass. Pull out metal tabs horizontally to avoid cracking the frames.
Glue the frames together with E6000 to form a rectangle. Tape in place while drying.
Paint wood blocks with territorial beige thinned with water. Make a base piece and a lid piece with trimmed 1x2 wood and a tumbling block on top.
Glue the base to the bottom of the frames. For the lid, glue small blocks on the wood so it sits in place without sliding off.
20. Hanging Wood Wall Pocket
Materials: Bamboo cutting board, 12" 1x2 wood
Cut two 1x2 pieces at 7 3/4 inches and one at 4 inches.
Paint the wood with Waverly Sandstone. Tape off 2 3/4 inches from the bottom of the cutting board and paint that section too.
Flip the board over. Glue the long 1x2 pieces on the sides and the short one at the bottom to form a U shape. Clamp and let dry.
Add triangle hangers on the back.
21. Decoupaged Cake Plate
Materials: Clear cake plate, napkin with blue tropical design, Mod Podge
Paint the plate with white acrylic paint — just the top surface and up to the scalloped edge.
Remove the extra layers from the napkin so you're working with just the printed layer. Place the plate on the napkin and trim, leaving 1.5 inches extra.
Apply Mod Podge on the plate surface. Lay the napkin down starting from the center. Smooth with your fingers and a clear plastic sheet.
Apply Mod Podge over the top and let dry overnight. Sand off the excess napkin along the edges.
For the base, stack two plastic bowls painted white on the inside. Glue the bottoms together, then glue to the plate.
22. Extended Woven Basket
Materials: Cream woven basket, nautical rope, white yarn
Hot glue nautical rope along the top of the basket, wrapping around to extend the height. Go around about four times.
Cut nine pieces of white yarn, each about 3 feet. Use a plastic yarn needle to weave through the rope.
Loop the yarn over the first row of rope four times, then over two rows four times, then over three rows four times. Mirror the pattern on the way back. Space the patterns about 3/4 to 1 inch apart.
Tuck the ends inside the loops instead of gluing.
23. Beaded Frame Riser Tray
Materials: Wooden beaded frame, square plank, wooden beads
Remove backing and glass from the frame. Paint the square plank territorial beige.
Dry brush white paint on the frame — you want most of the wood to show through.
Glue the square plank in the center of the frame. Glue wooden beads on the bottom corners. Paint the beads to match the plank.
24. Pedestal Tray with Metallic Sticker
Materials: Square wooden tray, metallic sticker, white pillar candle pedestal
Apply the metallic sticker on one side of the tray. Paint everything with Waverly Sandstone — several layers on the sticker.
Lightly sand the edges. Apply antique wax with a damp cloth. Use a small brush for the sticker details.
Rub a little antique wax on the pedestal. Glue the pedestal to the bottom of the tray with E6000.
25. Stenciled Cookbook Stand
Materials: Bamboo cutting board, stencil, 1x2 wood, paint stir stick
Stencil a decorative circle at the top of the board. Stencil "recipe" in the center (cut the stencil with your Cricut or use letter stickers).
Glue a 1x2 and a paint stir stick together. Trim to the width of the board.
Glue a Dollar Tree easel on the back of the board. Stand it up so the easel repositions itself, then clamp.
Paint the glued wood pieces white. Glue them to the bottom front of the board. Seal with spray sealer.
26. Double-Sided Wallpaper Riser
Materials: Hanging shelf kit, 12" 1x2, peel & stick wallpaper
Trim the 1x2 to the shortest side of the shelf. Mix khaki and territorial beige with water, apply to deepen the wood color.
Apply wallpaper in the center of the shelf, leaving the ends exposed for gluing. Glue the trim blocks on each end.
Flip it over and cover the other side with leftover wallpaper. Now it's a double-sided tray or riser.
27. Tumbling Block Riser
Materials: 36 tumbling tower blocks, 2 thick wood blocks
Stain the blocks with Walnut gel stain. Apply on one wide side only. Sand the end grain of the thick wood blocks before staining.
Glue 11 blocks together side by side. Make two sets. Glue 7 blocks together side by side. Make two sets.
Glue the 7-block pieces between the ends of the 11-block pieces to form a rectangle. Clamp with painter's tape.
Touch up any unstained areas. Glue the rectangle between the two thick wood blocks.
28. Grapevine Wreath with Wood Sign
Materials: 18-inch grapevine wreath, greenery bouquets, flowers, wood slice, poster stickers
Bend two greenery bouquets to follow the curve of the wreath. Tuck them in opposite each other. Add lavender bunches on top.
Hot glue three flowers in the center — two ivory, one peach.
Sand the poster stickers lightly to distress them. Peel and stick "HELLO" on the wood slice. Seal in place.
Remove the string hanger from the wood slice and hot glue it in the center of the wreath.
29. Stacked Basket Pedestals
Materials: Round weave baskets
Flip one basket over. Apply hot glue on the bottom. Place another basket on top, aligned. Hold until set.
For extra height, glue another basket on top with the tops connected — they fit together like puzzle pieces.
30. Butterfly Wallpaper Frame Set
Materials: Black frame, blue butterfly wallpaper, hexagon mirror, wood words
Trace the frame on the wallpaper. Cut slightly larger. Peel backing, smooth onto the frame, trim excess.
Do the same with the hexagon mirror.
Paint the wood words black with chalk paint. Glue them in the center of the frame.
31. Metallic Beaded Riser
Materials: Beaded wood round, 3 wooden dice
Paint the wood round with Brown metallic paint. Make sure the beads get full coverage.
Paint the sides of the dice only. Remove the plastic sticker from the bottom of the wood round.
Glue the dice evenly spaced on the bottom. Use a tower block to check spacing from the edge. Place weight on top while drying.
32. Stenciled Canvas Trio
Materials: 3 canvases, Waverly chalk paint (celery + sandstone), tumbling blocks, rub-on transfers
Paint one canvas celery, one sandstone, leave one white.
Glue 10 tumbling blocks into a rectangle frame (3 blocks on long sides, 2 on short). Glue 3 more single blocks for stands.
Stain the frames with Walnut gel stain. Lightly sand the joints first to blend gaps.
Apply the rub-on transfers: gardening tools on sandstone, wildflowers on celery, farm fresh on white. Rub with a plastic scraper, peel slowly.
Glue the frames onto the canvases with Tight Bond (hot glue didn't hold). Glue a single block on the back vertically for the stand.
33. Stacked Wood Slice Candle Holders
Materials: Small round wood slices, pillar candles
Stack several slices at varying heights. Place pillar candles on top. No glue, no paint. Done in 30 seconds.
34. A-Frame Planter
Materials: 2 brown frames, white paint, bamboo sticks, string
Remove backing and glass. Dry brush the frames with grayish-white paint. Wipe with a damp cloth while still damp to bring out the wood grain.
Paint bamboo sticks dark brown, then lightly brush white over them.
Join the frames with backs together. Wrap the top with string. Pull the bottoms apart to form an A shape. Glue bamboo sticks on the bottom corners.
Add hot glue at the top to keep it together. Hang a small metal pail with a shower curtain hook.
35. Painted Oval Bowl
Materials: Plastic oval bowl, white spray primer, Waverly Sandstone
Spray the bowl with plastic-bonding primer. Paint the inside with Sandstone chalk paint. Let some white show through for a stone look.
Cut 1-inch square dowel into 2 1/4-inch pieces for legs. Stain with Walnut gel stain.
Glue the legs with E6000, positioning them on the side of the bumper pegs closer to the center. Spray with Krylon sealer.
36. Book Covered in Wallpaper
Materials: Book, peel & stick wallpaper
Lay the wallpaper face down. Place the book on top. Fold the wallpaper over, making sure the center aligns with the spine.
Cut the corners at an angle. Cut two slits along the spine.
Peel the backing and stick starting from one cover. Flip and do the other side. Fold in the top and bottom flaps. Cut the side flap corners at an angle, fold in, tuck inside the cover.
Trim the spine excess and fold down.
37. Leather Handle Basket
Materials: Large basket, faux leather cord, wooden rings
Cut two pieces of leather cord, each about 2 feet. Thread through a plastic yarn needle.
Attach a wooden ring to one side of the basket by pushing the needle through and wrapping the leather around the ring. Keep looping without overlapping. Tie a knot underneath.
Do the same on the opposite side.
38. Mini Basket Candle Holders
Materials: 6-inch round woven baskets, battery-operated pillar candles
Place the candles inside the baskets. That's it.
For a fuller look, add baby's breath around the base of the candle. Mix in greenery and small flowers for color.
39. Butterfly Sticker Riser
Materials: Oval wood shape, large flower sticker, 1x2 wood
Paint the wood shape white. Trace the flower section you want on the sticker, cut it out, peel and stick.
Sand the overhang for a clean edge.
Cut 1x2 wood for legs. Paint with khaki + territorial beige thinned with water. Leave the narrow side unpainted for gluing.
Glue the legs on the bottom so they don't protrude past the oval. Seal with Mod Podge.
40. Leather Handle Cutting Board Tray
Materials: Bamboo cutting board, 1/2-inch leather strip, metal thumbtacks
Cut two leather strips to about 7 inches. Apply glue on one end, attach to the side of the board. Hold with tape. Do the other side.
Let dry completely. Mark where you want the thumbtacks, poke through the leather, and hammer them in. Put tape on top of the tack to prevent denting.
You can flip the handles to point away from the tray if you prefer.
Quick Tips That Apply to All These Projects
- Dab your brush before stenciling. Most bleeding happens because the brush is too wet.
- Let stenciled areas dry overnight before sealing. Otherwise the paint smudges.
- Sand end grain before staining. It soaks up way too much color otherwise.
- Hot glue for temporary, E6000 for permanent. They work great together — hot glue holds while E6000 cures.
- Paint over metallic stickers in thin layers. Too thick and you fill in the details.