What You'll Need
DIY Evap Cooler: How to Build a 5-Gallon Bucket Swamp Cooler
I've got a 5-gallon bucket, a fan, and a pump — and it can drop the temperature in a room by almost 20 degrees. I ran this in my house when it was 84° inside, and I was getting 65° out of the vent. Not bad for something that costs maybe $40 to build.
Let me show you how to put one together.
- 5-gallon bucket (standard plastic, like from a home center)
- Evaporative cooling pad (about 14" x 31")
- Small fountain pump (any submersible pump will work)
- 1/4" aquarium tubing (or 3/8" — whatever you have)
- A fan that fits inside the bucket rim (I used one that drops in snug)
- Window screen or garden cloth
- A nail or pin for making holes in the tubing
- A clamp (to close the end of the tubing)
- Drill with a hole saw or spade bit
Step 1: Drill Air Intake Holes
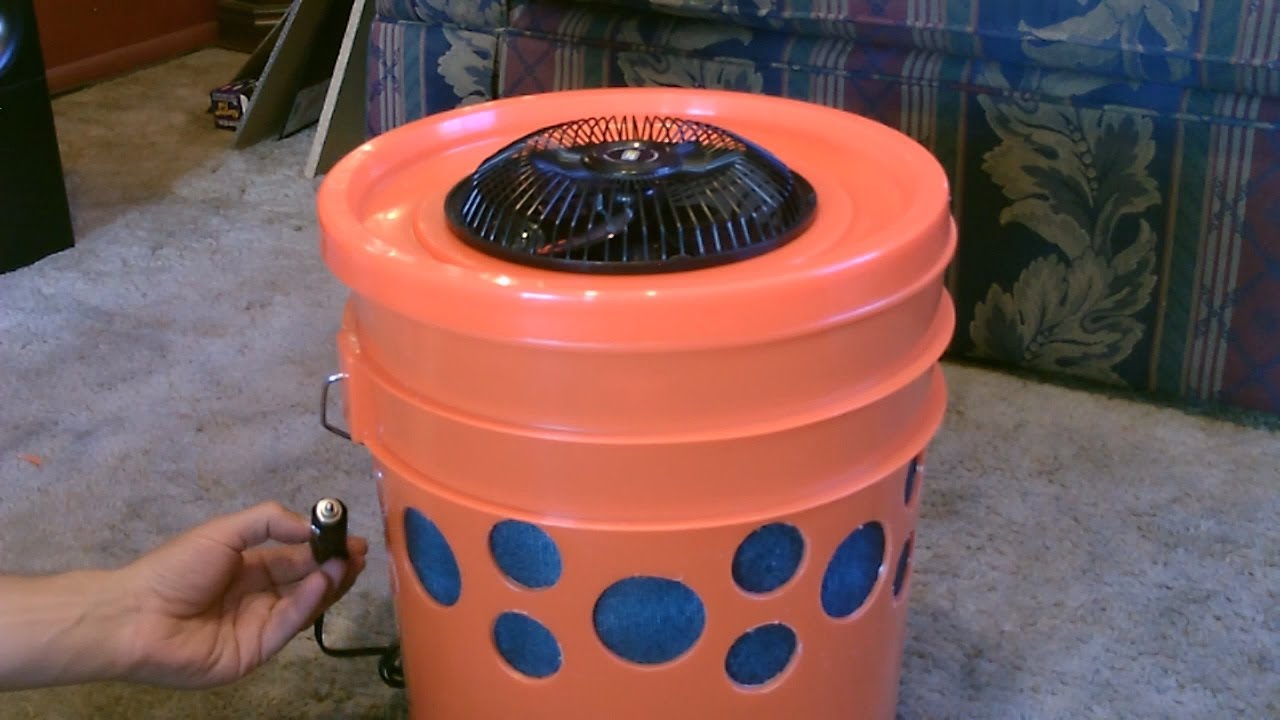
Fill the bucket with 2 gallons of water. Then drill a row of holes around the side of the bucket — make sure they're all above the water line. I did two rows of holes evenly spaced all the way around. Nothing fancy, just enough to let air in.
Step 2: Cut the Cooling Pad
You want a piece about 13–14 inches high and 30–31 inches around. Cut it from your cooling pad roll and set it aside.
Step 3: Install the Screen
Before you put the pad in, wrap window screen around the inside of the bucket, between the side and where the pad will sit. This keeps the pad from touching the holes directly. It also helps hold moisture. Garden cloth works too.
Step 4: Put the Pad In
Slide the pad into the bucket, all around the inside. It should fit snug against the screen. I trimmed mine so it sat right at the rim.
Step 5: Mount the Fan
Cut a hole in the lid of the bucket (or just drop the fan in from the top). I cut the lid so the fan sits right in the opening, almost a perfect fit. Gravity does the work — it just sits there. You'll want the fan blowing downward into the bucket, so it pulls air through the wet pad and pushes cool air out.
Step 6: Set Up the Pump and Soaker Hose
Drop the pump into the bottom of the bucket. Connect the aquarium tubing to the pump outlet. Run the tubing up the side of the bucket and wrap it once around the top edge of the pad. Clamp the end of the tube so water doesn't just shoot out the end.
Now take a nail or pin and poke holes along the tubing — about one hole every centimeter (a couple per inch). This turns the tube into a soaker hose. You want water to drip out evenly along the top of the pad. Start with a few holes, test it, add more if needed. I aimed for a steady drip, not a stream.
Step 7: Fill and Run
Make sure there's enough water in the bucket to cover the pump. Turn it on. The water drips down through the pad, the pad gets completely saturated, and the fan pulls hot dry air through the wet pad. That's it.
I ran mine and the whole pad was wet — no water dripping out the sides or through the holes. The screen keeps it contained.
Tips and Things to Know
- This only works in dry air. Evaporative coolers need low humidity. If you're in a humid climate, skip it.
- Dump the water when you're done. Don't leave a wet pad sitting around — bacteria will grow. Take the pad out and let everything dry.
- You can add ice. Drop a big block of ice in the center of the bucket along with the water. It'll make the air feel colder.
- Solar powered? The fan I used runs on DC, and I hooked it up to a small solar panel. The pump is low power too. Totally doable off-grid.
How Well Does It Work?
In my 84° house (dry heat), I was reading 65–66° right at the outlet. Almost 20 degrees cooler. The suction was even across all the intake holes. No water issues.
I definitely recommend making one. It's cheap, it works, and you can build it in an hour.