What Is a DIY Air Conditioner
When a heatwave hits, plenty of people go looking for a cheap way to cool down, and the homemade air conditioner is a perennial favourite. A diy air conditioner is a device you build yourself to cool air using simple parts, most often a fan combined with ice, chilled water, or a small electronic cooling module. The appeal is obvious: low cost, quick assembly, and something you can tailor to a desk, a bedside, a tent, or a van.
One thing worth saying at the outset, because experienced builders in online communities repeat it often: most of these are really air coolers rather than true air conditioners. They chill the air around you, but they do not pump heat out of the room the way a refrigerant-based unit does. That distinction matters for setting expectations, and it runs through everything below.
This article looks at the three designs people build and debate most, walks through the community-favourite copper-coil version step by step, explains the honest limits and how to get the most from a build, and covers the safety points that come with mixing electricity, water, and ice.
The Three Designs People Build Most
Ask around in DIY and off-grid communities and the same three approaches come up again and again, each with a different balance of simplicity, effectiveness, and power use.
Design 1: Fan Across Ice
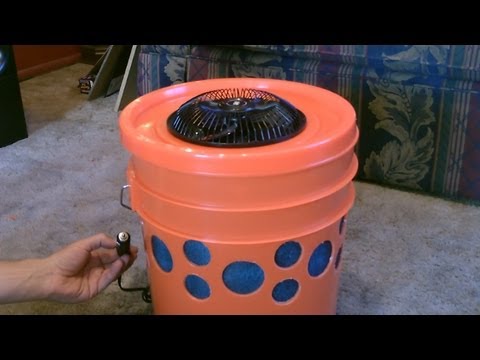
The classic starter build puts ice in an insulated cooler, mounts a fan on the lid, and adds vents so the fan draws air across the ice and pushes it out cool. It costs little and takes minutes to assemble, which is why almost everyone tries it first.
It also comes with two complaints that builders raise constantly. First, the ice melts quickly, so the cooling is short-lived unless you keep refilling it. Second, because the air blows directly over ice and meltwater, it picks up moisture and raises the humidity in the room, which can leave things feeling damp. Both problems are exactly what the next design sets out to solve.
Design 2: The Copper Coil Water Loop
This is the design that experienced builders tend to recommend, because it fixes the two big weaknesses of the basic version. Instead of blowing air over exposed ice, a submersible pump circulates chilled water from an ice cooler through a copper coil mounted in front of the fan, in a closed loop. The fan blows through the cold coil, cooling the air indirectly, while the water flows back to the cooler to be chilled again.
- 1Bend copper tubing into a flat coil sized to sit in front of the fan.
- 2Fix the coil to the front of the fan so all the air is blown through it.
- 3Run plastic tubing from a submersible pump in the cooler up to the coil and back, forming a closed loop.
- 4Place the pump in the cooler and add ice and enough water to cover it.
- 5Switch on: the pump sends chilled water through the coil, the fan blows cool, dry air out, and the return line carries the water back to be re-chilled.
The advantages people report are threefold. The ice lasts far longer, often stretching a single batch to a day or more, because the fan is separated from the ice and the loop reuses the cold rather than melting ice straight into the air. There is no added humidity, since the fan never touches the ice or water directly, making it a strong choice for humid climates where the basic version disappoints. And placement is flexible: because the tubing can carry water up a fair height, the fan can sit on a table or shelf while the cooler tucks away on the floor.
Design 3: The Thermoelectric (Peltier) Cooler
The third approach ditches ice entirely. A thermoelectric module, the same kind of component used to cool computer chips, gets cold on one side when powered, and mounting it with a heat sink and a fan inside a length of vented PVC pipe makes a small, ice-free cooler. It is compact, portable, and needs no refilling.
The community verdict, though, is lukewarm. Builders consistently report that thermoelectric units draw a lot of power for the modest amount of cooling they produce, and many rule the design out for that reason. It can be a fun electronics project and works for very small, close-up cooling, but it is not the efficient choice for meaningful comfort, which is why the ice and copper-coil builds remain more popular.
The Honest Truth: Cooler vs Conditioner
Here is the point the most experienced builders keep making, and it is worth taking on board. A true air conditioner works like a refrigerator: it uses mechanical compression or absorption to move heat out of a space and dump it elsewhere, and it keeps doing so until the room is cool. A DIY build does not move heat outside; it simply transfers heat from the air into a block of ice or a coil, which then warms up and melts inside the same room. That is why builders call these devices air coolers, not air conditioners.
The scale of the difference is stark. Homemade builds typically deliver somewhere in the low hundreds up to perhaps a bit over a thousand effective units of cooling, while even a small window unit is rated at several thousand and a modest mini split far more, running continuously. There is also a subtle catch worth knowing: if you freeze the ice in your own freezer, that appliance dumps its heat back into the house, so across the whole home you are not really gaining cooling. None of this makes a DIY cooler useless, it just means treating it as targeted, temporary comfort rather than whole-home climate control.
Making the Cooling Last
Since ice is the limiting factor for most builds, the practical tips builders share all revolve around making the cold last longer.
One more note on frozen bottles: while they are cheap and reusable, the plastic insulates the ice from the air, so they can cool less effectively than a block or than the closed-loop water approach. Match the method to your goal, longevity from a block and a loop, convenience from bottles.
Dry vs Humid Climates
Climate strongly shapes which build works best. In hot, dry areas, an evaporative or "swamp cooler" approach, where a fan pushes air through wet pads, is efficient and needs no ice, running on little more than the power of a small fan and pump. The trade-off is that it adds moisture to the air, which is welcome in the desert but not in muggy weather.
In humid climates, adding more moisture is the last thing you want, so the copper-coil water loop is the standout: it cools the air without wetting it, because the fan blows over a sealed cold coil rather than over water. Knowing whether your problem is dry heat or sticky heat points you straight to the right design.
Where a DIY Build Makes Sense
Understood for what they are, these builds are genuinely useful. They shine for personal cooling and small spaces: a spot by the couch or bed, a desk, a small room, a van or tent, or as emergency cooling during a power issue or when a unit is down. In all of these, cheap, targeted cool air is exactly what is needed, and a homemade cooler delivers it for very little. Aim it at yourself, keep the ice topped up, and it does its job well, provided you are not expecting it to cool an entire home.
Safety Tips
Mixing electricity with water and ice calls for a few sensible precautions.
- 1Keep the fan motor and all electrical connections clear of meltwater and condensation to avoid shorts or shocks.
- 2Make sure any submersible pump stays fully covered by water so it does not run dry and overheat.
- 3Never use dry ice in an enclosed space; it releases carbon dioxide as it sublimates, which can be dangerous indoors. Use ordinary ice.
- 4Keep tidy, insulated wiring, and remember a homemade cooler cannot replace a real refrigerant air conditioner for a whole home.
Frequently Asked Questions
Conclusion
A DIY air conditioner is a rewarding, low-cost way to take the edge off the heat, as long as you know what you are building. The fan-over-ice version is the quick starter but melts fast and adds humidity; the copper-coil water loop solves both by cooling indirectly through a closed loop, giving longer-lasting, drier cooling and flexible placement; and the thermoelectric route is neat but power-hungry. Above all, remember the community's honest refrain: these are air coolers, not true air conditioners. Use a solid block of ice, keep the electrics away from water, skip dry ice indoors, and treat your build as targeted personal cooling. Do that, and a homemade cooler will keep you comfortable through the hottest days for a fraction of the cost of the real thing.