What You'll Need
Here is a DIY tutorial based on the transcript provided.
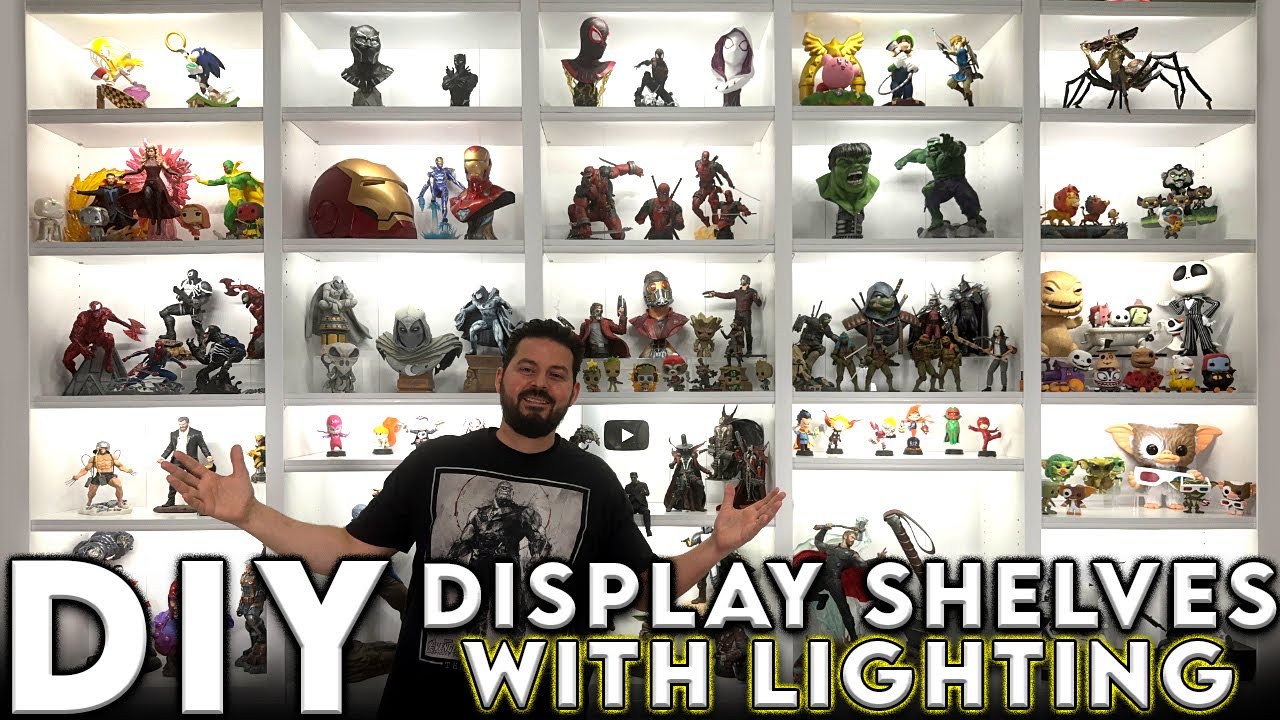
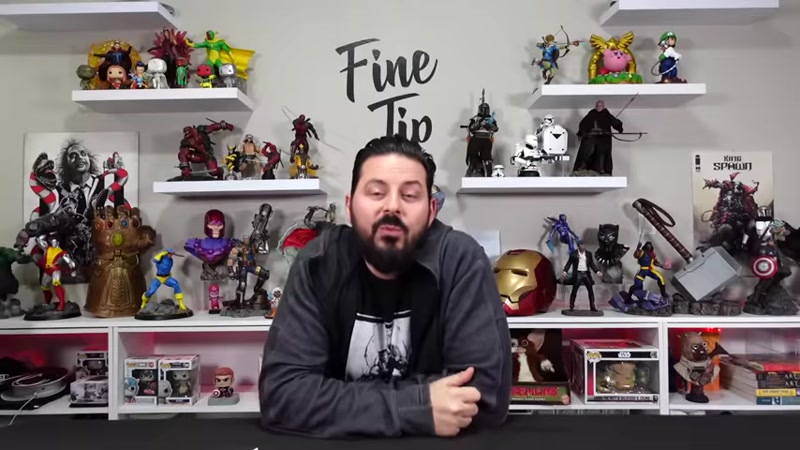
# How to Build a Custom Wall-to-Wall Display Shelf with LED Lighting
Do you have a growing collection of collectibles but are running out of space to display them? This tutorial will show you how to combine affordable bookshelves, custom trim, and LED lighting to create a stunning, professional-looking display wall. This project is perfect for game rooms, home offices, or any space where you want to showcase your treasures.
Materials:
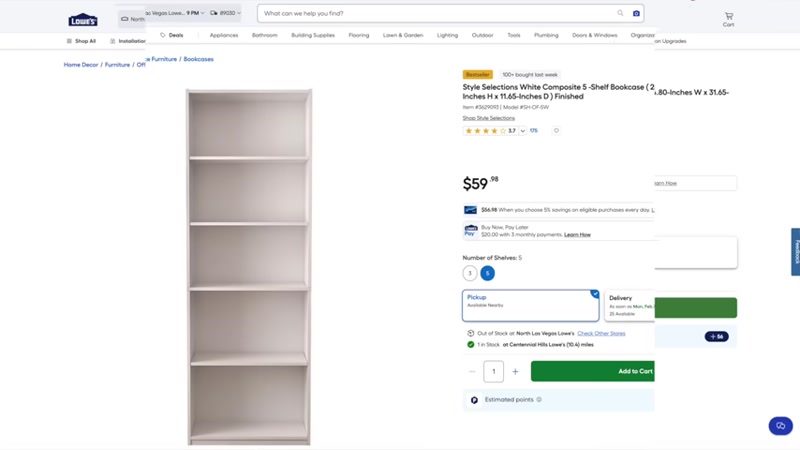
- 5 Tall 5-Shelf Bookcases (approx. 72" x 12" x 72")
- 5 Short 3-Shelf Bookcases (approx. 25" x 12" x 72")
- 6 LED Strip Light Kits (with dimmer, power supply, and extension cables)
- Pre-finished molding for uprights (approx. 1" x 2")
- Pre-finished molding for shelf lips (approx. 1" x 1/2")
- 2 Long shelves for the base (to spread weight and add stability)
- Double-sided tape (heavy-duty)
- PVC strips (to align bookcases)
- Wood for additional custom shelves (if needed)
Tools:
- Screwdriver
- Drill with drill bits (including a bit to match shelf peg size)
- Measuring tape
- Level
- Stud finder
- Miter saw or hand saw
- Scissors or wire cutters
- Tape (to mark drill depth)
Step-by-Step Guide
Step 1: Build the Bookcases
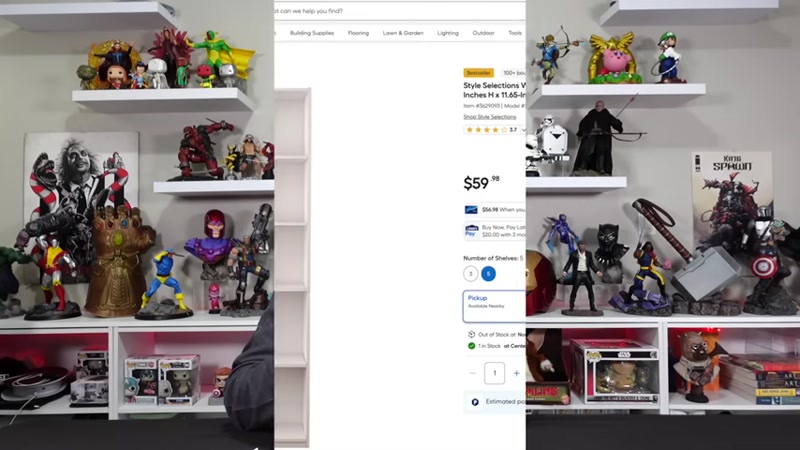
Start by assembling all five tall bookcases and all five short bookcases according to the manufacturer's instructions. This is the most time-consuming part of the build. The short bookcases will serve as the base, with the tall ones stacked on top.
Step 2: Prepare the Shelves for Lighting

The LED strips will be attached to the underside of each shelf. To make them look clean and professional, you will add a small piece of molding to the front edge of each shelf to hide the light strip.
- Measure the width of each shelf.
- Cut the 1" x 1/2" molding to these lengths using your saw.
- Attach the molding to the front edge of each shelf using heavy-duty double-sided tape. This creates a lip that will hide the LED strip from direct view.
Step 3: Install the LED Light Strips
- Peel the backing off the adhesive on the LED strips and attach them to the underside of each shelf, pushing them back so they are hidden by the molding lip you just added.
- Connect the light strips using the provided extension cables. You will need to run these cables from shelf to shelf.
- For the middle shelves that are fixed in place, drill a small hole through the shelf panel to run the extension cable up to the next level.
Step 4: Assemble the Base and Stack the Shelves
- Place the two long shelves on the floor where you want your display wall. These will distribute the weight of the entire structure.
- Place the five short bookcases on top of these long shelves.
- Stack the five tall bookcases directly on top of the short ones. Important: Remove any small plastic feet from the bottom of the bookcases to ensure they sit flat and stable.
Step 5: Secure the Shelves to the Wall

Safety is crucial, especially with a tall, top-heavy structure.
- Use a stud finder to locate the wall studs behind your bookcases.
- Use the included safety straps (or your own) to securely anchor the top of the tall bookcases to the wall studs. This prevents them from tipping over.
- Use PVC strips between the bookcases to keep them aligned and prevent them from shifting.
Step 6: Connect and Hide All Wiring

- Route all the light extension cables from the top shelves down to the bottom. You can feed them through the back of the bookcases.
- For the bottom shelves, add an extra LED strip and run its cable to a central power station.
- Drill a hole in the back of the base bookcases to feed all the cables to a central power strip, which will be hidden behind the display.
- To hide the vertical wires running between the bookcases, use the larger 1" x 2" molding. Cut it to the height of the bookcases.
- Apply double-sided tape to the back of the molding and press it into the gap between the bookcases, trapping the wires. This creates a clean, built-in look.
Step 7: Customize Shelf Heights (Optional)

You may have collectibles that are too tall for a standard shelf space.
- Identify the shelf you want to adjust.
- Measure and mark the location for new peg holes.
- To prevent drilling too deep, wrap a piece of tape around your drill bit at the desired depth.
- Drill new holes at your marks. This allows you to move the shelf to a higher or lower position.
Step 8: Add Top Lighting (Optional)

For an even more dramatic effect, add extra LED strips to the very top of the end bookcases.
- Drill a small hole through the top panel of the end bookcases.
- Feed an LED strip through the hole. Since most power supplies can handle up to 10 strips, you can easily add 3 extra strips to each end.
Tips for Success
- Plan Your Wiring First: Before you start taping down trim, map out exactly how your extension cables will run. This will save you from having to redo work later.
- Use a Level Constantly: A slight tilt in one bookcase will be magnified as you stack them. Check that each unit is level both front-to-back and side-to-side.
- Drill with Care: When drilling holes for cables or new shelf pegs, use a piece of tape on your drill bit as a depth stop. This prevents you from drilling through the top of a shelf or the back of a bookcase.
- Hide Everything: The key to a professional look is hiding all the wires and hardware. Take your time with the trim and molding to get a clean, seamless finish.
- Check Your Power Supply Limits: Before adding extra lights, check the specifications of your power supply. Most can handle a maximum number of strips (often 10). Overloading it can be a fire hazard.