What You'll Need
Here is a step-by-step DIY tutorial based on the provided transcript.
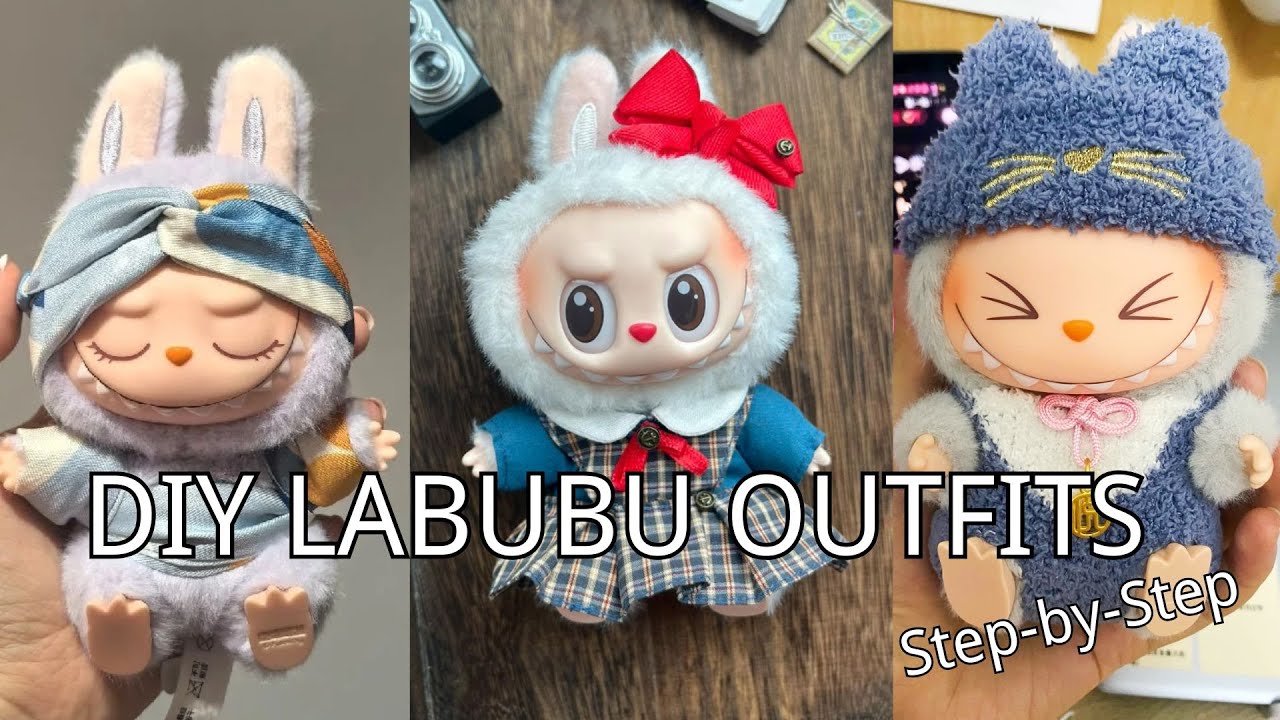
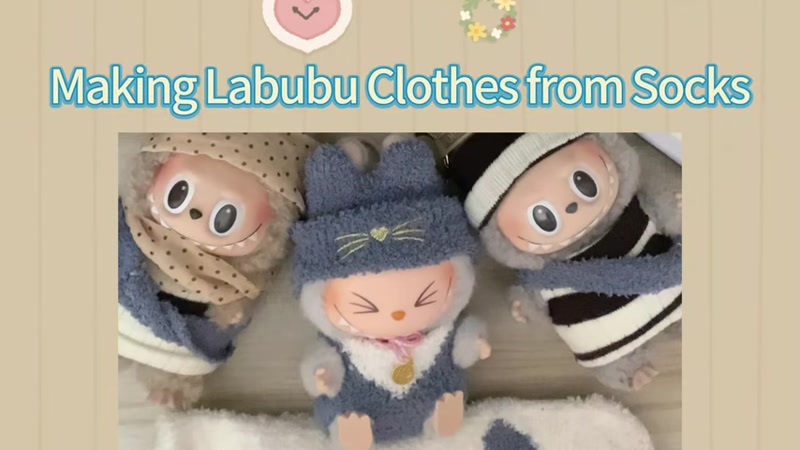
# How to Make Adorable Doll Outfits (Labubu Style)
Learn how to transform simple materials like socks and scarves into a whole new wardrobe for your favorite doll. This guide covers three distinct projects: a quick sock outfit, a no-sew scarf dress, and a detailed English-style dress.
For the Sock Outfit:
- A fuzzy sock (with a fun pattern)
- Scissors
For the Scarf Outfit:
- A long scarf (or two matching scarves)
For the English Style Dress:
- Fabric for the bodice (blue)
- Fabric for the collar and skirt (white)
- Matching thread (blue and white)
- Ribbon for the bow tie
- A small bead for decoration
- Velcro
- Scissors
- Needle and thread
- Tweezers (for turning fabric)
- Pen or fabric marker
- Ruler
Step-by-Step Guide
Project 1: The Simple Sock Outfit
Step 1: Prepare the Main Body Piece
Choose a fuzzy sock. Hold it against your doll to estimate where the body will be. If you want the pattern on the front, plan your cut accordingly. Cut straight across the sock, just below the heel. Remember to leave a little extra fabric for folding later.
Step 2: Slide and Position
Slide the main body piece onto the doll. Center the pattern on the front.
Step 3: Cut Arm and Leg Holes
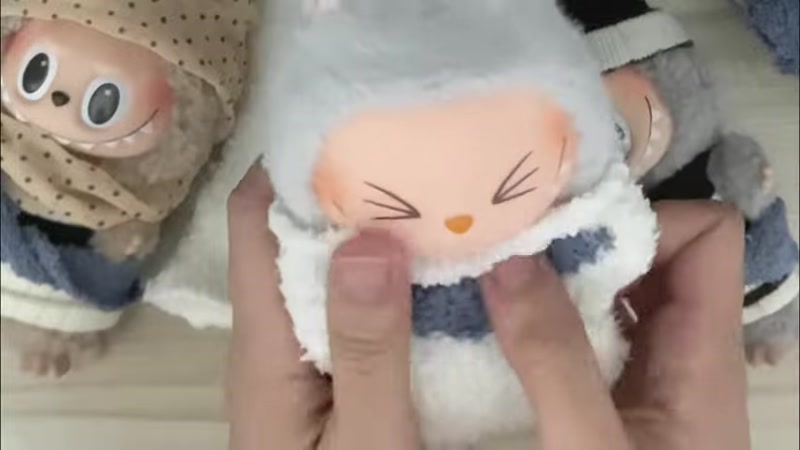
Be careful not to cut the holes too big, or they will stretch out and look messy. Make small snips for the arms and legs. Pull the doll's arms and legs through the holes. The basic shirt shape is ready.
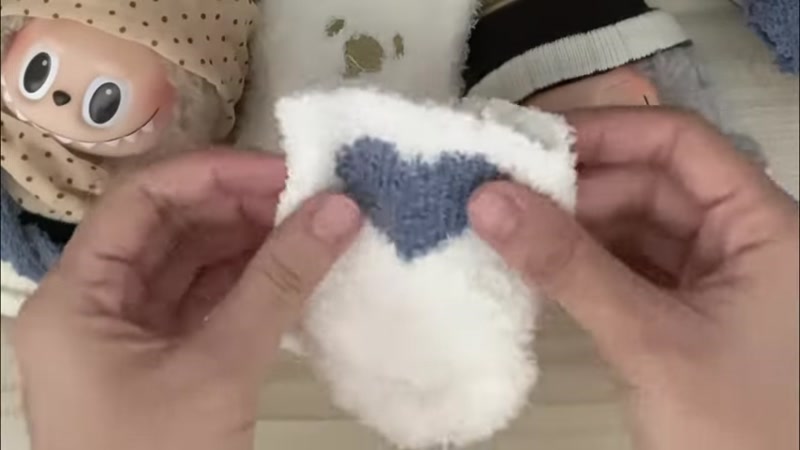
Step 4: Neaten the Bottom Edge
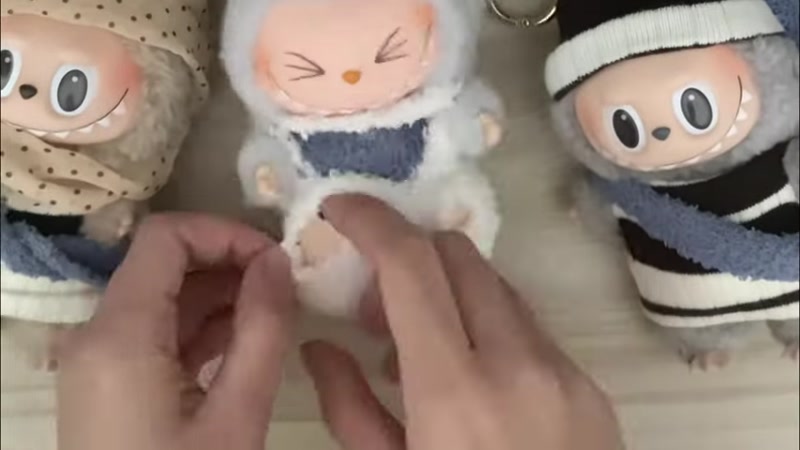
To make the bottom edge neat, fold the raw fabric inwards. The extra material you left allows for a cleaner fold. You could sew it for extra neatness, but folding works fine. The shirt is done.
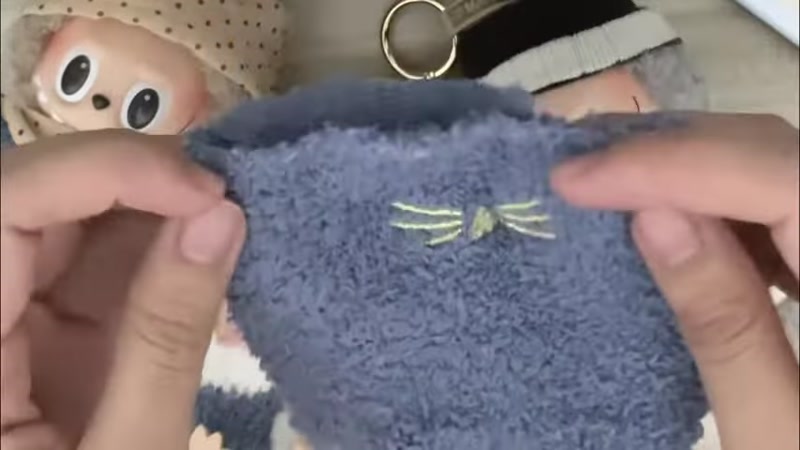
Step 5: Make the Hat
Take the top of the sock (the toe area). Cut across, leaving enough fabric to fold for a brim. Slip it onto the doll's head. Fold the bottom edge up to create the brim and adjust the pattern.
Project 2: The No-Sew Scarf Outfit
Step 1: Create the Shirt Base
Take your scarf and fold it in half. Place the folded center point at the front of the doll's waist. Wrap the ends around the back and cross them over. This crossing point at the back forms the main part of the shirt.
Step 2: Form the Sleeves
Bring the ends forward under the arms. Wrap these ends around the arms to create the sleeves.
Step 3: Secure the Back
Once the sleeves are done, bring the ends to the back and secure them by crossing again.
Step 4: Make the Headscarf
Take the remaining length of the scarf (or a second scarf) and place it across the doll's forehead. Adjust the position as needed. Twist and wrap the ends around the head, crossing them as you go. Finally, tie the ends at the back and tuck in any excess fabric to keep it neat.
Project 3: The English Style Dress
Step 1: Sew the Bodice and Sleeves
Take the front bodice piece and align it with the sleeve pieces, right sides facing. The pattern lines are for stitching, not including seam allowance, so leave a 0.5 cm seam allowance. Stitch the front piece to the sleeves. Repeat this step to attach the back pieces to the sleeves.
Step 2: Shape the Seams
After stitching, make a couple of small snips at the curves of the seam allowance. Be careful not to cut the thread. Open the seam and press it flat with your fingernail to help it lie smoothly.
Step 3: Prepare and Attach the Collar
Find the center point of the front bodice piece by folding it in half and marking with a small notch. Cut out the collar pieces, leaving a seam allowance. Sew the collar pieces together along the marked line. Clip the curved seam allowance and trim the corners, then turn the collar right side out using tweezers to push out the corners.
Step 4: Attach the Collar to the Bodice
Position the collar pieces onto the right side of the bodice neckline. Clip the curved seam allowance on the bodice fabric. Fold the raw edge of the bodice fabric under the collar and turn the entire piece right side out. Top stitch along the edge of the collar to secure it.
Step 5: Finish the Bodice
Fold the sleeve pieces in half and sew along the edge to create the sleeves. Clip the seam allowance below the sleeve opening. Turn the garment right side out. Fold the raw edges of the back opening inwards and stitch them down. Hem the bottom edge of the garment. Attach the Velcro.
Step 6: Make and Attach the Bow Tie
Fold the ribbon into a bow shape and secure the center with a needle and thread. Attach the red bow tie to the center front of the collar. You can also add a bead to decorate the bow tie.
Step 7: Make the Pleated Skirt
Cut a small slit in the middle of the V-shaped collar piece. Turn the fabric right side out. Take the back piece of the collar and stitch it. Lay your fabric out flat and press the seams. Fold both sides inwards. Turn the piece right side out and top stitch along both folded edges.
Step 8: Create the Pleats
Fold the long strip of fabric in half lengthwise. Find the midpoint and cut a small notch. Do the same for the V-shaped collar piece. Align the notches and create pleats by folding both sides inwards every 2.5 cm. Stitch the pleats in place.
Step 9: Assemble the Dress
Align the center of the pleated skirt with the center of the collar piece. Sew them together. Fold the pleated edge inwards and top stitch. Sew the back strap piece onto the final pleat. Turn the skirt under and stitch it. Add the Velcro.
Tips for Success
- Cut Conservatively: When cutting holes for arms and legs in the sock outfit, start with smaller snips. You can always make them bigger, but you can't undo a cut that is too large.
- Use the Right Scissors: Use sharp, small scissors for precise cutting, especially when making small snips in curved seams.
- Press Your Seams: Taking a moment to press seams open with your fingernail (or an iron) makes the finished garment look much more professional and helps it lie flat.
- Practice Patience: The English-style dress has many steps. Take your time, especially when turning small pieces right side out. Using tweezers can be very helpful.
- Match Your Thread: For a clean look, use thread that matches the color of the fabric you are sewing.


