What You'll Need
Here is a DIY tutorial based on the provided transcript, formatted for MakeDIYHub.com.
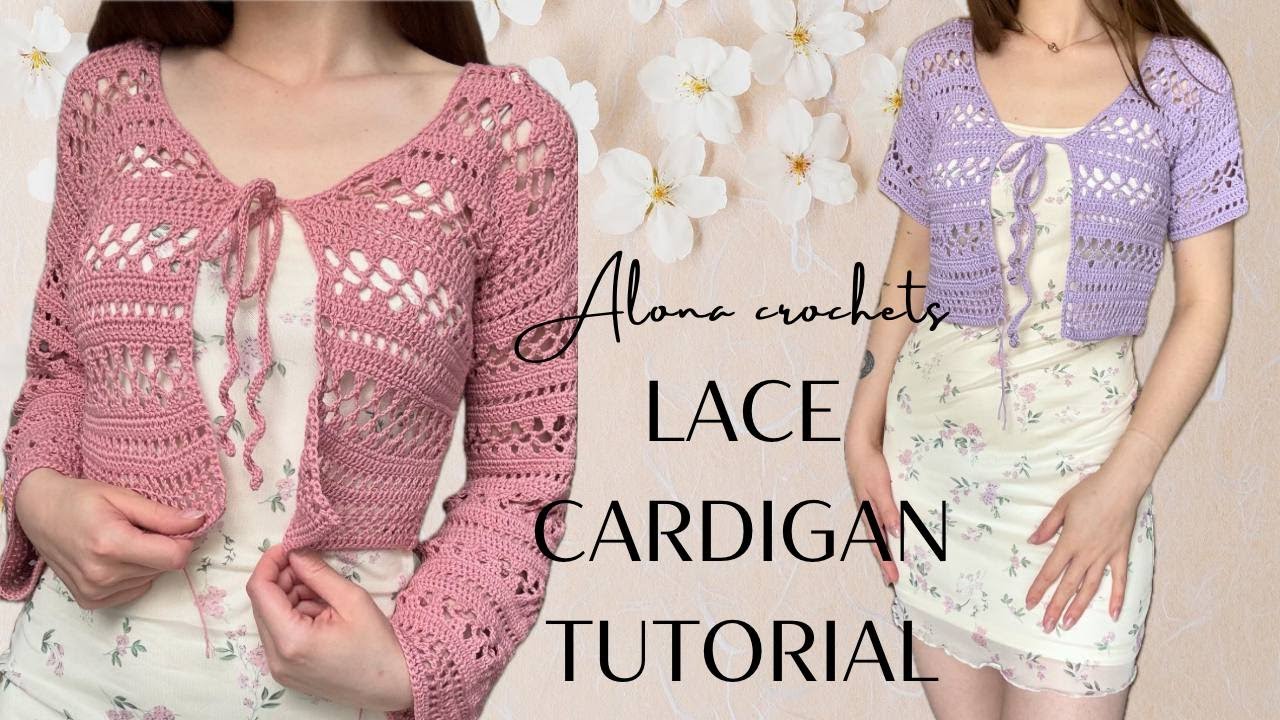
# How to Crochet a Lightweight Cotton Cardigan
This guide will walk you through creating a beautiful, breezy crochet cardigan perfect for layering. The pattern is worked from the top down and can be customized with short or long sleeves. We’ll cover everything from creating the front and back panels to joining them and finishing with stylish ties.
- Yarn: Cotton yarn (e.g., Drops cotton yarn). The amount will depend on your size and sleeve length.
- Crochet Hook: 3.0 mm (or size recommended on your yarn label)
- Measuring Tape
- Scissors
- Stitch Markers (4-6 recommended)
Step-by-Step Guide
1. Create the Front Panels (Make Two)
Measure and Start the Foundation Chain:
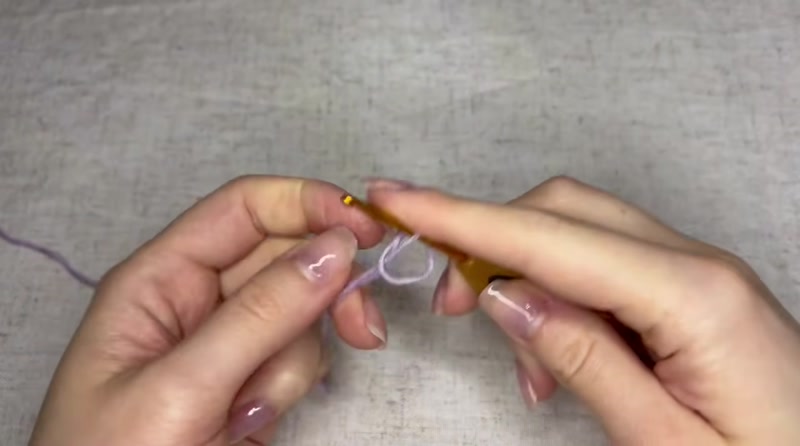
Measure from your collarbone to your shoulder. For this tutorial, that was 12 cm. Make a slip knot and chain a length that matches this measurement. The number of chains must be a multiple of 4. Add 3 extra chains for turning. The example here uses 24 chains (21 base + 3 turning).
Rows 1-7: Build the Top Shoulder Section
- Row 1: Double crochet (dc) into the 4th chain from the hook. Dc into each chain across. You should have 24 dc stitches.
- Row 2 (Square Pattern): Chain 4 (counts as 1 dc + ch 1). Turn your work. Skip the next stitch, dc into the next stitch. Chain 1, skip next stitch, dc into next stitch. Repeat from * across the row. End with a dc into the 3rd chain of the turning chain.
- Rows 3-4: Repeat Row 2.
- Row 5 (Dc Row): Chain 3. Turn. Dc into each chain space and each dc stitch across. Dc into the top of the turning chain. You should have 24 dc.
- Row 6: Repeat Row 2 (Square Pattern).
- Row 7: Repeat Row 5 (Dc Row). You should still have 24 dc.
Row 8: Begin Main Pattern with a Single Crochet Increase
Chain 1, turn. Work a single crochet (sc) into each stitch across, but add 1 extra stitch by working 2 sc into any stitch. You should now have 25 sc.
Rows 9-11: Work the Main "Semicircle" Pattern
- Row 9: Chain 3, turn. Skip first stitch, dc into the next stitch. Chain 5, skip next stitch, work 3 double crochets together (dc3tog) into the next 3 stitches. Chain 5, skip next stitch. Repeat from * across. At the end of the row, skip the next stitch and work 2 double crochets together (dc2tog) into the last 2 stitches.
- To make a dc3tog: Yarn over, insert hook into stitch, yarn over, pull through (3 loops on hook). Yarn over, pull through 2 loops (2 loops on hook). Yarn over, insert hook into next stitch, yarn over, pull through (4 loops). Yarn over, pull through 2 loops (3 loops). Repeat from * once more into the next stitch (5 loops). Yarn over, pull through all 4 loops on hook.
- Row 10: Chain 5, turn. Single crochet into the first chain-5 space from the previous row. Chain 5, sc into the next chain-5 space. Repeat from * across. End with chain 2, then dc into the last stitch.
- Row 11: Chain 3, turn. Dc into the first stitch. Chain 1, work 3 dc into the next chain-5 space. Chain 1. Repeat from * across. End with 2 dc into the last chain-5 space.
Row 12: Single Crochet Row
Chain 1, turn. Work 1 sc into each stitch and each chain-1 space across. You should have 25 sc.
Rows 13-43: Repeat Pattern with Gradual Increases
You will now repeat the pattern (Rows 9-12) while making increases to shape the front panels. The increases are worked on the Dc rows and Sc rows. Here is a summary of the increase sequence used:
- Row 13 (Dc Row): Skip the first stitch, dc across. At the end, make 2 dc into the second-to-last stitch, and 2 dc into the last stitch. (Total: 26 dc).
- Row 14 (Square Row): Chain 5, dc into the very first stitch (this creates an increase). Continue the square pattern. At the end, make 2 dc into the last stitch. (Total: 29 dc after the next Dc row).
- Row 15 (Sc Row): Make 2 sc into each of the first 3 stitches. Sc across the row. (Total: 33 sc).
- Rows 16-18: Repeat Rows 9, 10, and 11 without increases.
- Row 19 (Sc Row): Make 2 sc into each of the first 2 stitches. Sc across the row. (Total: 35 sc).
- Row 20 (Dc Row): Skip the first stitch, dc across. At the end, make 2 dc into the last 2 stitches. (Total: 36 dc).
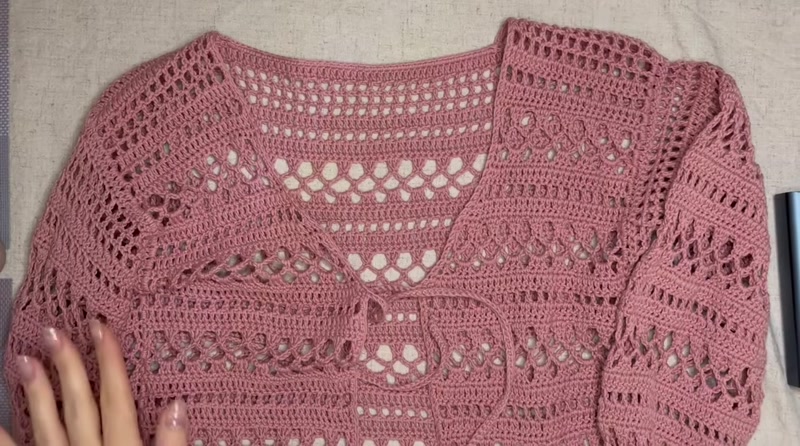
Continue the Pattern: Repeat the sequence of (Double crochet row, Square row, Double crochet row, Single crochet row, 3 rows of main pattern, Single crochet row) two more times. The final rows should be a repeat of the beginning: Double crochet, Square, Double crochet, then 3 rows of squares, and a final Double crochet row. The example front panel has 43 rows total.
Finish the Panel: After the last row, chain 1, cut the yarn, and pull tight to secure. Repeat all steps to make a second, identical front panel.
2. Create the Back Panel
Measure and Start the Foundation Chain:
Measure from shoulder to shoulder. For this tutorial, that was 40 cm. Make a slip knot and chain a length that matches this measurement. The number of chains must be a multiple of 4. Add 3 for turning. The example uses 95 chains (92 base + 3 turning).
Work the Panel:
Work exactly the same 43 rows as the front panels, but do not make any increases. The back panel will be a simple rectangle. Remember to add 1 extra stitch when working the single crochet rows (Row 8, 12, etc.) so the stitch count stays consistent with the pattern.
Finish the Panel: After the last row, chain 1, cut the yarn, and pull tight to secure.
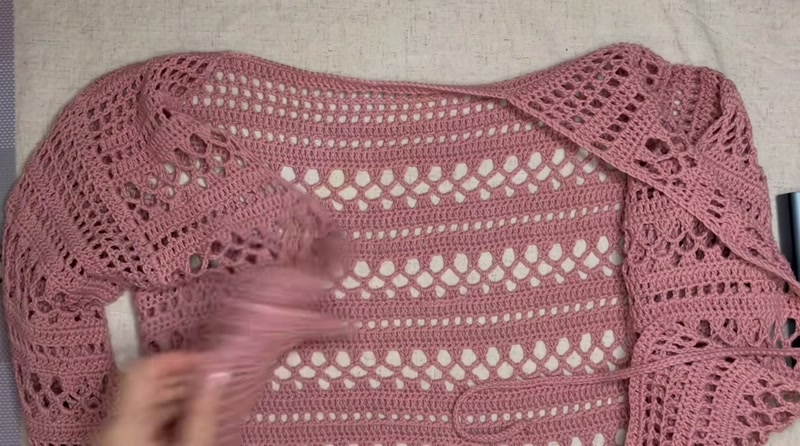
3. Assemble the Cardigan
Join the Shoulders:
Place the front panels on top of the back panel, right sides together. Match the top edge of the front panels to the top edge of the back panel. Use stitch markers to hold them in place. Join the yarn at one edge and use slip stitches to crochet the shoulder seams together. Repeat for the other shoulder.
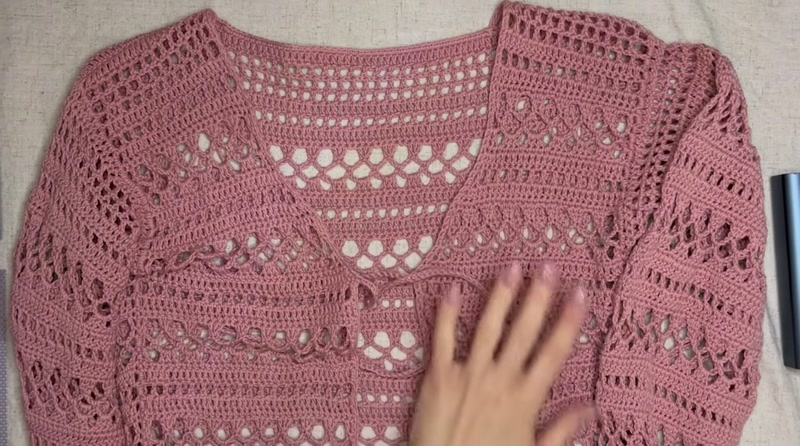
Create the Borders and Ties:
Find the last row where you made increases on the front panels. Place a stitch marker here on each panel.
- Join yarn at the bottom corner of the right front panel.
- Single crochet up the front edge until you reach the first stitch marker.
- Make the first tie: Chain 100, plus 1 for turning. Starting in the 2nd chain from the hook, sc into each chain back to the cardigan.
- Continue sc along the front edge until you reach the second stitch marker.
- Make the second tie: Repeat step 3 (Chain 101, sc back).
- Single crochet down the remaining edge of the second front panel. Cut yarn and secure.
Join the Side Seams:
Try the cardigan on. Place a stitch marker under each armpit to mark where the sleeves should start (e.g., 18 cm down from the shoulder seam). Join yarn at the bottom corner of one side seam. Single crochet up the side to the stitch marker. Cut yarn and secure. Repeat for the other side.
4. Crochet the Sleeves
Start the Sleeve:
Join the yarn at the underarm seam. You will work in rounds, turning your work at the end of each round.
- Round 1: Chain 3 (counts as 1 dc). Work 71 more dc evenly around the armhole. Join with a slip stitch to the top of the starting chain. (Total: 72 dc). Turn your work.
- Rounds 2-4: Work the same pattern (Square row, Main pattern rows) as you did for the body, turning at the end of each round.
- Continue: Repeat the main pattern (Rows 9-11) until the sleeve reaches your desired length. The tutorial's long sleeve version repeated the main pattern 5 times (approx. 50 cm). The short sleeve version repeated it once.
Finish the Sleeve: After the last row, chain 1, cut the yarn, and pull tight to secure. Repeat for the second sleeve.
Tips for Success
- Gauge is Key: Before starting, make a small swatch with your yarn and hook. The stitch count and measurements in this tutorial are based on a specific gauge. If yours is different, your cardigan will turn out a different size.
- Measure as You Go: Try the front panels on yourself as you work the increases to ensure a good fit around your bust.
- Keep Track of Increases: Use stitch markers to mark the rows where you need to make increases. This prevents mistakes and makes the process much smoother.
- Block Your Panels: Before sewing the panels together, lightly block them. This evens out the stitches and makes the fabric lie flat, making assembly much easier.
- Tie Length: The length of the ties (100 chains) is a suggestion. You can make them longer or shorter to suit your preference.


