What You'll Need
Here is a DIY tutorial based on the provided transcript.
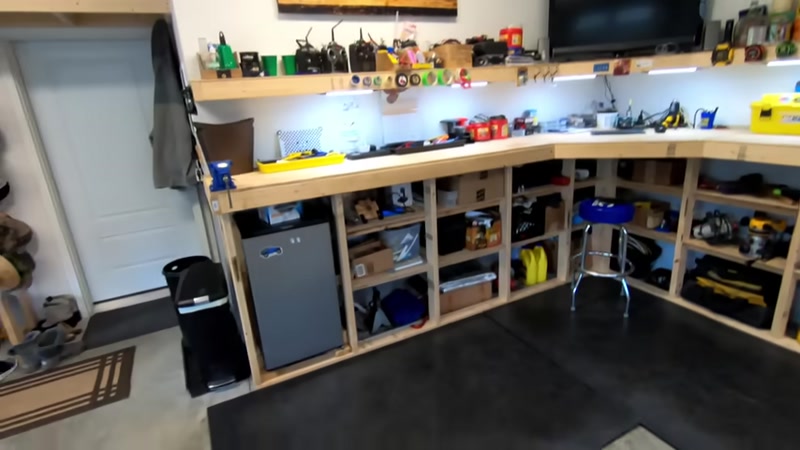
# How to Build a Super Stable, Low-Cost Wall-Mounted Workbench
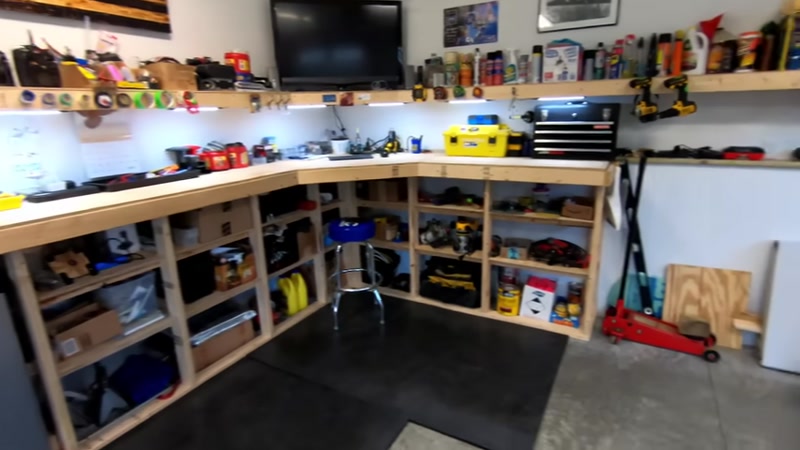
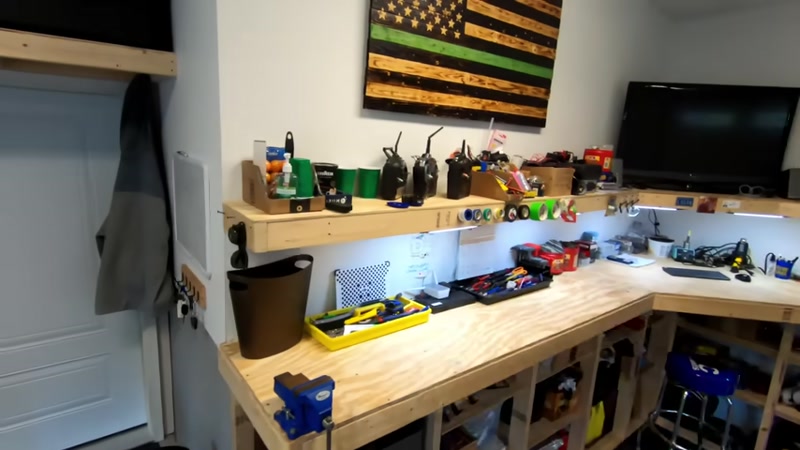
This guide will walk you through building a sturdy, built-in workbench system that anchors directly into your wall. The project is budget-friendly, using mostly 2x4s and plywood, and creates a professional-looking workspace with a floating shelf for extra storage. This design is strong enough to handle heavy use and is a great weekend project for any garage or workshop.
Materials:
- 2x4 lumber (approx. 72 pieces, adjust based on your layout)
- 3/4-inch plywood for the workbench top (4x8 sheets)
- 1/4-inch plywood for shelving (4x8 sheets)
- 2 1/2-inch construction screws
- 3-inch lag screws (for anchoring to wall studs)
- Wood glue
- Masonry nails (for attaching bottom plate to concrete, if applicable)
Tools:
- Miter saw or circular saw
- Drill / Driver
- Level
- Tape measure
- Stud finder
- Safety glasses
- Hammer
- Pry bar (for leveling)
Step-by-Step Guide
1. Plan Your Layout and Cut the Base Plates

Start by planning the layout of your workbench. This design uses a "T" structure that ties into the wall. Measure and mark the locations for the vertical studs on the floor (bottom plate) and the top plate on the wall. Cut your 2x4s for the top and bottom plates to the length of your workbench. Use a stud finder to locate your wall studs and mark their positions on your top plate.
2. Frame the Vertical Wall Structure
Secure the bottom plate to the floor using masonry nails (if on concrete) or screws (if on wood). Then, attach the top plate to the wall studs using lag screws. Cut your vertical studs to the desired height of your workbench (typically 34-36 inches) and install them between the top and bottom plates, spacing them 16 or 24 inches on center. Use a level to ensure they are perfectly plumb. This creates the main support wall for your workbench.
3. Build the Pantry or Storage Section (Optional)
If you want a pantry or storage area, frame out that section now. Cut vertical boards for the pantry side walls and attach them to the floor and wall. Add horizontal supports for the shelves. This creates a solid, anchored structure that will also help stiffen the entire bench.
4. Install the Shelf Supports and Shelves

Before installing the workbench top, cut and install the horizontal shelf support boards inside the pantry and on the back wall. These will hold your plywood shelves. Cut your 1/4-inch plywood shelves to size and place them on the supports. Secure them with screws.
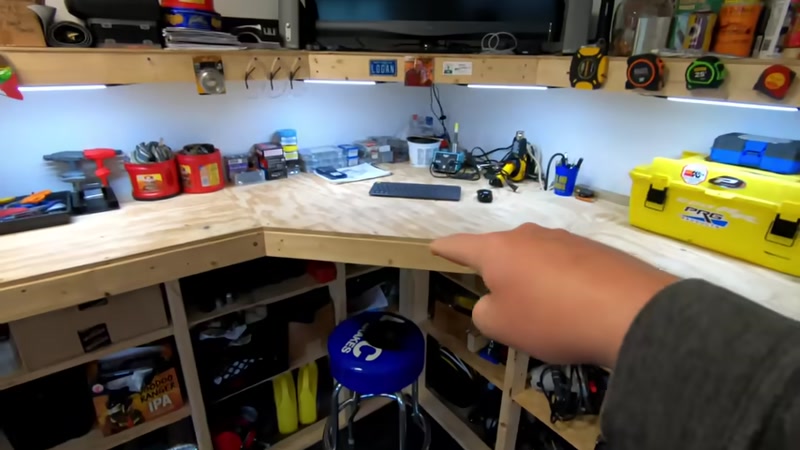
5. Build the "T" Structure for the Workbench Top

This is the key to the bench's strength. Cut 2x4s to span from the front of the new wall to the back wall. These will sit on top of the vertical studs, forming the top of the "T". Lay these 2x4s across the entire length of the workbench, making sure they are level and flush with the back wall. Toenail (drive screws at an angle) these into the vertical studs below and into the wall studs behind.
6. Square and Level the Top Frame
Use a level to check the entire top frame. If any areas are not level, use a pry bar to gently lift the low side and shim it until it is perfectly flat and level. Secure the frame to the wall studs with more screws or lag bolts. This step is critical for a flat work surface.
7. Cut and Install the Plywood Workbench Top
Measure the depth of your workbench (e.g., 24 inches) and cut your 3/4-inch plywood sheets to size. Lay the plywood on top of the 2x4 frame. If you have a corner with a 45-degree angle, cut the plywood to match. Secure the plywood top to the frame with plenty of construction screws, driving them down into the 2x4s below.
8. Build and Install the Floating Shelf
To build the floating shelf, construct a frame from 2x4s that is the desired length and depth (e.g., 12 inches deep). This frame needs to be open on the back side. Lift the shelf frame into position on the wall. Use a level to make sure it is perfectly straight. Drive long lag screws through the top of the shelf frame and into the wall studs. This method lifts the shelf and prevents sagging.
9. Finish the Shelf and Trim
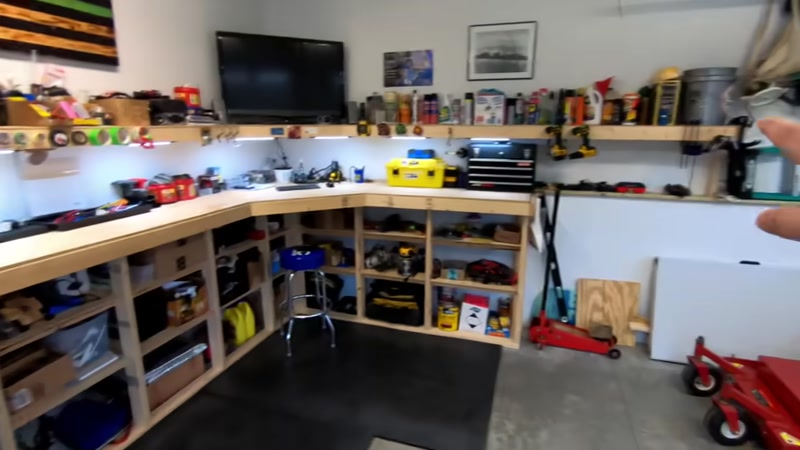
Cut a piece of plywood to fit the top of the floating shelf frame and screw it down. For a clean look, add a 45-degree trim piece to the front edge of the workbench and the floating shelf. This hides the plywood edge and gives the project a professional finish.
Tips for Success
- Find Your Studs: Use a high-quality stud finder. Every major structural screw and lag bolt must go into a wall stud for the bench to be stable.
- Level is Key: Spend the extra time to get the top frame perfectly level. A warped or uneven bench will make all future projects harder.
- Avoid Splitting Wood: When driving screws or nails near the end of a 2x4, pre-drill a pilot hole to prevent the wood from splitting.
- Use a T-Structure: The "T" design of the top frame (where the top 2x4s sit on the vertical wall) is what makes this bench incredibly strong and rigid.
- Safety First: Always wear safety glasses when cutting wood or driving fasteners. Be careful when using power tools.