What You'll Need
Here is a DIY tutorial based on the provided transcript, written in a beginner-friendly style for MakeDIYHub.com.
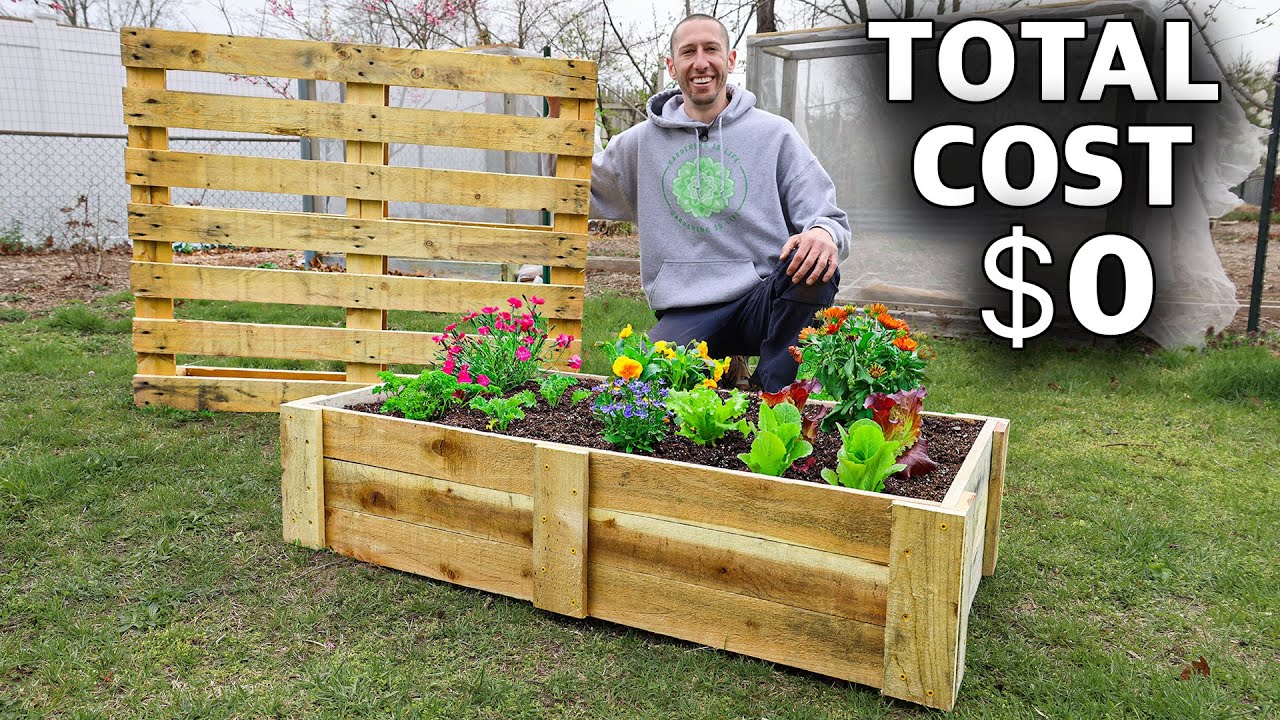
# How to Build a Free Pallet Raised Garden Bed
Building a raised garden bed doesn't have to cost a lot of money. With a single wooden pallet and a few basic tools, you can create a sturdy, functional bed for your vegetables, herbs, or flowers. This guide will walk you through the process of safely disassembling a pallet and turning it into a mini raised bed.
- Materials:
- 1 wooden pallet (look for one with an "HT" stamp for heat-treated wood)
- 1 ¼-inch exterior wood screws
- Tools:
- Circular saw or skill saw
- Hand saw or sawzall (for cutting nails)
- Measuring tape
- Carpenter's square
- Clamps (at least 2)
- Power drill with a drill bit (for pre-drilling)
- Pencil
- Safety glasses and work gloves
Step-by-Step Guide
1. Find and Select the Right Pallet

The most important step is finding a safe pallet. Look for a stamp on the side. You want one that says "HT" (Heat Treated). Avoid pallets stamped with "MB" (Methyl Bromide), as this chemical is toxic and not safe for growing food. Local cycling centers, hardware stores, or warehouses are great places to ask for free pallets. Take your time to find a pallet that is in good condition without too many cracks or splits.
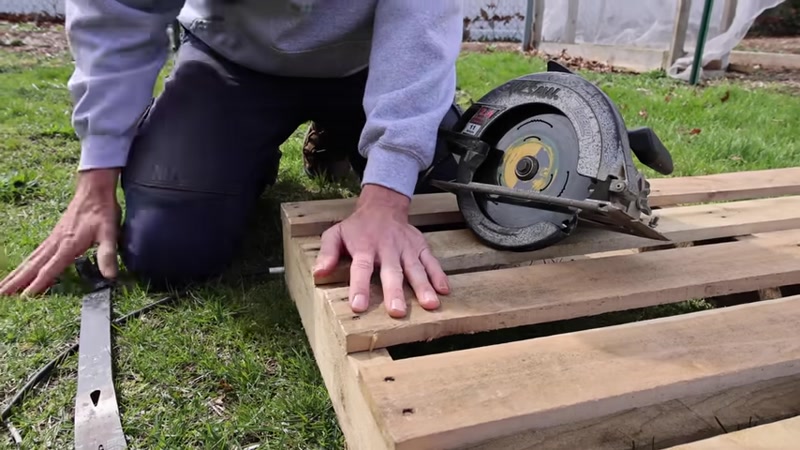
2. Disassemble the Pallet (The Easy Way)
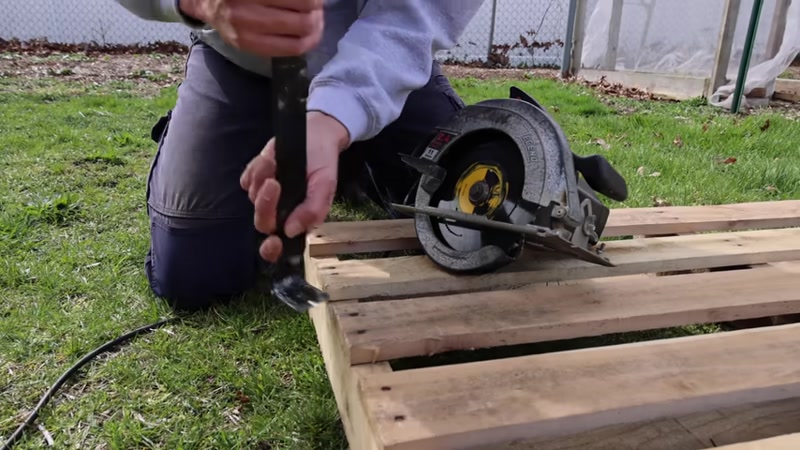
Don't try to pry the boards off with a pry bar—it's hard work and will likely split the wood. Instead, use a circular saw. First, adjust the blade depth so it's roughly the same thickness as the top boards. This prevents you from cutting into the bottom support boards.
Run your saw along the length of the pallet, as close to the nails as possible without hitting them. Do this on both long sides. For the center boards, flip the pallet over and use a hand saw or sawzall to cut the nails from the back side. This will release the boards without splitting them. Flip the pallet back over and repeat the process to free all the boards.
3. Square Up and Trim the Boards

Your cut edges might not be perfectly square. To fix this, use a carpenter's square to mark a straight line near the cut end. Use your circular saw or a drop saw to trim off the rough edge. Do this for all your boards.
4. Cut All Boards to the Same Length

Line up all your boards on a flat surface. Find the shortest board and measure its length. This will be your final length for all the long side boards. In the example, the shortest board was 43 inches. Use a square to mark this length on the remaining good boards, and cut them all to the exact same size.
5. Select Your Best Boards and Cut the Ends
You will need nine of your best boards for the main frame: three for the front, three for the back, and three for the two ends. Pick your best nine pieces. For the three boards that will form the ends, cut them exactly in half. Measure the full length (43 inches), find the center point (21.5 inches), and cut. Make sure you are not cutting through a knot, as this will weaken the board.
6. Assemble the Long Sides

Lay out three of your long boards for one side. Place one of the half-length end boards at each end, lining them up flush. Use a clamp to hold everything together. Measure the height of the stack of boards (it should be about 10.25 inches). Cut a scrap piece of wood to this height to use as a center brace. Position the brace in the middle of the side, flush with the top and bottom. Pre-drill holes to prevent splitting, then attach the brace using two 1.25-inch screws per board. Repeat this entire process for the other long side.
7. Assemble the Ends

Lay out your three half-length boards for one end. Clamp them together in the center. Cut two more braces to the same height (10.25 inches). Position one brace on each side of the end piece, flush with the top and sides. Pre-drill and screw the braces into place. Repeat this for the other end piece.
8. Final Assembly

Place one of the end pieces on a flat work surface. Take one of the long side pieces and hold it against the end piece. Make sure the top edges are flush. Pre-drill and screw the side piece directly into the end piece's brace. Repeat this for all four corners. Once all corners are attached, flip the bed over. You should have a sturdy, rectangular raised bed.
9. Fill and Plant

Your raised bed is now ready. Place it in your desired location, fill it with high-quality soil, and start planting. The bed is a great size for lettuce, herbs, flowers, and other small vegetables.
Tips for Success
- Safety First: Always wear safety glasses and work gloves when cutting wood. Be very careful with the circular saw to avoid cutting into the nails, which can ruin your blade and cause kickback.
- Check for Nails: Before cutting any board in half, double-check that the cutting line doesn't go through a nail. If it does, use a different board.
- Pre-drill is Key: Always pre-drill your screw holes. This is the best way to prevent the pallet wood from splitting, especially since it can be dry and brittle.
- Optional Extras: You can line the inside of the bed with landscape fabric to keep soil in and pests out. You can also apply a natural, food-safe oil to the outside of the wood to help it last longer.
- Use Your Scraps: Don't throw away the leftover pieces of wood. You can use them to make the braces for the sides and ends, as shown in the guide.