What You'll Need
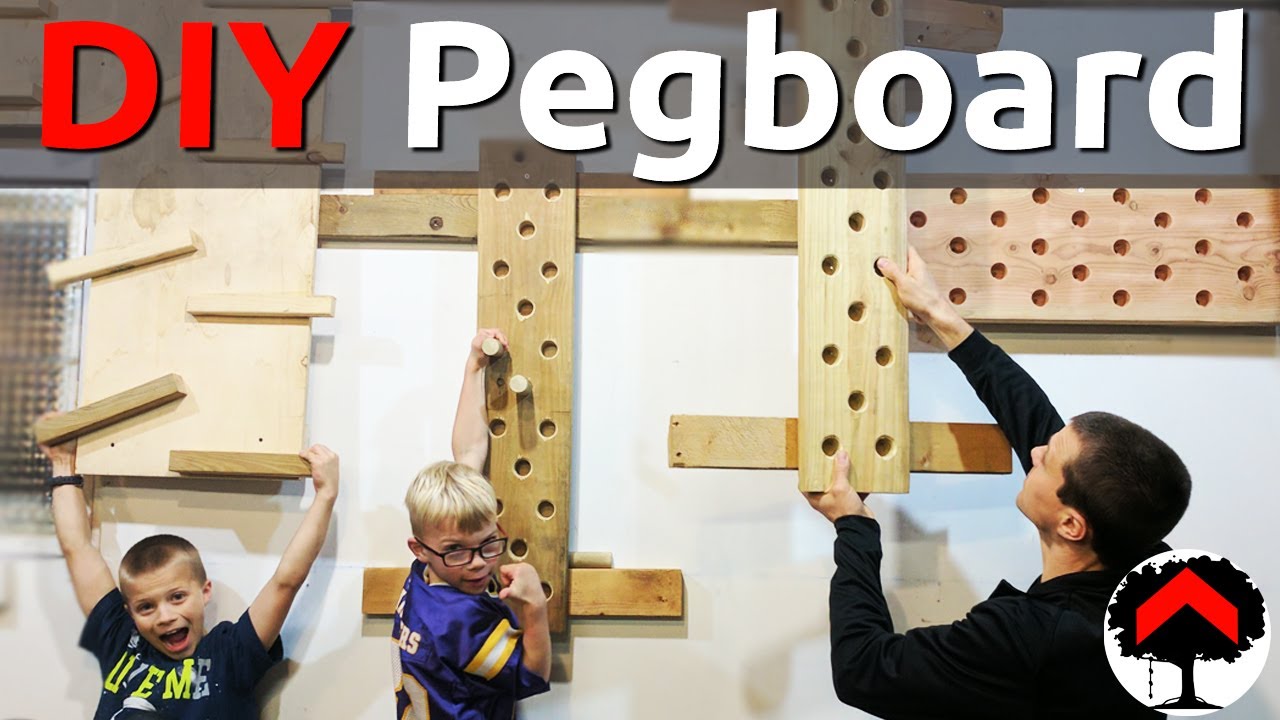
This is a climbing wall that adjusts to different heights. Kids can use the lower section while adults grab the upper holds without scraping their feet on the ground. The whole thing hangs on a French cleat system so you can move pieces around whenever you want.
For the French Cleat System
- 2x6 boards (ripped at 45° to create cleats)
- Lag bolts (Spax brand recommended by Reddit)
- Stud finder
- Level
For the Pegboards
- 2x8 boards (for vertical climbing boards)
- 2x12 board (for horizontal climbing board)
- Scrap pegboard (for backing)
- 1.5" dowels for handholds
- 3/4" spade bit
- Router with bevel bit
- Staple gun
- 2x4s for wall pressure supports
For the Climbing Ledges
- 2x4s cut at different lengths
- 1.5" dowel (ripped flat on one side)
- Plywood backing
- Wood glue
- Screws
Step-by-Step Guide
Step 1: Build the French Cleat System

Set your table saw to a 45° angle and rip your 2x6s down the middle. Each cut gives you two cleats — one mounts to the wall, the other attaches to whatever you're hanging.
Measure your wall space. Ours was 98 inches between windows. Cut your cleat to match.
Mount the wall-side cleats at two heights: one for kids, one for adults. This lets you shift climbing boards up or down depending on who's using it. Getting this perfectly level matters more than you think. A crooked cleat means a wobbly wall piece.
I asked Reddit what hardware to use. They recommended Spax lag bolts — they drive in easy and hold strong.
Step 2: Build the Vertical Pegboards

I used 2x8s for the climbing boards. Mark them at 1.75 inches from each end, find center, then mark every 3 inches. Draw straight lines across and circle where the holes go. The spacing worked fine for kids. For adults, the shoulders might feel a little tight — next time I'd go 1.5 inches from the sides.
Drill the holes with a 3/4" spade bit. A drill press makes this way easier because the holes stay straight. That matters when someone's hanging off them.
I routed a bevel on the front edges so the pegs slide in smoother. Not necessary, but I'd never used a router before and it was a good chance to learn. My father-in-law taught me, same way I was teaching my own kids.
Here's the mistake I made — I drilled all the way through the 2x8. That meant the pegs would push right out the back. So I stapled a scrap pegboard to the back as a stop. Next time I'll set the drill depth to 1/8" from through and save myself the extra step.
Step 3: Attach Cleats to the Pegboards
Cut 2-foot sections of French cleat and center them on the back of each 2x8. Two feet gives enough stability while leaving room to hang other boards next to it.
Safety reminder: I forgot my safety glasses while cutting these. Don't be me. Wear them.
Step 4: Make the Handholds
Cut the 1.5" dowels to the width of your hand plus 2 inches. File and sand the ends so they slide into the holes without jamming. You want them snug but not tight. Test fit, sand a little more, test again. You can always take more off.
Step 5: Add Wall Pressure Supports
Screw a 2x4 to the bottom of each 2x8. When the board hangs on the cleat, the 2x4 presses against the wall and keeps everything stable. Without it, the bottom of the board can swing out.
Step 6: Build the Horizontal Pegboard
I wanted something to connect the two vertical boards, so I built a horizontal pegboard from a 2x12. Same process as the vertical ones except this time I set the drill press to stop 1/8" from through. No backing needed.
Step 7: Build the Climbing Ledges
This is the fingerboard or "Cliff Hanger" section — a series of ledges that get harder as you go up.
Cut boards at different lengths and depths. I started with 2x4s ripped down at the top, then added angled pieces at 5° and 10°. The angle on the last ledge came out to about 23° — I went back to 9th grade math with a right-angle triangle to figure that out.
Space them 12 inches apart. Leave enough room between ledges so your hand doesn't hit the next hold when you grab one.
Rip a flat surface on some leftover 1.5" dowel so you can glue and screw it to the plywood backing. Apply heavy glue, screw from the back so the heads hold into the plywood.
Step 8: Attach the Cleat to the Ledges
Cut a French cleat across the top of the plywood. I took the sharp point off the cleat on the table saw so it doesn't create a wedge. Attach it, then hang the whole thing on your wall cleats.
How It Works
The system hangs on two cleats — one at kid height, one at adult height. The ledges and pegboards slide wherever you want them. Because there's a middle cleat on the wall, the top position has extra support. The bottom position relies more on the 2x4 pressing against the wall.
I can't move the top piece without a ladder, but everything else shifts around freely.
What the Kids Thought
First day I installed it, my boys came home from school and both went straight up, across, and down the pegboard. "That was fun," they said. They'd already built enough strength to do it without any practice. They're getting stronger, building balance, and encouraging each other. That's the whole point.
Tips
- Spacing matters. 12 inches between ledges worked for us. Test your own reach before committing.
- Don't drill through. Set your drill depth to leave 1/8" of material. Saves you from adding a backing.
- Sand the pegs gradually. You can always take more off. You can't put it back.
- Level the cleats perfectly. Everything depends on that first mount.
- Wear safety glasses. I didn't. Don't learn that lesson from experience.