What You’ll Need
IKEA doesn’t make low storage coffee tables. I don’t know why. I’ve decided to fix that.
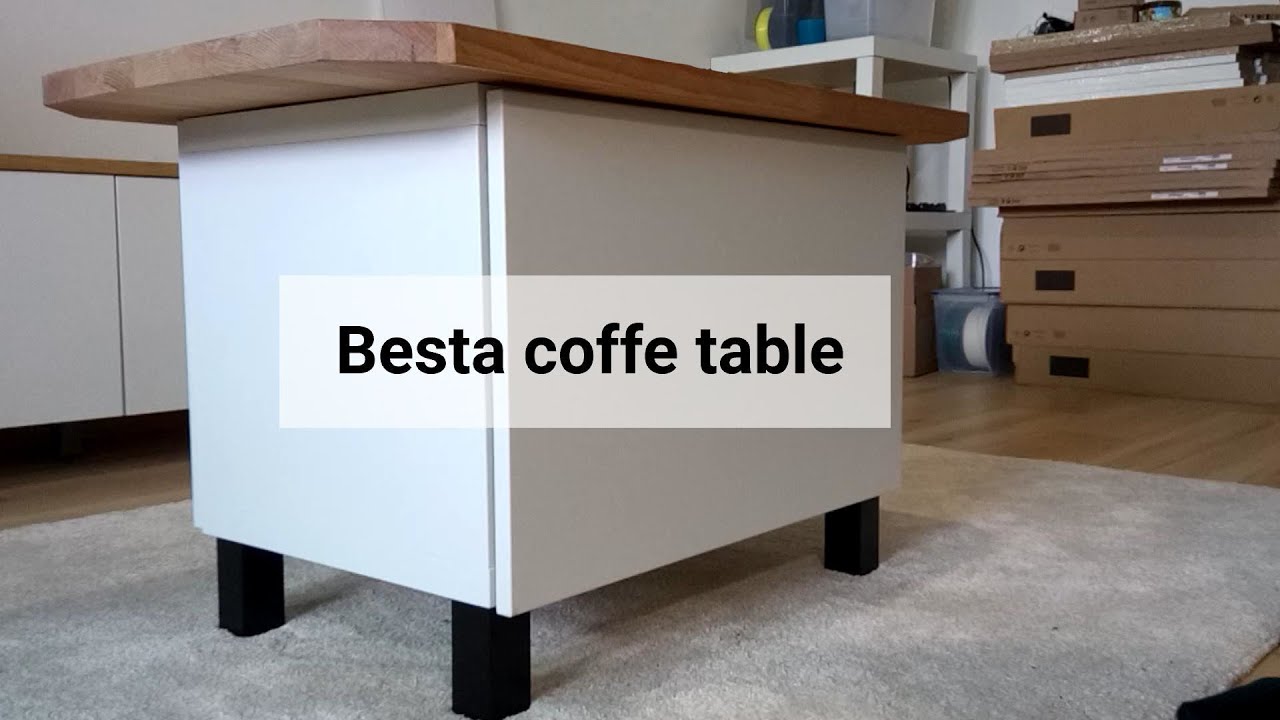
This hack uses a Besta cabinet frame, but flips the whole idea on its head: instead of a tall media unit, you get a low, wide coffee table with hidden storage. And the best part? It uses cheap IKEA parts so you don’t have to spend a ton.
Let’s get into it.
- IKEA Besta cabinet frame (any color – frame, legs, and doors are the same price regardless)
- Two Besta doors (same color – yes, two. One will go on the back.)
- Besta legs (cheapest option works fine)
- Tabletop – see below for options
- IKEA Besta brackets (the ones meant for shelves – you’ll break the tabs off)
- Wood screws (3mm x 12mm – not from IKEA, just four screws)
- Push-to-open mechanism (optional but recommended)
- Tools: drill, pliers, screwdriver, marker, tape measure
Tabletop Options
I used a scrap hardwood countertop from Bauhaus (leftover from a kitchen project). You probably don’t have that lying around, so here are cheaper alternatives:
- IKEA shelves – cut off the fixation rails
- Three IKEA Trofast shelves (aspen particle board) – screw them together
- IKEA Method/Sektion kitchen fronts – e.g., Högslott 60x80cm door
- IKEA Besta glass top panels – fixed with double-sided tape, no screwing at all
Step-by-Step Build
Step 1: Design Your IKEA Order

Go to IKEA’s Besta planner. Add:
- Cabinet frame (pick the size you want)
- Legs of your choice
- Two doors (same color)
Why two doors? Because you’ll mount one on the back to hide the ugly Besta back panel. The other goes on the front.
The base components cost the same regardless of color, so you can mix and match. Black frame + wood door + wood legs. White frame + black legs. Whatever you want. The cheapest options are usually the plain white or black, but you can also go wild with red doors on white – your call.
Step 2: Prep the Tabletop
If you’re using a hardwood countertop like I did, it’s already cut and ready. For IKEA alternatives, make sure the top is large enough to overhang the cabinet on all sides.
Critical: The Besta frame has a honeycomb core – it’s hollow. If you drill into it without care, you’ll ruin the panel. Tap on it and you’ll hear the hollow sound. So you need to pre-drill carefully.
Here’s the drilling depth formula:
- Besta top panel thickness = 30mm
- Measure your tabletop thickness (e.g., 28mm for some IKEA shelves)
- Add them together = 58mm
- Subtract 5mm for safety = 53mm maximum drill depth
Mark the depth on your drill bit with a marker. Drill through the Besta top and into the tabletop at the same time (have someone hold the cabinet top steady). Stop when the mark on the bit disappears.
Step 3: Assemble the Cabinet
Build it like a normal Besta cabinet, with two big differences:
- Door on the back: Take one of your two doors and mount it to the back of the cabinet. That hides the ugly Besta back panel. Use the additional shelf brackets – but first, break off the small tabs at the end of each bracket with pliers. These brackets have a left and right version. Screw them into the side walls at the midpoint between the two back fixation holes. Use the four extra screws for the back brackets? Actually, better to use 3mm x 12mm wood screws (IKEA doesn’t sell these separately, just buy four). The door mounted on the back won’t be wide enough for the brackets, so the 3mm screws go into the sidewall.
- Legs and top: Screw the legs into the bottom of the cabinet frame. Then mount the tabletop on top using the pre-drilled holes. Screw through the Besta top into the tabletop. Use the same 3mm screws or the ones from IKEA if they’re long enough.
- Cam locks: Don’t forget to lock the cams after assembling the frame.
Step 4: Mount the Doors and Mechanism
Now mount the front door (the normal one) using the hinges and push-to-open mechanism (if you want no handles). The back door is already on.
Important: Do NOT mount the front door before attaching the tabletop. I did that on my first try – bad idea. The weight distribution is off and it makes the whole thing wobbly. Mount the top first, then add the front door.
Once the front door is on, install the push-to-open mechanism per IKEA’s instructions. That’s it – you’re done.
Tips to Avoid Screwing Up
- Drill slowly when going through the honeycomb. The core gives way easily.
- Test fit the tabletop before you commit. Make sure it overhangs evenly.
- Use a back cover to hide the brackets on the back door – IKEA sells those separately.
- Don’t skip the back door – the bare Besta back is ugly. The second door makes it look intentional and finished.
Why This Works
The Besta frame is cheap, the doors are cheap, and the result looks like a solid hardwood coffee table with hidden storage. And you get to choose exactly the finish you want. I went with wood top + black frame + black legs, but you can do whatever.
If you’re a true lazy person, skip the screwing and use glass top panels with double-sided tape. No drilling needed. But that’s less permanent.