What You'll Need (varies by design)
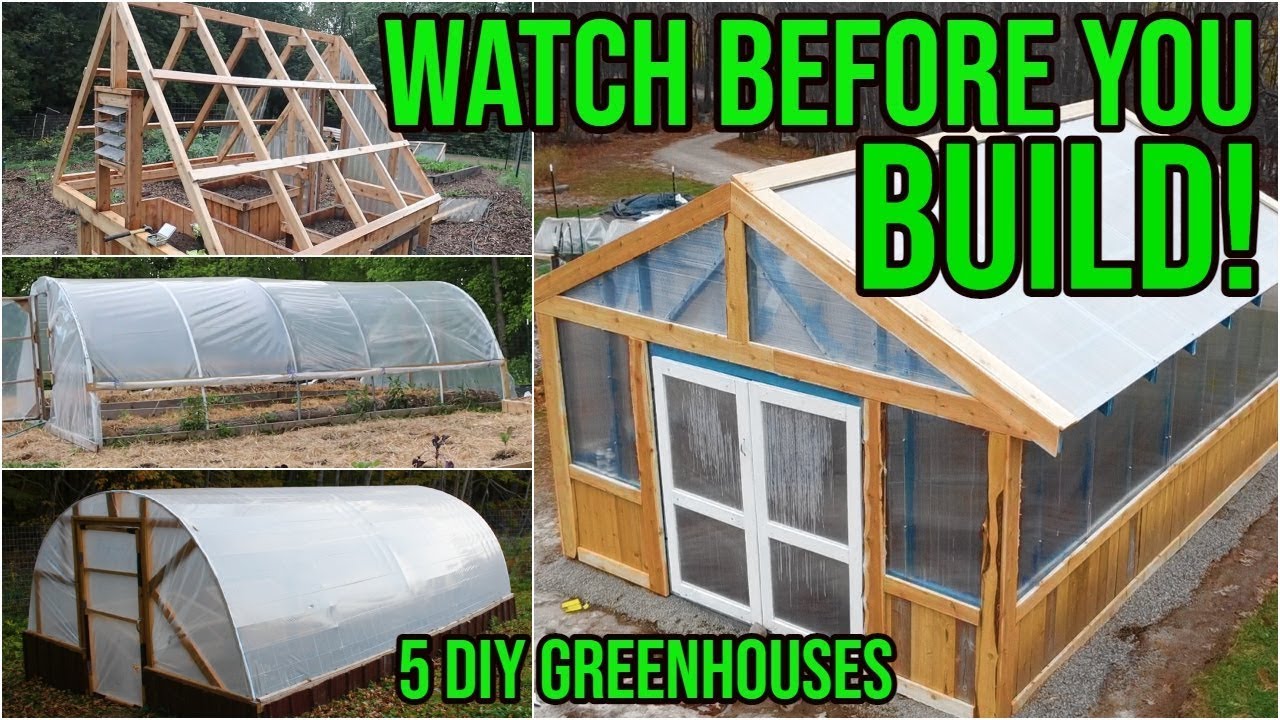
My brother and I have built five greenhouses over the past few years. Each one taught us something. Some worked great. Some had problems we didn't see coming. Here's the honest breakdown of each design, from simplest to most involved.
The materials change depending on which greenhouse you build, but across all five you'll need some combination of:
- Base lumber (2x6s, 2x4s, or 4x4s)
- Framing material (PVC pipe, metal conduit, cattle panels, or dimensional lumber)
- Covering (6 mil plastic, corrugated rigid panels, or twin wall panels)
- Anchoring system (rebar, deck plates, concrete)
- Fasteners (screws, greenhouse tape, foam rolls)
1. The PVC Greenhouse (12' x 19')
This was our first build. It's a 12x19 structure with PVC pipes bent over 2x6 baseboards. We drove 2x2 boards into the ground and screwed them to the baseboards to anchor everything.
The good: One person can build this. It's cheap — we had most of the PVC and lumber already. The angled roof sheds snow well, which matters when you live where we do (lots of snow). For the size you get, the time and money investment is hard to beat.
The bad: You'll be outside after every snowstorm brushing snow off the plastic. The PVC isn't a long-term material and honestly, I'm not sure it's ideal to have around food plants. The 6 mil plastic needs replacement every 3-5 years and doesn't regulate temperature well. Bugs were a nightmare in this one — we never found a good solution.
Bottom line: Great starter greenhouse. It'll get you growing for a few years. Just plan on replacing it eventually.
2. The Metal Hoop House (12' x 19')
Same footprint as the PVC one (12x19), same cedar baseboards with 2x2 anchors. But instead of PVC, we bent metal fence conduit spaced about 4 feet apart.
The good: Simple build, still cost-effective (though conduit prices have gone up since we built this 5 years ago). The metal lasts way longer than PVC — this one has survived three winters so far with no structural issues.
The bad: The round shape doesn't shed snow. When it snows, it sits on top and you have to manually clear it. The snow sinks between the conduit ribs, making it harder to push off. And you're still dealing with 6 mil plastic — same 3-5 year lifespan, same bug problems, same temperature regulation issues.
Bottom line: Better than PVC for longevity. But you're still fighting snow and replacing plastic.
3. The Cattle Panel Greenhouse (10' x 16')
We bent four cattle panels over a foundation of 4x4 anchors and 2x4 baseboards. The panels create continuous support across the whole structure instead of just at the ribs.
The good: Cattle panels are versatile — you can bend them to whatever width or height you need. They provide support across the entire plastic surface, which helps with snow load way better than the first two designs. We added a ridge beam and support, and this thing handles winter like a champ.
The bad: Those cattle panels have sharp edges that will shred your plastic. We learned this the hard way — ripped the first sheet we put on. You need greenhouse tape or foam rolls to cover every edge. And you still need that ridge beam if you get snow — without it, the panels will collapse on themselves. Plus, still 6 mil plastic with all its limitations.
Bottom line: Sturdy and spacious for the money. But prep those edges before you cover it.
4. The A-Frame Greenhouse (8' x 8') — My Favorite
This is the one I'm most proud of. Cedar frame, corrugated rigid plastic panels, anchored with square post anchors and metal deck plates. Nothing but metal goes into the ground — no wood rot issues.
The good: This thing is built to last. The rigid panels regulate temperature incredibly well — when it dropped below freezing outside, the inside stayed in the high 30s. During the day, it only got about 10 degrees warmer than outside. Snow slides right off the steep roof — we've watched it just fall off within a day. Rainwater collection is easy with the pitched roof — we rigged gutters from scrap metal that feed into the beds. And no bug problems so far.
The bad: Price. Cedar is expensive, and prices have jumped since we built ours. What we paid vs. what it costs now is a big difference. It also takes more skill to build — you'll want someone helping you.
Bottom line: If you can afford it, build this one. It's the best performer we've had.
5. The Twin Wall Panel Greenhouse (12' x 16')
We wanted something that would last as long as possible, so we went all out. Poured a concrete foundation. Used twin wall plastic panels with an air layer for insulation. These panels have a 10-year warranty against hail, weathering, and light transmission loss.
The good: Built to last decades, not years. The twin wall panels insulate way better than anything else we've used. Stick framing gives you total control over dimensions — you can build it to fit your exact space.
The bad: Expensive. Like, really expensive. And building something this size requires a lot of skills. This was our first time pouring concrete — we learned as we went, but it took a lot of time and energy.
Bottom line: The ultimate greenhouse if you have the budget and skills. We're still finishing the interior and planning to add a heating system.
Which One Should You Build?
If you're just starting out and want something cheap to get growing, build the PVC greenhouse. If you want something that'll last a few more years without much more work, go with the metal hoop house. The cattle panel greenhouse is the best middle ground for sturdiness and cost.
But if you can swing the budget and have some building experience, the A-frame or twin wall greenhouse will serve you for a decade or more without the headache of replacing plastic every few years.
I've got build videos and material lists for all of these linked in the description if you want to see the actual construction process.