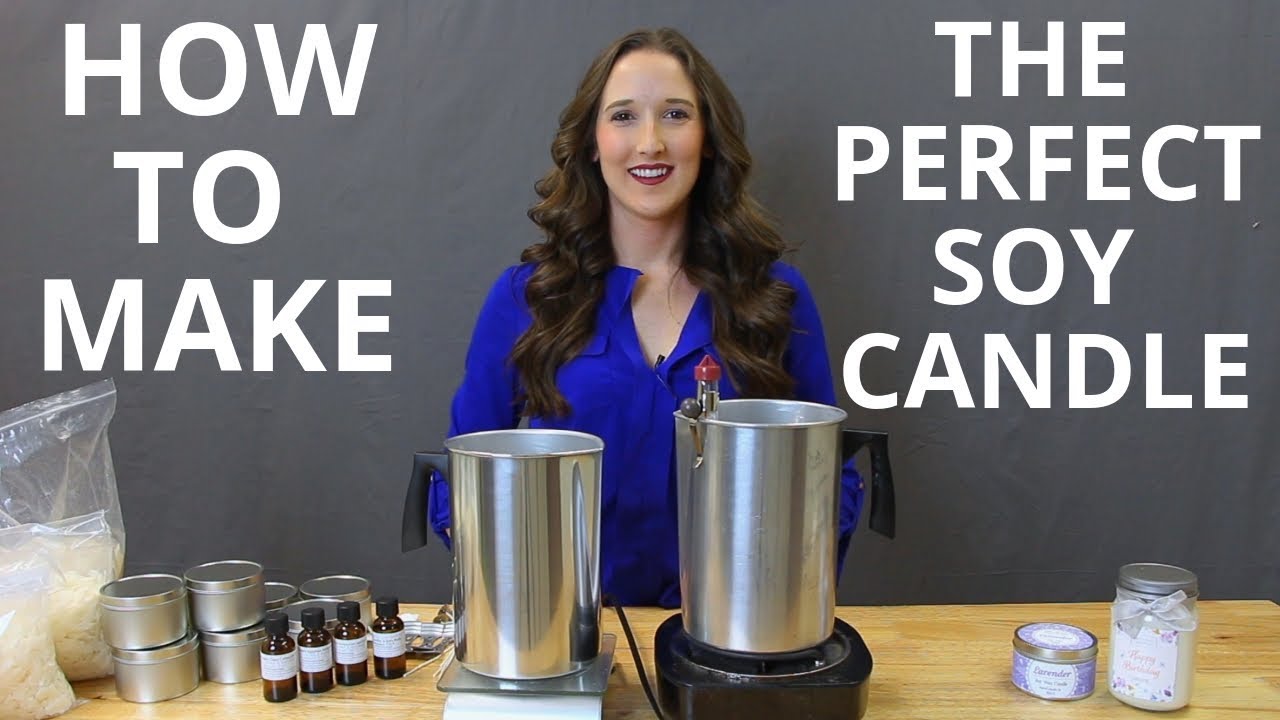
What You'll Need
I've been hand-pouring candles for years across several candle companies, and people always ask me the same thing: "Isn't it hard?" No. It's not. And once you learn the right temperatures and steps, you'll make candles that burn clean and fill a room with fragrance.
Here's exactly how we do it.
- Golden Brands 464 soy wax – US-grown, all-natural
- 8 oz tin containers (or whatever container you want)
- Pre-tabbed cotton wicks – grab these from Procandlesupply.com
- Glue stickers – way easier than hot glue guns. They hold up to 180°F.
- Bow tie wick holders – centers the wick while the wax cools
- Fragrance oil – I'm using Procandle Supply's lavender, their strongest
- Pouring pitcher – get one with a plastic handle so you don't burn yourself
- Kitchen scale – any one will do
- Heat source – hot plate, microwave, double boiler, or Presto Pot
- Candy thermometer – clips onto the pitcher, cheap and easy to read
- Metal stirring spoon
Sounds like a lot, but for what you'd pay for two candles at the mall, you can make a dozen. Once you have the supplies, each candle costs a few dollars to make. That leaves a lot of room for profit if you're selling them.
Step 1: Melt the Wax
Measure out 1 pound of soy wax on your kitchen scale. This makes three 8 oz tins. Put the wax in your pour pitcher and heat it to 185°F. Stir it while it heats – don't just let it sit or it can burn.
185°F is the magic number for this specific wax. At this temperature, the fragrance oil binds with the wax best. That's what gives you a strong-smelling candle.
Step 2: Add Fragrance Oil
Once your wax hits 185°F, pull it off the heat. The sample bottles in the Procandle Supply starter kit are 1 oz each – perfect for 1 pound of wax. Pour the whole bottle in and stir 20 to 30 times.
Set it aside to cool.
Step 3: Prep Your Containers
While the wax cools, get your tins ready. Take your glue stickers, peel them off, and stick one onto the tab of each wick. Peel the other side and stick the wick into the center of each tin.
Then slide a bow tie wick holder down over the wick and lock it into the notch. Your wicks are now centered and won't move while the wax sets.
Step 4: Pour at the Right Temperature
Wait for the wax to cool to 135–140°F. It'll look a little cloudy at this point. Pouring soy wax cooler gives you a smoother, prettier top. Pour it too hot and you'll get craters. Pour it too cold and it won't fill the container properly.
Once it's at the right temp, pour straight into the tins. That's it.
Step 5: Wait and Trim
You have to wait at least overnight. I know, it's hard. But let the candles set completely.
The next morning, remove the wick holders. If you're selling the candles, leave the wicks a little longer in case the wax swells in heat. If you're burning it yourself, cut the wick to 1/4 inch – that gives the best burn.
What the Finished Candle Looks Like
Clean top, trimmed wick, and a nice label with a tin lid. That's all there is to it.
If you've got questions, drop them below. I want to help you make these things right.