What You'll Need
This is one of those projects that looks complicated but is actually just a lot of repetition. The result is a massive squishy tube pillow — great for lounging, napping, or as a toy for kids. I'll show you two ways to tie the ends into a knot pillow shape.
- Stretchy fabric (I used 1.5 meters wide × 1 meter long)
- Hollow fiber stuffing
- Sewing machine and thread
- Scissors
- A stuffing tool (I made one from two tubes taped together)
- A long stick or mop handle for pushing stuffing through
Step 1: Cut the Fabric
Fold your fabric in half. The 1-meter side should face you. Even out the edges.
Mark four stripes, each 17 cm wide. Cut along the lines. You'll get four stripes, each 17 cm wide and 1.5 meters long.
Step 2: Sew the Stripes Together
Join two stripes together by stitching along the short end. Do this with the other two stripes too. Now you have two stripes, each 3 meters long.
Fold each stripe in half lengthwise (like a long tube) and stitch along the edge. This is a very long seam — take your time.
Step 3: Turn the Tube Inside Out
Make a small pad at one end of the tube and tack it with a few stitches. Use this pad to pull the whole tube inside out. It's like turning a sock, but way longer. Once it's fully turned, remove the pad and thread.
Step 4: Stuffing
Slide the fabric tube onto your stuffing tool. I used two tubes taped together — one whole tube and one half. This works for about 1.5 meters of tube at a time.
Feed hollow fiber into the tool and use a long stick (I used a crossbeam from a shoe rack) to push the stuffing into the tube. Work slowly and spread the stuffing evenly. Check the tube every so often and adjust the filling.
At the end, use your hands to finish stuffing. Repeat for the second tube.
Step 5: Join the Two Tubes
Fold the raw edges of both tube ends inward. Use an invisible stitch to join them. I've shown this stitch before — run the needle through one folded edge, then the other. Leave a small opening, add more stuffing if needed, then close it up.
Now you have one giant tube, 6 meters long, fully stuffed.
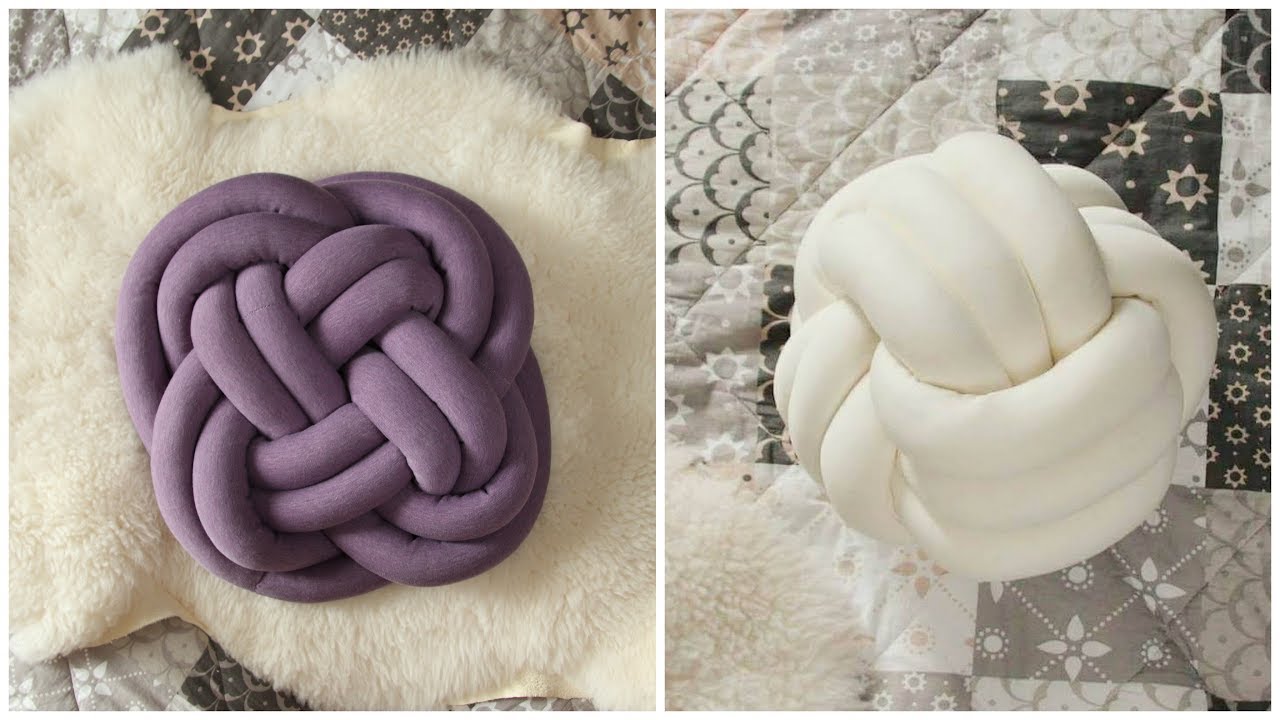
Step 6: Shape the Pillow (Version 1)
Make sure the seam is on the bottom so you won't see it on the front.
Make a loop, then arrange another loop beside it. Take the other end and run it over and under the loops — over, under, over, under — and tighten. Keep the loops roughly the same size.
Now take that same end and follow the pattern of the first end. Run it above the third loop, then repeat the path of the first end. Tighten and form the fourth loop. Keep repeating this pattern — here, then here, then here — until you've gone all the way around.
If it feels loose in some spots, start at the loose place and tighten along the tube. Make the last turn and hide the ends on the other side. You can just tighten the knot and tuck the ends, or sew them if you prefer.
Step 7: Shape the Pillow (Version 2 — Monkey Fist Knot)
Make a small loop and repeat it three times. Change direction to perpendicular, twist, and run three new loops over the three previous ones.
Run the end through the top, pull it out on the opposite side, and repeat three times. Hide the ends inside the pillow. Adjust the tightness.
That's it. These pillows take some time but they're worth it. The kids will probably steal them anyway.