What You'll Need
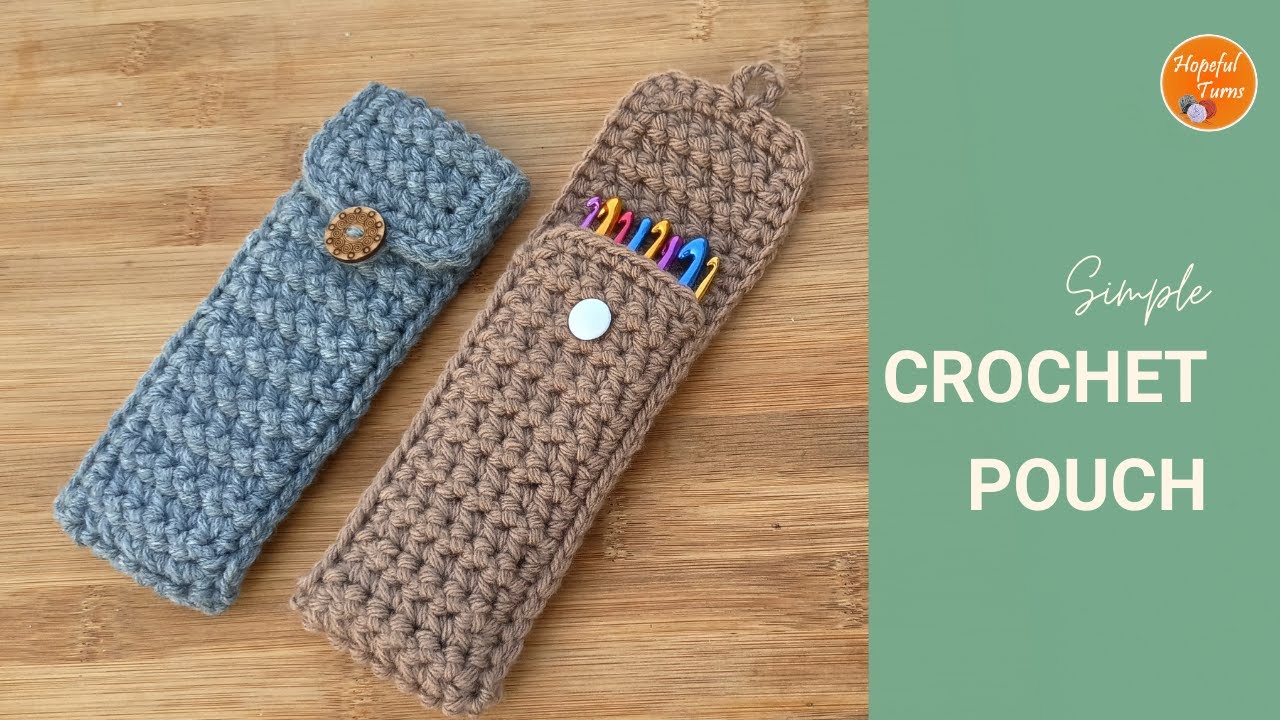
I love a good project that works up fast and actually gets used. This crochet pouch is one of those patterns you'll come back to again and again. I use mine for crochet hooks, but it works just as well for pens, colored pencils, or even a pair of reading glasses.
The pattern uses a single crochet two together stitch to create a nice textured fabric. It's beginner-friendly — if you know how to chain and single crochet, you can make this.
- Any yarn you have on hand (I used medium weight / worsted weight)
- Crochet hook matching your yarn (I used 5.5 mm)
- Scissors
- Darning needle
- One button for the closure
Step-by-Step
Make the Base Strip
Start with a slip knot. Chain 7 stitches.
This chain determines the width of your pouch. With 7 chains, your finished pouch will be about a quarter inch wider on each side. Want a wider pouch? Just add more chains to start.
Row 1: Skip the first chain from your hook. Insert your hook into the second chain and pull up a loop. Insert your hook into the next chain and pull up another loop. You'll have three loops on your hook. Yarn over and pull through all three loops — this is a single crochet two together stitch (sc2tog).
For the next stitch, insert your hook into the same stitch where you just finished (where the last sc2tog ended). Pull up a loop. Insert your hook into the next stitch, pull up a loop. Yarn over and pull through all three loops.
Keep repeating this pattern across the row. You're always inserting your hook into the stitch you just finished and the next stitch. When you reach the very last stitch of the row, make a normal single crochet.
Row 2 and beyond: Chain 1, turn your work. Repeat the same sc2tog pattern across the row. Remember to always start each sc2tog in the stitch where you just finished the previous one. End each row with a regular single crochet in the last stitch.
Keep going until your strip measures about 14 inches (36 cm) long. This gives you enough for the pouch body plus a flap. You can make it longer or shorter depending on what you're storing.
Add the Border
Once your strip is the right length, you'll add a single crochet border around all four edges. This cleans up the edges and makes joining easier.
Start at any edge. You'll find small gaps between the stitches where you can insert your hook. Evenly space your single crochets along the length. When you reach a corner, put 3 single crochets in that corner stitch. Continue around all four sides, putting 3 single crochets in each corner.
When you get back to where you started, slip stitch to join and cut your yarn.
Fold and Join
Fold your piece into a pouch shape. Decide how much you want the flap to overlap.
Attach your yarn at the bottom corner with a slip stitch. You'll join the two sides together by working slip stitches through both layers. Look for the V-shaped stitches on each side and insert your hook through both corresponding Vs, then slip stitch.
Work slip stitches up one side, across the bottom (if you're joining that too), and up the other side. When you reach the top edge where the flap is, continue making slip stitches along that edge — but stop at the center to make your buttonhole.
Make the Buttonhole
When you reach the center stitch of the flap edge, chain 5 stitches. Insert your hook back into the same stitch and slip stitch to close the loop. This creates a small loop for your button. Continue slip stitching across the rest of the flap edge.
Sew your button onto the pouch body in line with the buttonhole. Make sure to position it so the flap closes neatly.
Weave in all loose ends with your darning needle.
Tips
- If you're using a different weight yarn, just go with the recommended hook size. The pattern works the same.
- The buttonhole loop is adjustable — chain more or fewer stitches depending on your button size.
- This makes a great handmade gift. Fill it with hooks, pens, or art supplies and give it to a creative friend.


