What You'll Need
We've been in this house for 10 years, and most of our upgrades went to rooms we actually use — the primary bathroom, the living room. This small bedroom with decent closets? It became the office/storage dumping ground. Not a great use of space, especially when we started accumulating important stuff to display. You know, lightsabers, Legos, Captain America shields.
The back wall was perfect for built-in cabinets, shelves, and a desk I could use for working from home. I didn't want to spend a fortune since this isn't a daily-use room, so I went with cheap stock cabinets and modified them.
- Stock base cabinets (Project Source from Lowe's, basic oak)
- 3/4" birch plywood
- 3/4" poplar for face frames
- Crown molding
- Base cap molding
- Bead molding
- Wood glue
- 23-gauge pin nails
- 18-gauge brad nails
- Wood putty
- Paint (Sherwin Williams Infinity, West Highland White)
- Paint sprayer (Graco TrueCoat 360DS)
- Track saw (or circular saw with guide)
- Basic carpentry tools
Step-by-Step Guide
Step 1: Modify the Cabinets
Standard kitchen cabinets are 34.5" tall. I needed mine at 30" for a desk height. I could have cut off the toe kick and kept the drawer, but that would look weird against carpet. After some debate, I cut off the drawer entirely. The baseboards will wrap around the cabinets just like the rest of the room — we'll see if I regret that.
Step 2: Prep the Floor
I removed all trim, set the cabinets in place temporarily, and marked where I needed to cut out carpet. I wanted the cabinets sitting directly on the subfloor, not on carpet and pad. I moved the tack strips too — those thin wood strips with angled nails that grab the carpet and keep it stretched. Prevents shrinkage over time.
Step 3: Build the Desk Top
Back in the shop, I used my track saw to cut 3/4" birch plywood. My table saw isn't big enough for sheet goods, so the track saw is safer. The back wall spans about 12 feet, so I used one single piece across the desk and two seams under the shelves. I'll fill those seams with wood putty and sand them smooth — after paint, they should disappear.
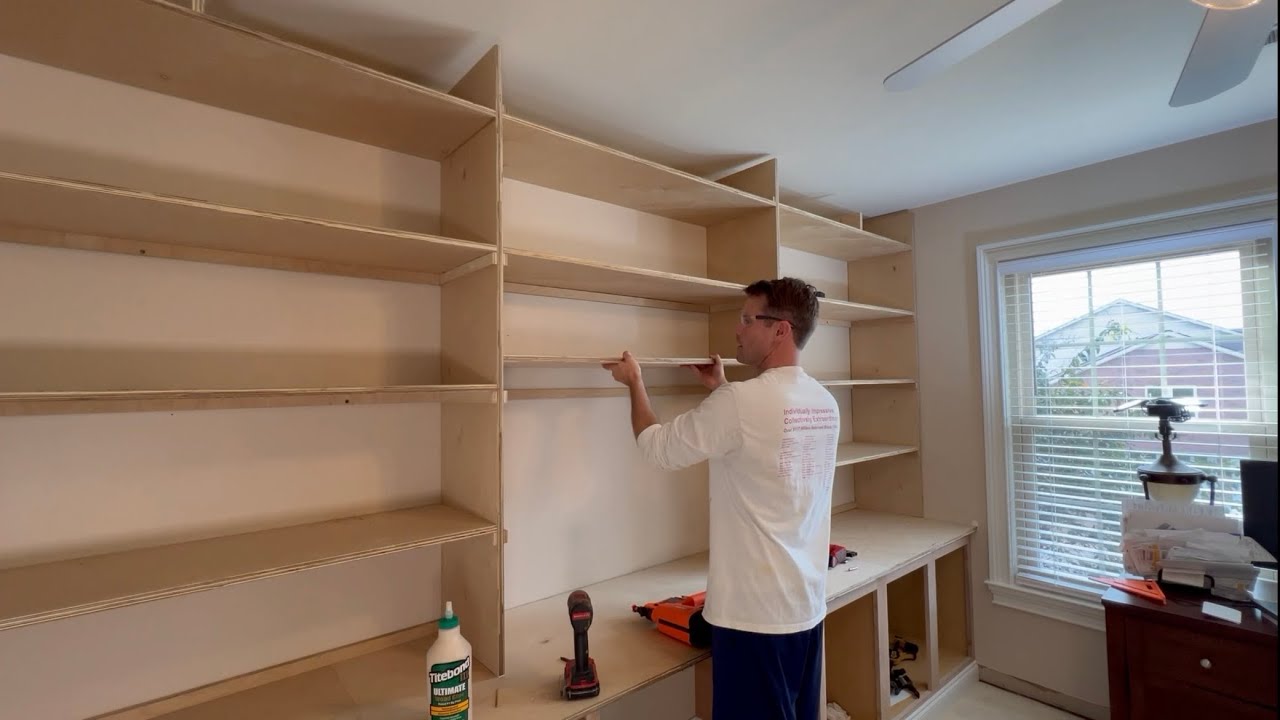
Step 4: Build the Shelf Units
The design has three separate units. I built the two side units first, then connected them with the middle section. Each shelf is 15" deep — two reasons for that. First, I can get three pieces out of one 48" wide plywood sheet. Second, it sits back about a foot from the front of the base, leaving room to use it as a desk.
For support, I glued and nailed brackets to each support piece, then glued and screwed the shelves in from the sides. Added supports to the back, and later the face frame will add more stability. I'm not storing encyclopedias on these, but they span over 4 feet, so I wanted them sturdy.
Step 5: Install and Connect
My wife helped me muscle the units into place. Then I added the center shelves to tie everything together. Notice the shelves don't go all the way to the ceiling — I'll address that.
Step 6: Build the Face Frames
Simple strips of 3/4" poplar, held with glue and brads. I've seen carpenters build the whole face frame first and attach it as one piece. I'm not that confident. I took my time making each piece perfectly flush with the shelf to minimize filling and sanding later.
Step 7: Add Crown Molding
Same concept as the baseboards wrapping the room — I did the same at the top of the built-ins, with an extra detail. A strip of base cap under the crown molding looks sharp. I installed a long strip of plywood, then the trim to encapsulate the upper shelves. A small piece of bead molding covers the plywood edge. Small crown molding covers the gap at the top of the cabinets.
Everything is glued and pinned with 23-gauge or 18-gauge nails. Filled all seams and nail holes with wood putty, sanded smooth.
Step 8: Paint
A few weeks passed before I got to painting. I masked everything off and sprayed to get it done in one chunk. I work full-time, so projects happen in bits and pieces — painting doesn't work that way. Used Sherwin Williams Infinity in West Highland White. Good paint limits clogs and sputters in the sprayer. The Graco TrueCoat 360DS is perfect for smaller projects like this. Refilled it a couple times, no big deal. Much easier than dragging out the big sprayer.
Cost Breakdown
- Cabinets: ~$450
- Plywood and materials: ~$500
- Total: ~$1,100
Final Thoughts
These built-ins actually make the room feel larger — all that extra depth and character along the wall. We got a functional desk and tons more storage. Stuff that's been in storage for years finally has a home. And I stole the opposite wall for all my nerd stuff.
I find myself using this room way more now. If you're thinking about doing something similar, hopefully this helps. Leave questions in the comments — or tell me what you'd have done differently.