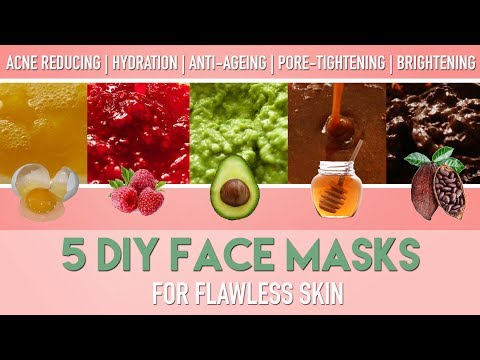
Overview

Creative self-expression through DIY projects has become increasingly popular among students seeking personalized fashion and accessories without breaking the budget. This comprehensive guide explores practical techniques for creating custom makeup applications, decorating footwear, and embellishing notebooks using everyday materials found around the home or classroom.

What These DIY Hacks Cover

The following techniques demonstrate how students can transform ordinary items into personalized accessories through creative crafting methods. These projects require minimal materials, basic tools, and a willingness to experiment with design concepts.

Quick Makeup Application Techniques

💄

Thread-and-Lipstick Method for Lip Lining

10 minuteslow difficulty
When traditional makeup tools are unavailable, a simple thread combined with lipstick can create precise lip definition. This technique involves taking a single thread (cotton or synthetic), rubbing it directly across lipstick to coat it evenly, and using the thread as a guide to create an outline around the lip edges. Starting with the bottom lip contour, the designer gradually fills in the colored area.
  • 1Take a single thread (cotton or synthetic)
  • 2Rub the thread directly across lipstick to coat it evenly
  • 3Use the thread as a guide to create an outline around the lip edges
  • 4Start with the bottom lip contour
  • 5Gradually fill in the colored area with standard lipstick
💡 Key Advantage
This method works because the thread holds enough pigment from the lipstick to create visible lines, allowing for more controlled application than using the lipstick bullet directly. The thread's thinness enables precision work on delicate lip areas.
Why This Works: Provides precise control, creates symmetrical lip lines, requires only two common items, and costs virtually nothing.

Footwear Customization Through Pencil Decoration

👟

Elevating Shoe Design with Colored Pencils

45 minutesmedium difficulty
One of the most accessible DIY projects involves transforming ordinary shoes using colored pencils and adhesive. The process includes selecting multiple colored pencils in complementary shades, applying hot glue or strong craft adhesive to the shoe heel, and arranging pencils vertically along the heel edge. Starting with smaller pencils at the bottom and graduating to larger diameter pencils as you move around the heel circumference ensures complete coverage with visual harmony.
  • 1Select multiple colored pencils in complementary shades
  • 2Apply hot glue or strong craft adhesive to the shoe heel
  • 3Arrange pencils vertically along the heel edge
  • 4Start with smaller pencils at the bottom
  • 5Graduate to larger diameter pencils as you move around
  • 6Ensure complete heel coverage with pencil arrangement
  • 7Repeat the process on the other shoe
🎨 Design Principle
The adhesive is applied in a thin line down one side of the heel. Pencils are then positioned vertically, with their colored tips pointing downward. As the designer moves around the heel, progressively larger pencils create a gradient effect.
Key Benefits: Transforms inexpensive footwear into unique statement pieces, uses commonly available materials, creates height and visual dimension, and remains durable when properly adhered.

Notebook Embellishment Techniques

📓

Using Sequins and Beads for Notebook Covers

60 minutesmedium difficulty
Personalizing notebooks with decorative elements creates unique stationery that reflects individual style. The enhancement process begins by gathering sequins, beads, and other small decorative elements in various colors, then sourcing a circular metal piece such as a chip or snack can lid. After applying hot glue along the edge of the metal circle and positioning it on the notebook cover, the designer surrounds the metal piece with arranged sequins and beads in a cohesive decorative pattern.
  • 1Gather sequins, beads, and decorative elements in various colors
  • 2Source a circular metal piece (chip can lid or similar)
  • 3Apply hot glue along the edge of the metal circle
  • 4Position the metal piece on the notebook cover
  • 5Arrange sequins and beads around the metal piece
  • 6Create a cohesive decorative pattern
  • 7Let the hot glue set completely before using
🎯 Design Considerations
Color coordination between sequins, beads, and notebook base creates visual harmony. The metallic quality of both the lid and sequins creates a cohesive, polished appearance. Balance between the decorated area and remaining notebook space ensures professional presentation.
Results: Creates professional-looking notebooks without commercial decoration services, allows complete customization of design, uses inexpensive materials, and can be completed in under an hour.

Tools and Materials Checklist

These DIY projects require minimal supplies, most of which are commonly found in home craft areas or readily available at low cost.

Essential Supplies
Hot glue gun or craft adhesive
Colored pencils (various sizes)
Threads (cotton or synthetic)
Sequins and small beads
Lipstick or colored cosmetics
Metal lids or circular objects
Heat gun (for some applications)
Microfiber towels or soft cloths
Scissors

Design Principles for DIY Projects

Color Harmony: Successful projects select complementary color schemes. This applies whether combining pencil colors on shoes or sequin arrangements on notebooks.

Balance and Proportion: Distribution of decorative elements should appear intentional. Symmetrical arrangements appeal visually, while off-center designs create modern aesthetic effects.

Durability Considerations: Strong adhesives ensure longevity. Proper application technique prevents premature failure or separation of components.

Personal Expression: Each project allows the creator to inject individual preferences, making finished pieces unique reflections of personal style.

Troubleshooting Common Issues

🔧

Adhesive Failure

Using hot glue instead of weak craft adhesive prevents elements from separating. Allow adequate drying time (typically 30 minutes to 2 hours) before using the finished item. Temperature and humidity affect drying times.
🎨

Color Coordination Challenges

Planning color schemes before beginning prevents mismatched aesthetics. Testing arrangements before final gluing ensures satisfaction. Consider the base color of the item being decorated when selecting complementary colors.
⚙️

Uneven Application

Taking time during the application process ensures professional-looking results. Rushing leads to misaligned elements and visible mistakes. Work in small sections and check alignment frequently.

Durability Problems

Quality materials and proper technique prevent wear. Using heat guns to set edges and strong adhesives extends project lifespan. Test finished items under normal use conditions before considering the project complete.

Results and Outcomes

Students who complete these projects typically achieve custom fashion items that reflect individual style preferences, functional accessories that serve practical purposes, and significant cost savings compared to retail alternatives. Beyond the tangible results, these projects build skill development in crafting techniques and material handling, along with creative confidence for attempting future DIY projects.

The accessibility of these techniques means that anyone—regardless of prior crafting experience—can create professional-looking personalized items. Timeline and effort investment for most projects requires 5-15 minutes for material gathering, 15-45 minutes for execution, and 30 minutes to 2 hours for adhesives to set, with total project duration of 1-3 hours from start to completion.

Frequently Asked Questions

Do I need prior crafting experience for these projects?
No. These projects are specifically designed for beginners with no prior experience required. The techniques are straightforward and materials are commonly available. Taking your time and following the step-by-step instructions ensures success.
What is the approximate cost of completing these projects?
Most materials cost very little since they use common household items or inexpensive craft supplies. Individual projects typically cost between $2-$10 in materials, compared to much higher prices for purchasing equivalent finished products.
Can I customize the designs shown in these projects?
Absolutely. These projects are specifically designed for personalization. You can adjust colors, patterns, materials, and design elements to match your preferences and available supplies.
How long do these finished items typically last?
With proper technique and quality materials, completed projects last for extended periods. Hot glue adhesive is durable for regular use, though items should be handled carefully to prevent damage to decorative elements.
What is the best way to store these items to prevent damage?
Store decorated notebooks and shoes in a cool, dry location away from extreme heat that could weaken adhesive. Avoid crushing or placing pressure on decorated areas. Keep shoes in a box rather than stacking them.
Can these techniques be adapted for gifts?
Yes. These personalized items make excellent gifts since the recipient can enjoy a unique, customized creation. Creating items specifically for someone else's preferences and style adds a thoughtful personal touch.

Conclusion

Creative DIY fashion and accessory projects provide practical methods for personalizing everyday items using accessible materials and basic tools. Whether decorating shoes with colored pencils, enhancing notebooks with sequins, or applying precise makeup techniques, these hacks demonstrate that customization is achievable without expensive equipment or professional assistance.

The projects emphasize creativity, resourcefulness, and personal expression. By following the demonstrated techniques and principles outlined above, anyone can transform ordinary items into unique, personalized accessories that reflect their individual style and interests. The minimal time investment, low cost, and beginner-friendly approach make these projects accessible to students and crafters of all skill levels.