What You'll Need
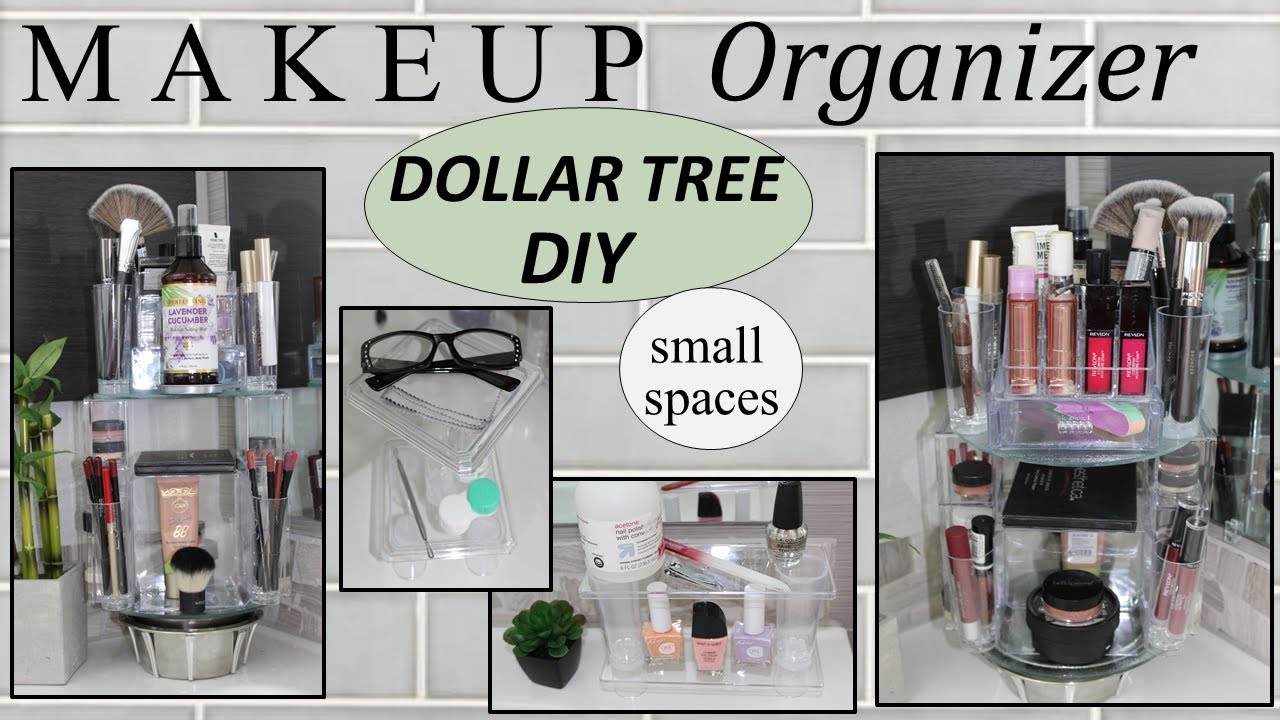
I needed more bathroom storage without spending much, so I built this rotating makeup caddy and two matching side shelves entirely from Dollar Tree stuff. Total cost: $16 for all three pieces. Here's exactly how I did it.
- 1 small tree (the kind with branches that come off)
- 1 dog bowl (the flat, wide kind)
- 1 small platter
- 2 organizers with lids (one single compartment, one three-compartment)
- 2 stackable organizing compartments
- 4 dessert cups (small, clear)
- 2 packs of dollar-store marbles
- 8 plastic spoons
- 1 six-piece mini storage container set
- E6000 glue
- Expo marker
- Rubber bands
- Book (for weight)
Step-by-Step Guide
Step 1: Build the Base
Take the small tree and remove the four little gummy supports from the bottom. Flip it over — now it's flat.
Take the dog bowl, flip it upside down, and glue the small platter to the center of it. Put a book on top to press it down evenly while it dries. This is the rotating base of the whole caddy.
Step 2: Prep the Organizer Containers
You've got two organizers with lids — one single compartment and one three-compartment. Pop the lids off all four sections and set them aside. You'll use those lids to make the side shelves later.
While the base dries, glue the single compartment organizer back-to-back with the three-compartment organizer. Put E6000 on the edges, line them up, and press them together. Then center the whole thing on the dog bowl base and push down firmly.
Step 3: Add the Side Organizers
Glue the two three-tiered organizers to the sides of the base. Put glue on the second shelf down and on the bottom so they attach to the platter. Wrap rubber bands around the whole thing to hold everything tight while it dries. I used two bands for extra security.
Step 4: Top Layer
Repeat the tree-nub-removal trick on another small platter to make it flat. Glue it on top of the three-compartment organizers.
Step 5: Attach the Dessert Cups
These are going to hold your brushes and lipsticks. Put four dessert cups on the bottom layer — one in each corner. I put two thin lines of glue on the side of each cup and a dab on the bottom to stick to the platter. Repeat for all four.
Step 6: Stack the Top Organizers
Take one stackable organizing compartment and glue it on top of the three-compartment section. There are two ridges that stick up — put E6000 along those. I slid mine forward a bit to leave space in the back for my setting spray bottle.
Glue the second stackable compartment on top of the first. Put glue only around the edges where they touch.
Step 7: Top Cap
Take the lid from a magnetic organizer (Dollar Tree) and flip it upside down. Put glue around the metal edge and press it onto the top of the second stackable compartment. Center it and press down.
Step 8: Make the Two-Tier Side Shelves
First shelf (rectangular): Take two of the longer rectangular lids you set aside. Flip them upside down so the lip faces up. Glue two dessert cups to the top lid. Once those dry, put glue on the bottoms of the cups and attach the second lid underneath. Add glue to the bottom of the cups and attach the base of the first shelf.
Second shelf (square): Use the square lids. You need one dessert cup and four of the small containers from the mini storage set. Flip the top lid upside down, glue the dessert cup to it, then glue the small containers to the bottom of the cup. I shifted the bottom layer to be perpendicular to the top — gives it a cool diamond look.
Step 9: Spoon Decoration
This part is optional but looks great. Use an Expo marker to draw lines on the bottom of the dog bowl like you're cutting a pizza — eight equal sections. Mark where each spoon shaft will go. Cut the spoons at the mark, line them up with the wider edge toward the top, and glue them in place. Repeat seven more times.
Step 10: The Rotating Mechanism
Pour the two packs of marbles into the decorated bottom dog bowl. You'll probably have one marble that's too big — take it out so the surface is flat and even. Place the other dog bowl on top and give it a twirl. It should spin smoothly.
Cut off the rubber bands and you're done.
What It Looks Like
All three pieces fit nicely in my bathroom. The makeup caddy spins, the side shelves hold nail polish and hair supplies, and the whole thing cost $16. Not bad for a weekend project.