What You'll Need
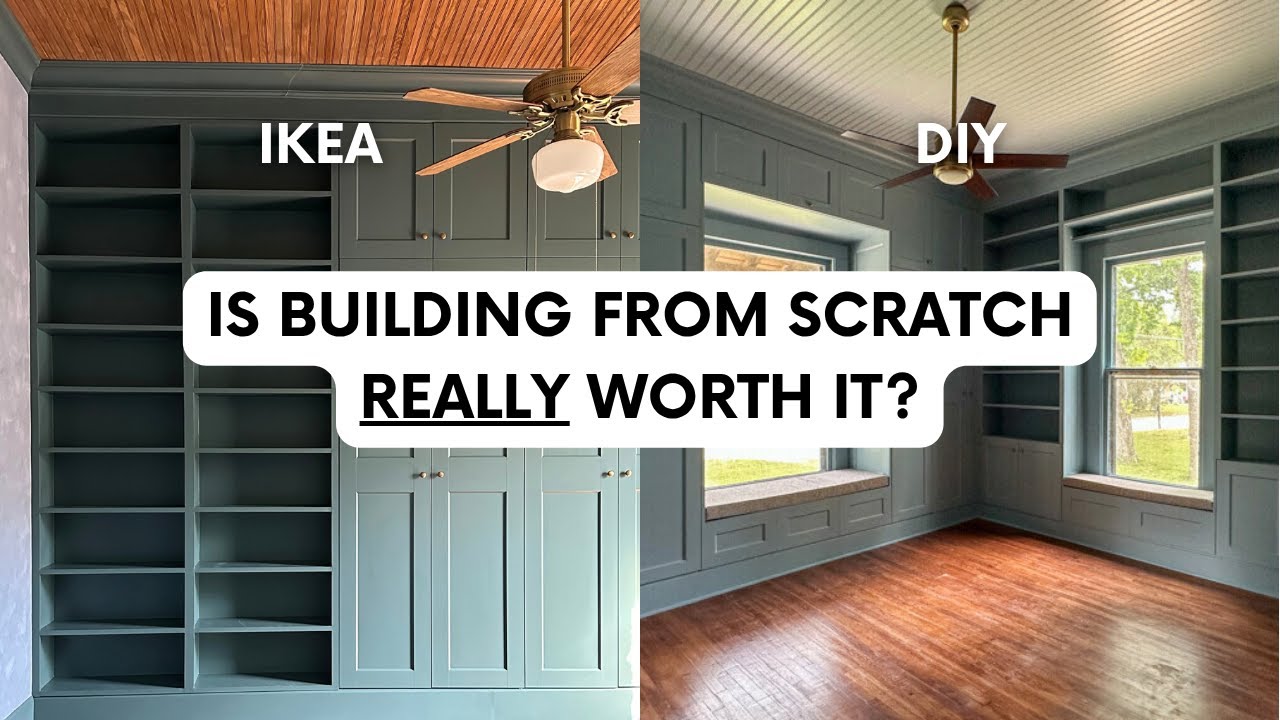
Are you dreaming of floor-to-ceiling built-in bookcases but unsure whether to go the IKEA route or build your own? I've done both in a 1915 home with 12-foot ceilings, and I'm sharing everything I learned—including the surprising cost comparison. Let's break it down so you can make the best choice for your space, budget, and skill level.
For IKEA Billy Bookcases:
- IKEA Billy bookcases (choose sizes to fit your space)
- Height extenders (if needed for tall ceilings)
- Corner units (optional)
- Screwdriver or drill
- Hammer
- Metal shelf braces (to reinforce sagging shelves)
- 1/4-inch plywood (to replace the flimsy back panel)
- 1/8-inch thick filler wood strips
- Face frame wood (pine or poplar)
- Shellac-based primer or spray paint primer
- Paint and brushes
- Bondo (for filling seams)
- Sandpaper (various grits)
- Wood glue
- Nails and nail gun (optional but helpful)
For Building From Scratch:
- 3/4-inch birch plywood (for shelves, sides, and dividers)
- 1/4-inch plywood (for the back panel)
- Circular saw with rip cut guide
- Miter saw (or circular saw with guide)
- Pocket hole jig
- Drill and impact driver
- Clamps (various sizes)
- Dowel jig and dowels (for extending sides to tall ceilings)
- Wood glue
- Sandpaper
- Paint or stain
- Paintbrushes or sprayer
- Temporary diagonal brace (to prevent racking)
Step-by-Step Guide
Option 1: IKEA Billy Bookcases
#### Step 1: Measure Your Space
Measure the height, width, and depth of your alcove or wall. Note the ceiling height—if it's over 7 feet, you'll need height extenders. For my 12-foot ceilings, I used three extenders per bookcase.
#### Step 2: Assemble the Bookcases
Follow IKEA's instructions to assemble each Billy unit. Use a drill with a screwdriver bit to speed up the process, but be careful not to overtighten and strip the holes.
#### Step 3: Replace the Back Panel (Optional but Recommended)
The included back panel has a visible crease from folding. Cut a sheet of 1/4-inch plywood to the exact size of the bookcase back. Remove the IKEA back and attach the plywood with wood glue and small nails. This adds stability and hides the crease.
#### Step 4: Reinforce the Shelves
Books are heavy, and Billy shelves sag over time. Install metal braces under each shelf, or add a face frame to the entire front. For the face frame approach, you'll need to fill the gap between the shelf front and the bookcase sides.
#### Step 5: Fill the Shelf Gap
The fronts of Billy shelves are recessed from the sides, creating a gap when you add a face frame. Rip down 1/8-inch thick filler strips and nail them onto the front edges of each shelf. This closes the gap before attaching the face frame.
#### Step 6: Add the Face Frame
Cut pieces of pine or poplar to create a frame around the entire front of the bookcase. Attach with wood glue and nails. Fill any seams with Bondo, then sand smooth. Note: Bondo is smelly and hard to sand, so work in a ventilated area.
#### Step 7: Prime and Paint
IKEA's finish is slick and repels paint. Use a shellac-based primer (like Zinsser BIN) or spray paint as a primer. Apply multiple thin coats. Once dry, paint with your chosen color. Expect to do 2-3 coats for full coverage.
Option 2: Building Bookcases From Scratch
#### Step 1: Design Your Bookcase
Sketch out your bookcase dimensions. For standard 8-foot ceilings, you can use full sheets of plywood. For taller ceilings, plan to extend the sides using dowel joinery. Include dividers every 2-3 feet to prevent shelf sagging.
#### Step 2: Cut the Plywood
Use a circular saw with a rip cut guide to cut 3/4-inch plywood sheets to width. Then use a miter saw to cut them to length. Wear safety glasses and a dust mask. Cut the following pieces:
- Two side panels (height of your bookcase)
- One top and one bottom panel (width of your bookcase)
- Shelf dividers (as needed)
- Shelves (as many as you want)
- One back panel from 1/4-inch plywood
#### Step 3: Assemble the Box
Use a pocket hole jig to drill pocket holes along the edges of the top, bottom, and divider pieces. Attach them to the side panels using wood glue and 1-1/4-inch pocket hole screws. Clamp everything tightly while the glue dries.
#### Step 4: Prevent Racking
Before attaching the back, install a temporary diagonal brace across the front of the bookcase. This keeps the frame square while you work. Without it, the bookcase can tilt sideways (rack) and you'll have to disassemble and redo the back.
#### Step 5: Attach the Back Panel
Cut the 1/4-inch plywood back to size. Apply wood glue to the back edges of the bookcase frame, then nail the back panel in place. Use a level to ensure the bookcase is perfectly square before the glue sets.
#### Step 6: Install the Shelves
Mark shelf positions on the side panels. Use shelf pins or dado cuts to support the shelves. For a cleaner look, cut shallow dadoes with a router. Insert the shelves and secure with pocket holes from underneath.
#### Step 7: Extend for Tall Ceilings (If Needed)
If your ceilings are over 8 feet, you'll need longer sides. Use a dowel jig to drill matching holes in the top of your side panels and the bottom of extension pieces. Apply wood glue, insert dowels, and clamp until dry. Sand smooth after curing.
#### Step 8: Sand and Finish
Sand all surfaces with 120-grit, then 220-grit sandpaper. Wipe away dust with a tack cloth. Apply primer and paint, or stain and seal. Birch plywood takes paint beautifully and also accepts stain for a wood-grain look.
Tips for Success
- Store plywood flat – After cutting, lay pieces flat on a level surface. If stored on edge, they can warp, ruining your bookcase's straight lines.
- Use a temporary brace – For scratch-built bookcases, attach a diagonal piece of scrap wood across the front while you work on the back. This prevents racking and saves you from having to redo the back later.
- Reinforce IKEA shelves early – Add metal braces or a face frame before loading books. Waiting until you see sagging means the damage is already done.
- Prime IKEA surfaces properly – Skip the regular primer. Use shellac-based primer or spray paint as a base coat. Test on a hidden spot first to ensure adhesion.
- Measure twice, cut once – This old rule is critical for bookcases. A 1/8-inch error can throw off the entire fit, especially when adding face frames or fitting into alcoves.