What You'll Need
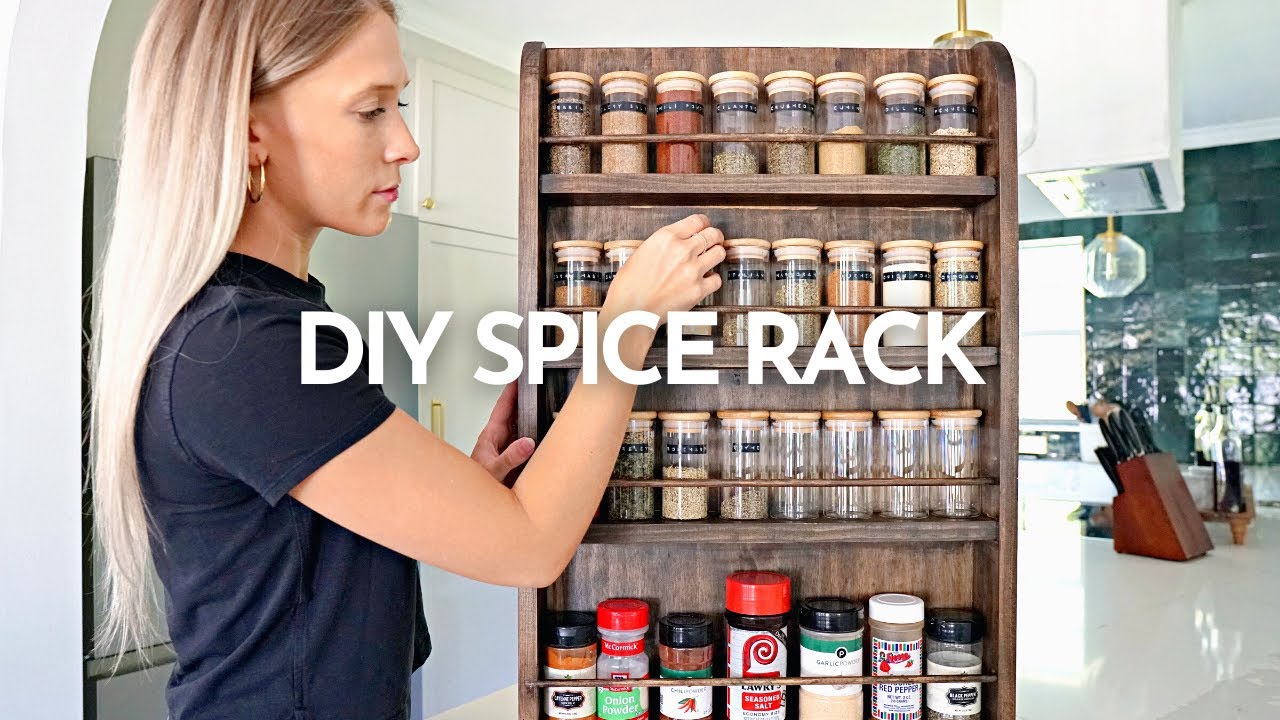
I needed more spice storage and had this empty space on the back of my pantry door. So I built a custom spice rack. You can hang yours on a wall, mount it on the side of a cabinet, or just set it on your countertop.
- 1x4 boards (side supports)
- 1x3 boards (shelves)
- 3/8 inch wooden dowels
- 3/4 inch project panel (back piece)
- 3/8 inch drill bit
- Brad nailer with 1 1/2 inch brad nails
- Wood glue
- 24 inch clamps
- Jigsaw and circular saw
- Orbital hand sander
- Wood filler
- Wood stain (I used Behr Premium in Espresso)
- Satin polyurethane
- Spice jars and labels (optional)
Step 1: Figure Out Your Dimensions
Grab the spice jars you plan to use and lay them out. This tells you how wide your shelves need to be and how much space you need between them.
My rack ended up 29 inches tall and 19 1/2 inches wide. Your dimensions will depend on your jars and available space.
Step 2: Cut and Shape the Wood
Cut your 1x4s, 1x3s, and project panel to size. I used a circular saw for straight cuts.
I wanted rounded corners on the side supports, so I traced a bowl to get that arch shape and cut it out with a jigsaw.
Sand everything smooth with an orbital hand sander before assembly.
Step 3: Mark and Drill Dowel Holes
Measure and mark where your shelves and dowels go. For the 3/8 inch dowels, use a 3/8 inch drill bit. Put a piece of tape on the bit 1/4 inch from the tip so you know exactly when to stop drilling. You don't want to go through the wood. Just 1/4 inch deep.
Step 4: Dry Fit Everything
Before you glue anything, put all the pieces together to make sure everything fits. Adjust spacing if needed.
Step 5: Glue and Clamp
Apply wood glue to all joints and clamp everything together. Let it sit. Once the clamps are tight, reinforce with 1 1/2 inch brad nails through the sides into the shelves.
Step 6: Fill and Sand
Fill nail holes with wood filler. Let it dry completely. Sand everything smooth again, including any sharp corners.
Step 7: Stain and Seal
Apply your wood stain. I used Espresso. Let it dry.
Finish with a few coats of satin polyurethane, lightly sanding between coats with fine grit sandpaper.
Step 8: Organize Your Spices
I consolidated all my spices into matching jars from Amazon. They came with labels, but I used a label maker for cleaner-looking ones. To keep labels straight, I folded a piece of blue tape in half and used it as a guide so every label was in the same spot.
Mounting Tips
If you're putting this on a pantry door like I did, make sure the rack is a few inches smaller than your door. Otherwise it won't close properly.
For wall or cabinet mounting, use appropriate hardware for your wall type.
That's it. A custom spice rack that actually fits your jars and your space.