What You'll Need
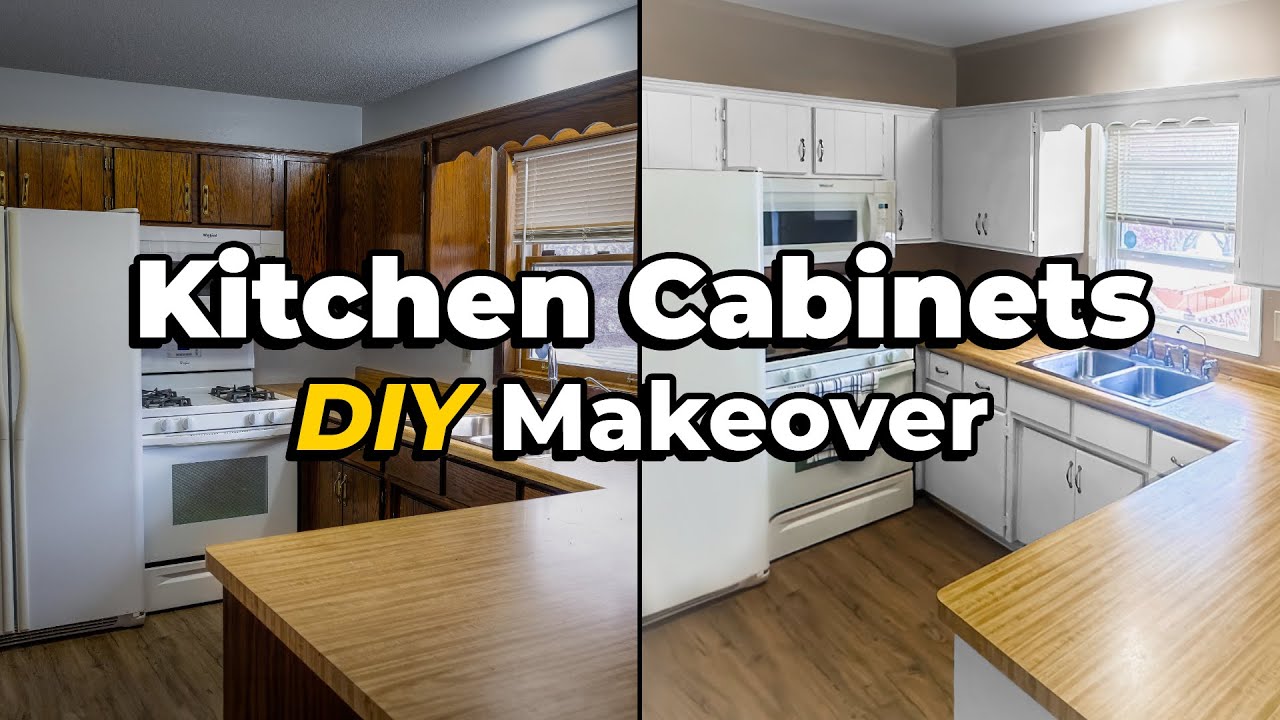
Painting oak cabinets is one of the most satisfying projects you can do. The before and after is night and day. I just finished a full kitchen makeover for a client who wanted her dark 1960s oak cabinets turned into something bright and modern before her family came over for Christmas.
If you've got oak cabinets with that deep, porous grain, you already know the problem: paint those things without filling the grain and you'll end up with little dark lines and holes showing through your finish. Here's how I do it right.
- Brown rosin paper (for floor and counter protection)
- Frog Tape (green, works best for clean removal)
- 3M sanding sponges – medium, fine, extra fine
- Drywall mud (for homemade grain filler)
- Paintbrushes, mud knife, vacuum
- Wagner Flexio 5000 sprayer (or similar HVLP)
- Bare acrylic alkyd enamel primer
- Bare satin urethane alkyd enamel (top coat)
- Plastic sheeting
- 3M hand masker (optional but saves time)
- Paint triangles or folding tables for drying doors
Step-by-Step
1. Prep the Kitchen
First thing I do is lay brown rosin paper over the floors and countertops. It protects everything from drips and dings. Then I run Frog Tape along the edges where the plastic will go. Frog Tape releases clean even after sitting for a week.
Pull all the hardware off the cabinets and toss each piece into the cupboard it came from. I label every door with a piece of tape and a number so I know exactly where it goes later. Skip this step and you'll spend hours trying to figure out which door fits which opening.
On this job, the old clear coat had been brushed over the hinges. Gobs of it gluing everything together. The client wanted new hinges but they didn't arrive in time, so I ended up painting the old ones. More on that later.
2. Sand Everything
Hit every door front and back with a medium grit sanding sponge. You're breaking down the original clear coat and giving the grain filler something to bite into. It also knocks off any grease, dirt, or grime. Use a mud knife to scrape off those old plastic bumpers — mine literally disintegrated when I touched them.
Vacuum all the dust. Keep your workspace clean.
3. Apply Grain Filler
Mix three parts drywall mud to one part water. Stir until it's about the consistency of paint. Brush it into the grain, then go back with a mud knife and push it in while scraping off the excess.
This homemade grain filler is way more sandable than store-bought stuff and way cheaper. It's the secret to getting a smooth finish on oak. I don't put grain filler on the backs of doors unless the client specifically asks for it — most people don't care about the backs.
On these doors, the client wanted to keep the little grooves in the middle. She said they added charm. So I cleaned those out with my fingers before the filler dried.
4. Sand the Grain Filler
Use a fine grit sanding sponge. Don't over-sand — if you sand too much, you'll pull the filler back out of the grain and you're back where you started. You want it smooth, not gone.
Vacuum again.
5. Tape and Plastic the Kitchen
Use the 3M hand masker with inch-and-a-half Frog Tape. Tape the inside edges of the cabinets, leaving the back edge of the tape loose so you can tuck the plastic under it. Run plastic over the countertops, appliances, windows — everything.
If a cabinet is greasy (especially near the stove), clean it first. Otherwise the tape won't stick and you'll get overspray inside the cabinet.
For cabinets with nothing to tape to — like under the sink — just tape to the backside and touch it up with a brush later.
6. Prime
I used bare acrylic alkyd enamel for the primer. Thin it 20% with water. If you don't thin it, your sprayer will struggle and you'll get bad atomization. Even expensive sprayers need thinned paint to lay down nice.
I pour water into the paint bucket first, then add the paint. That way I get every last drop out of the can. Stir until it flows like heavy cream.
I spray the doors horizontally on paint triangles set up over brown rosin paper on the countertops. This is the best method for DIYers. You won't get runs on the doors. The only place you have to watch for runs is the face frames.
Spray the fronts first, let them dry, then flip and spray the backs.
7. Sand the Primer
Use extra fine sanding sponges. Light sanding — just enough to knock down any rough spots and give the top coat a smooth surface.
8. Caulk All Gaps
This step matters more than you think. On a white finish, every crack and gap shows up as a dark line. Caulk where two pieces of wood meet, around crown molding, windows — anywhere there's a seam.
I use a wet rag to smooth the caulk. A dry finger leaves it rough and you'll see it through the paint.
9. First Top Coat
I used bare satin urethane alkyd enamel. Satin is what I use on 95% of my projects — cabinets, doors, trim, windows. It looks great and hides imperfections better than gloss.
Same 20% water reduction. Spray the doors horizontally. For the face frames, go slow. There's more risk of runs because they're vertical. Dial the sprayer back if you need to. Fixing runs is way more work than going slow.
I almost forgot to spray the underside of one cabinet. Caught it and hit it with an extra coat. It happens.
10. Second Top Coat
Same process. Day four was identical to day three. Two coats of enamel gives you a durable, professional finish.
11. Reinstall Hardware and Doors
The client accidentally bought the wrong hinges, so I put all the old ones back on. I brushed two coats of paint onto the hinges after installing them. Not how I'd normally do it, but she had a Christmas party the next day and I wasn't going to let the kitchen look half-finished.
The touch-up paint blended perfectly. You couldn't tell they were painted.
She did get new handles, and those made the whole kitchen come together.
Match each door to its number. Everything fit the first time. I've made the mistake of not labeling doors before — learned that one the hard way.
12. Touch-Ups
Plan for a couple hours of touch-ups. Little spots you missed, areas that need another pass. It's part of painting.
I also painted the walls while I was there. I caulk the cabinets to the walls and let overspray hit the walls intentionally — it gives you sharp, clean lines. Takes about two hours and makes the kitchen look fantastic.
How It Turned Out
Five days of work and the kitchen was done just in time. The client was thrilled. The oak grain was completely smooth under the white paint. Those little grooves she wanted to keep? They actually look good. My wife called it "country charm." The homeowner was right to trust her gut on that one.
The old hardware looks fine painted. She'll swap them for silver later, and that'll give it an extra boost.