What You'll Need
Here is a DIY tutorial article based on the provided transcript.
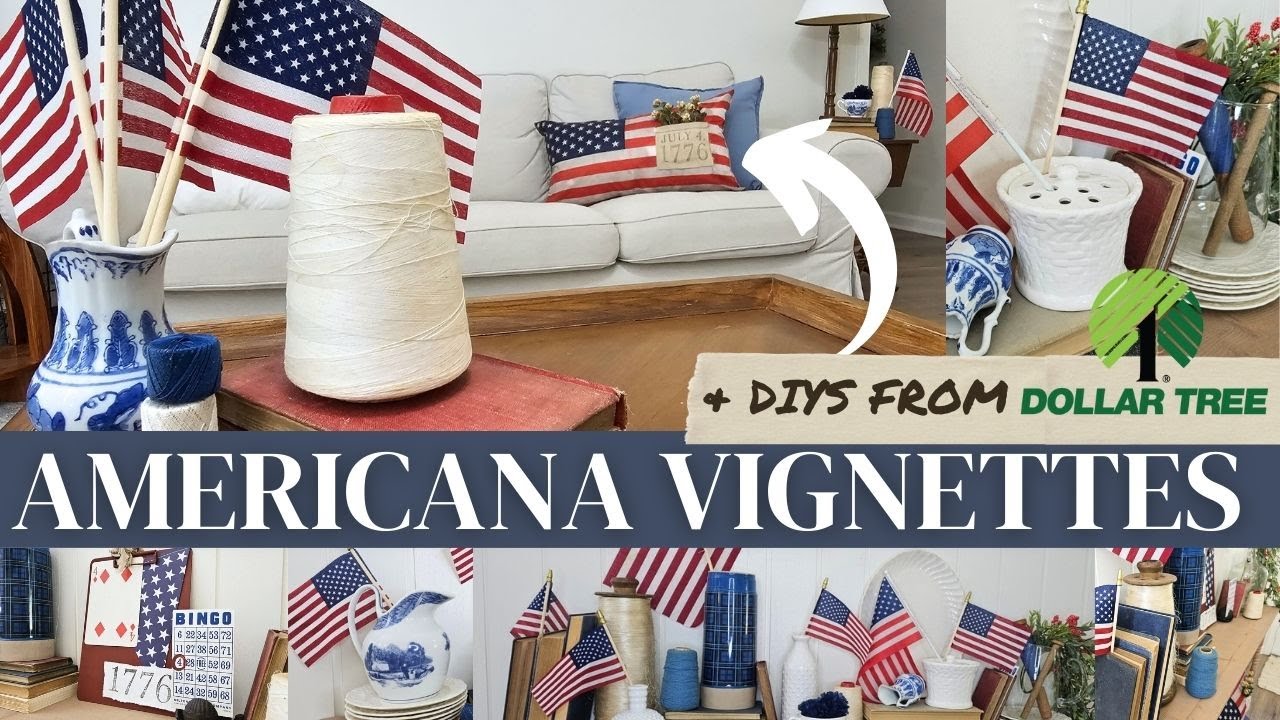
# Transform Dollar Store Finds into Vintage Americana Decor
Are you looking to add a touch of patriotic charm to your home without breaking the bank? In this guide, we’ll show you how to take basic Dollar Tree items and thrifted treasures and turn them into beautiful, vintage-inspired Americana decor. We’ll cover techniques like paint distressing, tea-dyeing (or paint-watering), and creative repurposing to give your 4th of July and Memorial Day decorations a unique, high-end look.
Materials
- Dollar Tree mini flags (the larger size)
- Dollar Tree long door banner (plasticky material)
- Dollar Tree chair cover (red, white, and blue)
- Dollar Tree clipboard
- Dollar Tree floral picks (red, white, and blue)
- Dollar Tree poster board
- Oval wooden embroidery hoop (thrifted or from craft store)
- Round wooden pieces (from your stash or craft store)
- Dixie Belle chalk paint in "Rustic Red" and "Fluff" (or similar colors)
- Fusion Mineral Paint in "Chocolate" (or similar brown paint)
- IOD Type Setting stamps and black ink
- Vintage Bingo card (thrifted)
- Giant playing cards (thrifted)
- Vintage books (red, white, and blue covers)
- Lumbar pillow insert
- Drop cloth (previously tea-dyed)
- Twine or rope
- Ribbon
- Hot glue sticks
- Spray adhesive
- Sandpaper
Tools
- Scissors
- Hot glue gun
- Paintbrushes (including a pointed sash brush)
- Small container for mixing paint
- Water
Step-by-Step Guide
1. Create a Framed Flag Art Piece
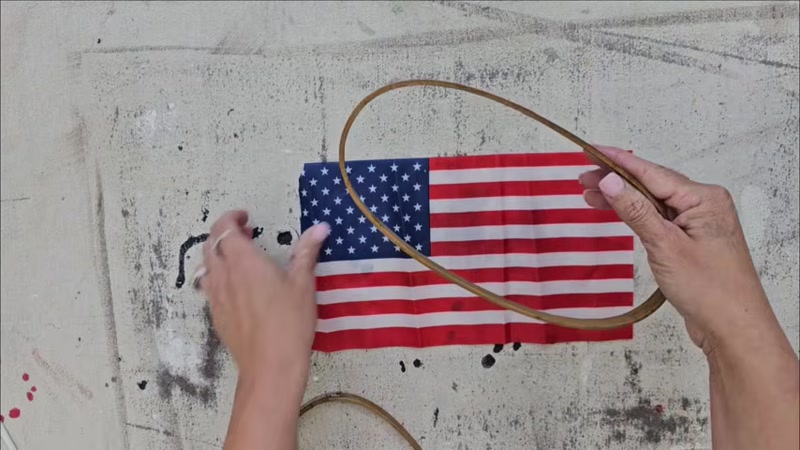
Start with a simple but effective project. The Dollar Tree flags are larger than expected, making them perfect for framing.
- Sandwich the flag: Take your oval wooden embroidery hoop and separate the two rings. Place the flag between the inner and outer hoops.
- Straighten and trim: Ensure the flag's lines are straight inside the hoop. Tighten the hoop’s screw to secure it, then trim off the excess flag fabric from the back.
- Add a hanger: Tie a piece of ribbon to the metal hanger on the embroidery hoop. Your art piece is ready to hang.
2. Antique a Dollar Tree Door Banner

This technique tones down the bright, plasticky look of the banner, giving it a vintage feel.
- Prepare the paint mixture: In a small container, mix a small amount of Fusion Mineral Paint in "Chocolate" with water. The consistency should be like a thin wash.
- Apply the mixture: Using a brush or a cloth, apply the brown paint wash to the entire banner. Because the banner is plastic, the paint will sit on the surface, creating a subtle, antique effect.
- Let it dry: The process takes only a couple of minutes. The paint will dry to a matte, aged finish.
3. Craft a Vintage-Style Hanging Banner

This project uses the antiqued door banner and adds a rustic wooden rod.
- Prepare the wooden rods: Cut two round wooden pieces to the desired length. Apply the same brown paint mixture to them to give them a deeper, richer look. Let them dry.
- Attach the rod: Remove the original stick from the top of the Dollar Tree banner. Using hot glue, attach one of your wooden rods to the top edge of the banner on the front side.
- Add the hanging rope: Cut a piece of rope or twine to your desired length. Hot glue each end of the rope to the back of the wooden rod, near the edges.
- Add decorative florals: Take the Dollar Tree floral picks and dip them into the brown paint mixture. Let them dry. This will tone down the bright red and blue. Note: The white florals may turn a grayish color, so it's best to leave them as is. Hot glue the antiqued florals into your wreath or banner arrangement.
4. Build a Vintage Game-Themed Clipboard Decor

This is a fantastic way to upcycle a clipboard into a unique piece of wall art.
- Paint the clipboard: Apply one coat of Dixie Belle chalk paint in "Rustic Red" to the entire clipboard, including the metal clip. Let it dry.
- Add the bingo card: From your stack of vintage Bingo cards, find one with the number "4" on it. Use a small brush and a bit of the red paint to circle the number.
- Stamp the date: Using your IOD type setting stamps and black ink, stamp "1776" on a small piece of paper.
- Assemble the elements: Glue the bingo card and the "1776" stamp to the front of the clipboard. Find a red number "4" from the giant playing cards and glue it onto the board as well.
- Add a paper flag: Cut a blue star section from the Dollar Tree flag banner. This is paper, so it can be decoupaged or simply glued onto the clipboard for a final touch.
5. Create a Pocket Pillow from a Chair Cover

This clever project turns a simple chair cover into a decorative pillow.
- Antique the cover: Apply the same brown paint-and-water mixture to both the front and back of the chair cover to tone down the bright colors. Let it dry.
- Stamp the fabric: On a piece of your tea-dyed drop cloth, use your stamps and black ink to spell out "July 4th 1776". Let the ink dry.
- Create a pocket: Cut out the stamped fabric piece. Using hot glue, attach it to the side of the chair cover, creating a small pocket. Be careful not to glue the front and back of the cover together at the top.
- Insert the pillow form: Slide the lumbar pillow insert into the chair cover.
- Seal the bottom: Use hot glue along the bottom edge of the cover to close it up. You can add a few small florals to the pocket for a final touch.
6. Make a Distressed Wooden Flag Art Piece

This project uses a mystery wooden piece (or any similar shape) to create a unique, rustic sign.
- Paint the wood: Apply two coats of Dixie Belle chalk paint in "Fluff" (or a bright white) to your wooden piece. Let it dry completely.
- Distress the edges: Use sandpaper to sand all the edges and corners of the wood, revealing the original wood color underneath.
- Prepare the flag: Cut the pole off one of the Dollar Tree mini flags. Use spray adhesive to glue the flag onto a piece of poster board. Once dry, cut the poster board to the same shape as the flag to create a stiff backing.
- Attach the flag: Turn the flag over and hot glue two pieces of twine to the top corners of the poster board.
- Hang the flag: Tie the two ends of the twine to the spindles or top edges of your painted wooden piece. Your unique artwork is now complete.
Tips for Success
- Test your paint wash: Before applying the brown paint mixture to your entire project, test it on a small, inconspicuous area to ensure you like the color and effect.
- Don't over-water the paint: The mixture should be a thin wash, not watery. Too much water will cause it to run and not create an even antique effect.
- Use a stiff backer for fabric: When using fabric flags or banners, a poster board or cardboard backer helps them stay straight and not sag when hung.
- Hot glue caution: When gluing fabric pockets, be sparing with the hot glue to prevent it from seeping through and fusing the front and back layers together.
- Shop your stash first: Before buying new materials, look around your home for old books, wooden pieces, or thrifted items that can be repurposed for a cohesive look.


