What You'll Need
Here is a detailed DIY tutorial based on the transcript you provided.
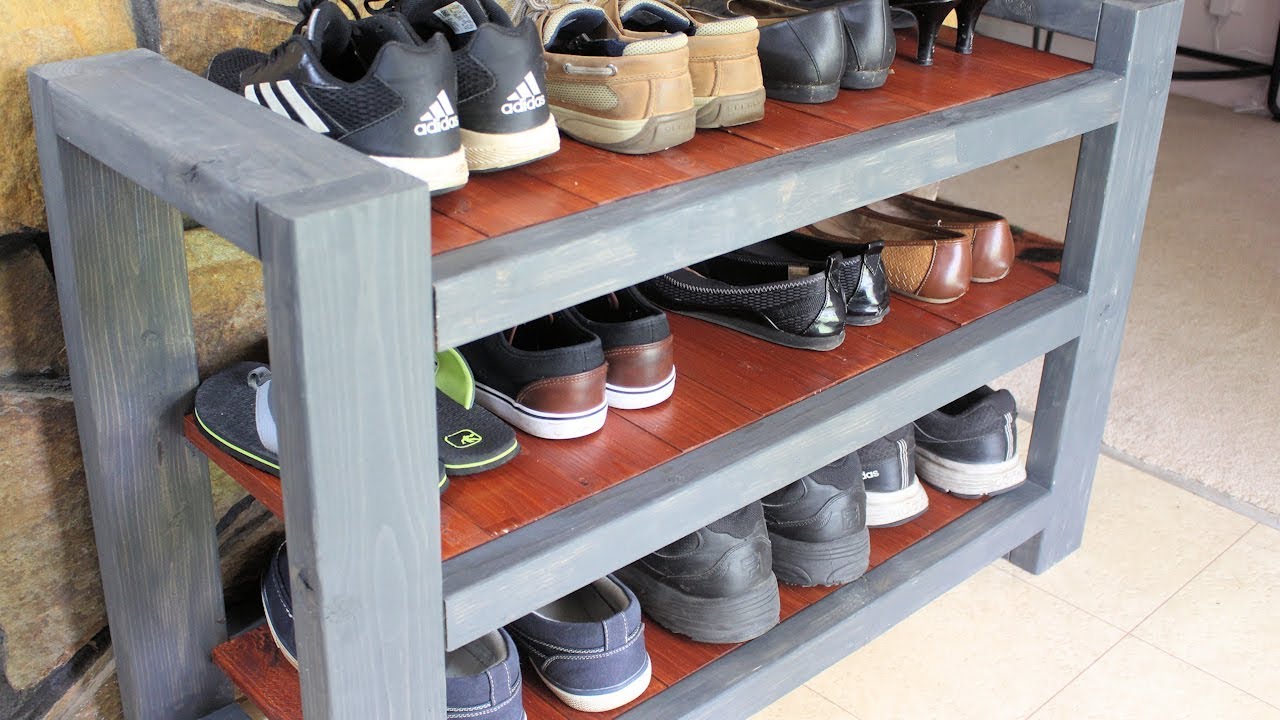
# How to Build a Heavy-Duty Custom Shoe Rack
This tutorial will guide you through building a heavy-duty shoe rack that is both sturdy and stylish. Designed to handle the wear and tear of a busy household, this project uses simple joinery and affordable materials to create a piece of furniture that keeps your shoes organized and off the floor.
Materials:
- 2x4 lumber (for the main frame and legs)
- 1x4 lumber (for the shelf slats)
- Wood glue
- 1 ¼-inch pocket hole screws
- Carbon gray stain (for the frame)
- Traditional cherry stain (for the shelves)
- Wood finish or sealant (optional, for extra protection)
Tools:
- Miter saw or circular saw
- Drill/driver
- ¼-inch socket and ratchet (for tight spaces)
- Pocket hole jig (e.g., Kreg Jig)
- Clamps
- Measuring tape
- Pencil
- Sandpaper or a sander (downdraft table recommended)
- Drop cloths or old sheets (for staining)
Step-by-Step Guide
Step 1: Cut and Prepare the Frame Pieces

Start by cutting your 2x4s to length. You will need two long pieces for the top and bottom rails and several shorter pieces for the vertical legs. The exact dimensions will depend on your desired size, but aim for a depth that fits your largest shoes.
To create the cross supports for the shelves, rip a few 2x4s in half lengthwise using a table saw. This will give you six thinner pieces that are perfect for supporting the shelf slats. Sand all of your cut pieces smooth to remove any rough edges and splinters.
Step 2: Assemble the Side Frames
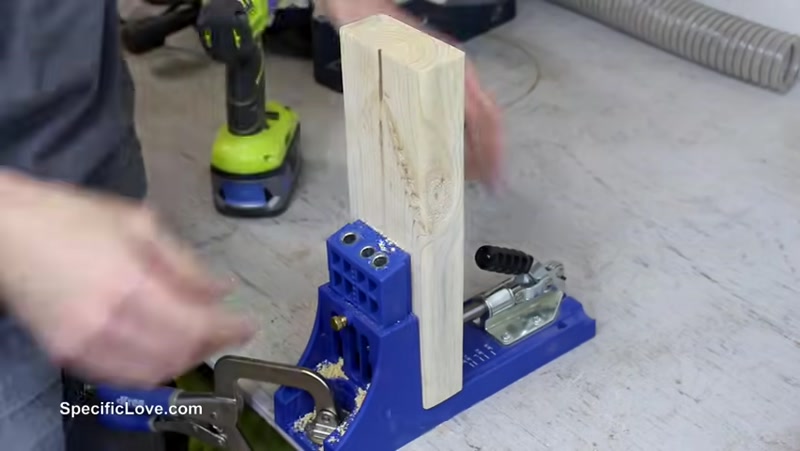
To make the project easy to repair in the future, use a pocket hole jig to drill pocket holes into the ends of your vertical leg pieces. This joinery is strong and simple.
Attach the legs to the top and bottom rails.
- For the bottom screws, a standard drill works fine.
- For the top screws, the space might be too narrow for a drill. Use a ¼-inch socket and ratchet to hand-tighten these screws into place.
Repeat this process to create a second identical side frame.
Step 3: Attach the Cross Supports
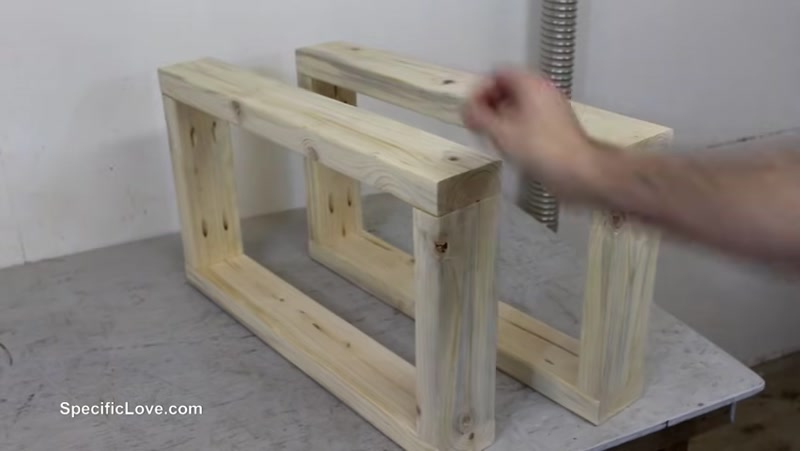
Lay one of the side frames flat on your work surface. Carefully measure and mark the best locations for your shelf supports, keeping practicality and aesthetics in mind. Clamp the first three support pieces in place and secure them with screws.
Next, attach the other side frame. Flipping the project onto its side allows you to easily reach the joints to attach the remaining three supports.
Step 4: Adjust the Width (If Necessary)

Once the frame is assembled, place it in its intended location to check the fit. In this example, the rack was too wide for the hallway. To fix this, measure how much you need to remove (e.g., 18 inches).
Disassemble the frame by unscrewing the pocket screws. Use a miter saw to trim each support piece and the main rails down to the new width. Drill new pocket holes in the shortened pieces and reassemble the frame, making sure to put all parts back in their correct locations.
Step 5: Cut and Install the Shelf Slats
Measure the depth of your shelves. Cut your 1x4 boards to this length. Using a stop block on your miter saw makes this repetitive task quick and accurate.
Secure each 1x4 slat to the cross supports using pocket screws. This creates a solid, durable platform for your shoes.
Step 6: Apply the Stain

Stain the frame and the shelf slats separately for a clean, professional look.
- Apply the carbon gray stain to the 2x4 frame.
- Apply the traditional cherry stain to the 1x4 shelf slats. This color works well with red clay dirt common in some areas.
Allow all pieces to dry completely according to the stain manufacturer's instructions.
Step 7: Final Assembly and Placement

After the stain has dried, flip the frame over. Mark the center of each shelf rail. Install the center shelf slat first. This ensures the remaining slats are evenly spaced and the total width is perfectly centered.
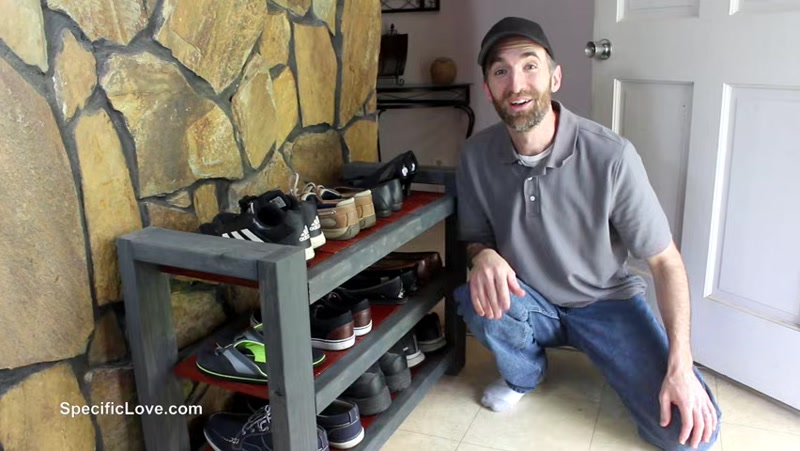
Secure the rest of the slats on each side of the center board. Repeat this process for all shelf levels. Once fully assembled, carry the rack into its final position. Load it up with shoes and enjoy your organized entryway.
Tips for Success
- Plan for the Space: Before cutting any wood, measure the exact spot where the rack will live. Consider traffic flow to ensure you won't be bumping into it.
- Use a Stop Block: When cutting multiple shelf slats to the same length, use a stop block on your miter saw. This guarantees every piece is identical and speeds up the process.
- Stain Separately: Staining the frame and shelves before final assembly makes the job much easier. You don't have to worry about getting stain on the adjacent parts.
- Center First: When installing the shelf slats, start with the center piece and work your way out. This prevents the final slat from being off-center or requiring a gap that is too wide.
- Test the Fit: Always test the frame in its final location before finishing. It is much easier to trim and adjust an unfinished frame than a finished one.
