What You'll Need
Here is a DIY tutorial based on the provided transcript, written in the requested style and format.
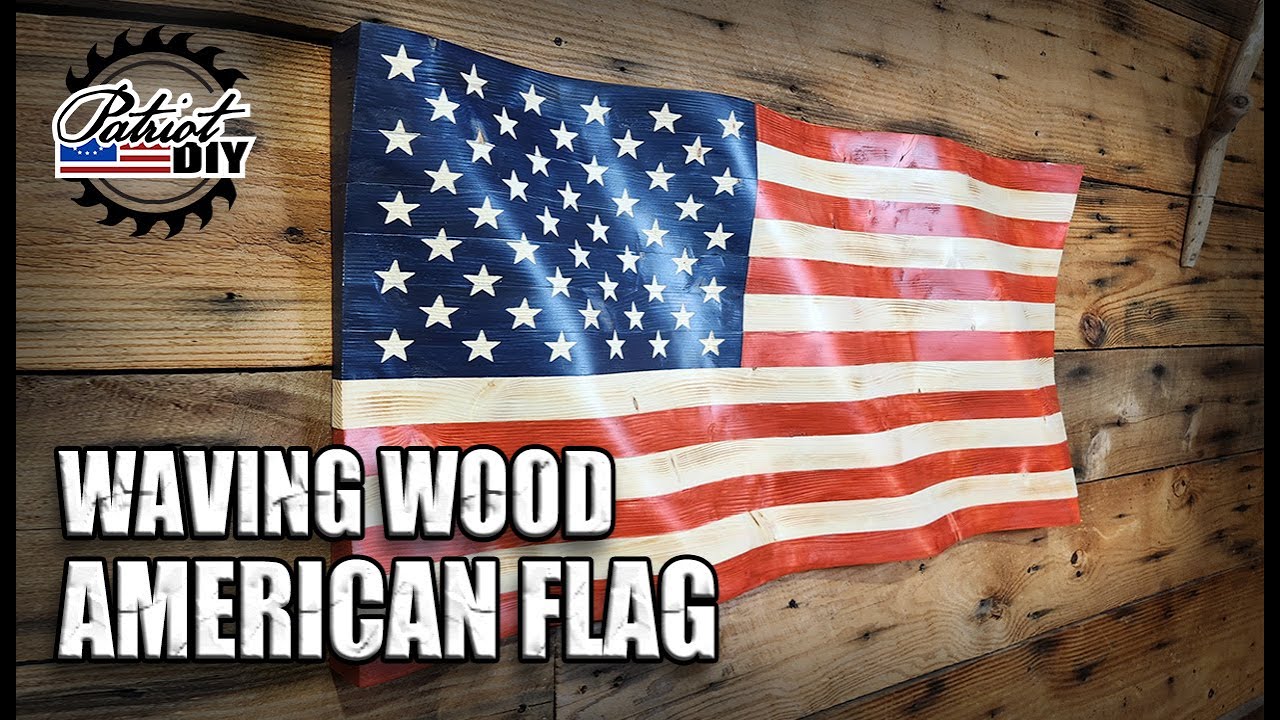
How to Build a Waving Wooden American Flag
This project creates a stunning three-dimensional wooden American flag that looks like it's waving in the wind. It’s a step up from a standard flat flag and makes a fantastic statement piece for your home or workshop. We'll walk you through the entire process, from cutting the lumber to carving the stars.
Materials:
- 7 pieces of 2x4 lumber, each 36 inches long
- Wood glue (water-resistant)
- Minwax water-based stain: Crimson Red
- Minwax water-based stain: Navy Blue
- Minwax Polycrylic protective finish: Clear Satin
- Sandpaper (80, 120, and 220 grit)
- D-ring hangers for mounting
Tools:
- Planer
- Jointer
- Table saw
- Bandsaw
- Angle grinder with carving disc and sanding flap disc
- Orbital sander
- Belt sander (for the back)
- Heat torch
- Dremel 8250 with engraving bit and flex shaft adapter
- Small sanding bit for Dremel
- Stencil for stars (link in description)
- Razor blades
- Clamps
- Painter's tape
Step-by-Step Guide
Step 1: Prepare the Lumber

Start by cutting your 2x4s to a length of 36 inches. You'll need seven of these. Run each piece through a planer to ensure they are flat and even. Then, use the jointer and table saw to remove the rounded edges, giving you a final width of exactly 3 inches per board.
Step 2: Create the Wave Pattern
You need to create a "wave" shape on your boards. Use a template or draw a gentle, flowing curve freehand on your first board. Crucially, move your template over by exactly 1 inch on each subsequent board. This offset is what creates the angled, waving effect when the boards are assembled. Label each board (1-7) to keep them in order.
Step 3: Cut and Shape the Wave
Use a bandsaw to cut along the curved line you drew on each board. Once cut, clamp all seven boards together, making sure the ends are perfectly aligned. Now, use an angle grinder with a carving disc to knock down the high ridges and create a smooth, flowing shape across the entire assembly. Follow this with a sanding flap disc (starting with 80 grit, then 120 grit) to smooth the surface.
Step 4: Sand and Burn the Surface
Use an orbital sander and hand sanding to achieve a perfectly smooth surface. Next, use a heat torch to lightly burn the entire front face of the flag. Don't be afraid to go a bit dark; you can always sand it back to lighten it. This step gives the wood a beautiful, aged character.
Step 5: Mark and Disassemble for Staining
Use your star stencil to mark the location of the blue union (the canton) on the top-left corner of the flag. Now, carefully disassemble the boards. Use razor blades to separate the blue section from the red and white stripes on the boards that contain the union.
Step 6: Stain the Stripes and Union
Apply the red stain to the stripes that need it, and the navy blue stain to the union area. Use a razor blade as a guide to prevent the stain from bleeding into the white areas. Let the stain sit for a few minutes, then wipe off the excess. Let the pieces dry overnight.
Step 7: Reassemble and Glue
Reassemble the boards in their correct order. Apply a thin bead of wood glue to the bottom half of each board's edge (to minimize squeeze-out on the top). Clamp the entire assembly together, ensuring the ends are flush. Wipe away any excess glue immediately with a damp cloth.
Step 8: Carve the Stars

Once the glue is dry, place your star stencil back on the blue union and trace all 50 stars with a pencil. Using a Dremel with an engraving bit (a flex shaft adapter is highly recommended for comfort and precision), carefully carve out each star. Go slowly and follow your pencil lines. Use a small sanding bit to smooth the inside of each carved star.
Step 9: Finish the Back

Flip the flag over. Scrape off any dried glue and sand the back smooth with a belt sander. This is a good time to add any branding or a signature using a wood-burning tool or a wood scorch pen.
Step 10: Apply Topcoat and Hardware
Apply a clear satin polycrylic finish to the entire flag to protect the wood and stain. Let it dry completely. Finally, attach D-ring hangers to the back so you can hang your flag on the wall.
Tips for Success
- Keep Boards in Order: When you label your boards (1-7) after cutting the wave, keep them in that order. Mixing them up will ruin the wave effect.
- Control the Burn: When torching the wood, you can always sand it down if it gets too dark. It's better to go a little too dark and lighten it than to not burn it enough.
- Prevent Stain Bleed: Using razor blades as a shield between the blue and white/red sections is the most effective way to get clean, sharp lines when staining.
- Flex Shaft is Key: For carving the 50 stars, a Dremel flex shaft adapter will save your hands and give you much better control for a cleaner result.
- Work in a Well-Ventilated Area: Staining, torching, and applying a topcoat all produce fumes. Always work in a well-ventilated space or wear a respirator.


