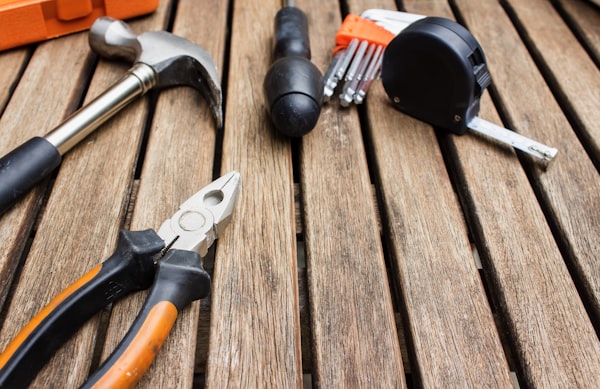
There is a particular kind of dad who has a corner of the garage, shed, or spare room that is entirely his own — workbenches, tool racks, sawdust on the floor, and something half-built on a Saturday afternoon. If that sounds familiar, then the best Father's Day gift for him is not something bought from a shelf. It is something made with the same hands-on spirit he has always modelled. Workshop dads appreciate effort, materials, and craft. They notice the joinery. They will ask how you cut that angle. And they will use a well-made gift for years.
This collection focuses on handmade projects specifically suited to the dad who lives for building, fixing, and making — projects that either serve his workshop directly or carry the spirit of woodworking into other parts of his daily life.
Why Handmade Beats Store-Bought for This Kind of Dad
A workshop dad already owns most of the tools he wants. He has strong opinions about which brands he trusts and which he doesn't. Buying him a random power tool is risky at best, wasted money at worst. But something handmade — especially something that demonstrates knowledge of how he works — lands completely differently. It shows that you paid attention. It shows that you understand his world well enough to build something that fits inside it.
The projects below range from simple afternoon builds to weekend efforts. None require advanced skills. All of them result in something genuinely useful or genuinely sentimental — ideally both.
Project 1 · Personalised Hardwood Cutting Board
Few handmade gifts hit the intersection of practical and sentimental as cleanly as a well-made cutting board. For the dad who cooks, grills, or runs a household kitchen with any seriousness, a hardwood board is a daily-use item. Personalised, it becomes something he holds onto for decades.
Materials
- →A piece of hard maple, walnut, or cherry — hardwoods are the right choice here because they are dense enough to resist deep knife scarring, and they engrave or burn beautifully
- →Food-safe mineral oil or beeswax finishing wax
- →120-grit and 220-grit sandpaper
- →A wood burning pen (pyrography tool) or a rotary tool with an engraving bit
The Process
Start by sanding the board surface smooth with 120-grit, then refine with 220-grit until the surface is uniformly flat and silky. Run your hand across the grain in every direction — any roughness will trap food and bacteria later, so this step matters.
For the personalisation, a wood burning pen is the most accessible option for beginners and produces a warm, rustic result that suits the material well. Practise the lettering or design on a scrap piece of timber first. Natural, slightly imperfect handburned lettering actually looks more personal and considered than mechanically perfect fonts — do not worry about absolute precision.
Design options that work particularly well:
- →His name or initials in a clean, simple font
- →A family surname with the year the family was established
- →A short phrase — something like "From the kitchen of [Name]" or a favourite BBQ motto
- →Coordinates of a meaningful location (the family home, a favourite fishing spot, a camping ground the family returns to every year)
Once the burning or engraving is complete, wipe away any dust and apply two to three generous coats of food-safe mineral oil, allowing full absorption between coats. The wood will darken, the grain will become more vivid, and the finished board will look like something from a specialty kitchen store — except with his name on it.
Project 2 · Wall-Mounted Workshop Tool Organiser
Every workshop, however well-organised its owner believes it to be, has at least one problem area: a drawer where small tools congregate without logic, a bench cluttered with things that have no designated home, or a wall that could be doing more work. A handmade wall-mounted tool organiser solves all three.
Materials
- →A piece of pine, plywood, or MDF — 40 × 60 cm is a good starting size but adjust to the wall space available
- →A length of timber dowel (18–25 mm diameter works well for most hand tools)
- →Woodscrews and wall anchors appropriate for the wall type
- →Sandpaper (120-grit)
- →Paint or stain of choice — or leave as raw timber for a natural finish
- →Optional: a router or chisel to cut simple grooves for holding rulers, squares, and flat tools
The Process
Cut the main back panel to the desired size and sand all edges smooth. The dowels are the key element — they function as horizontal pegs from which tools, jars, and loops of wire can hang. Cut dowels to a length of 8–12 cm each, depending on how far from the wall the tools need to sit. Drill holes into the back panel slightly smaller than the dowel diameter, apply a small amount of wood glue to each dowel, and press them firmly into the holes. Allow to dry completely before mounting.
Personalisation options:
- →Burn or stencil "Dad's Workshop" or his name across the top section of the panel
- →Paint the panel in his favourite colour or a workshop-appropriate charcoal or dark green
- →Add a small shelf to the base of the panel for holding a can of WD-40, a jar of screws, or a notepad
Mount the finished organiser to the wall at a height that suits the tools it will hold, and consider adding a few of his most-used small tools as the "starter" arrangement — it shows you thought about how he actually works, not just what the generic version of a workshop looks like.
Project 3 · Scrap Wood Phone and Tablet Stand
This is a fast project — genuinely achievable in under an hour — but the results are far more impressive than the time investment suggests. A custom phone or tablet stand for the workshop bench or kitchen counter serves a real function (hands-free viewing of project plans, recipes, or video calls) while carrying the warmth and character of handmade timber.
Materials
- →A single scrap of hardwood or pine, approximately 15 × 10 × 4 cm — or two thinner pieces laminated together
- →A circular saw, jigsaw, or even a handsaw
- →Sandpaper
- →A small length of felt or cork sheet (for the base — prevents sliding)
- →Stain, oil, or clear lacquer
The Process
The basic form is a block with two angled cuts: one that creates the rear-leaning face of the stand, and one that creates a shallow groove or ledge at the base where the device rests. The exact angles depend on preference — a rear angle of around 60–70 degrees from horizontal produces a comfortable viewing angle.
Cut the base groove to approximately 5 mm deep and 5 mm wide, which is enough to hold either a phone or a slim tablet case. Sand all faces smooth, paying particular attention to any cut edges. Apply stain or oil and allow to cure.
Personalisation:
- →Burn initials into the back face of the stand
- →Stain the timber to match the existing furniture in the room where it will be used
- →Use a contrasting wood species for the groove insert — even a thin strip of walnut inserted into a pine body creates a premium visual effect from a few scraps
Project 4 · Handmade Beer Caddy with Bottle Opener
This project sits squarely in the intersection of workshop skill and weekend personality. A timber beer caddy — a carrying box sized to hold six bottles with a central divider and a handle — is a gift that gets used at BBQs, camping trips, backyard gatherings, and every occasion in between.
Materials
- →Pine hobby board or plywood — roughly 6 mm to 12 mm thick depending on preference for weight
- →A length of dowel for the handle (25 mm diameter works well for comfortable grip)
- →Wood glue and small screws or nails
- →A metal bottle opener (surface-mount type, widely available in hardware stores)
- →Sandpaper and finishing oil or paint
The Process
Cut two long side panels, two shorter end panels, a base, and a central divider that runs the length of the box. Assemble with glue and fasteners, ensuring all corners are square. Drill holes in the two end panels to accept the dowel handle, apply glue, and press the handle through. Allow to dry overnight.
Mount the bottle opener to one of the end panels using the included screws — this small detail transforms the caddy from a carrying box into a complete beverage station.
Personalisation:
- →Engrave or burn a name, initials, or a phrase on the long side panel
- →Stain in a dark walnut tone for a premium look, or paint in a bold colour for a more playful result
- →Add a leather luggage tag style label tied to the handle with the year or a short message
Project 5 · Engraved Tool Handle
This is perhaps the most personal project on this list, because it does not require making something new — it requires transforming something he already uses every day. A cherished hammer, a favourite chisel, or a well-worn wooden-handled screwdriver can be given new life and new meaning with a carefully burned or carved inscription.
Materials
- →His existing tool (with permission — or a new equivalent if the gift is a surprise)
- →A wood burning pen
- →Fine-grit sandpaper (320-grit) for surface preparation
- →Linseed oil or teak oil for finishing
The Process
Lightly sand the handle to open the grain slightly, which helps the wood burning tool produce cleaner, more consistent marks. Burn in initials, a short date, a brief message, or even a small design — a family motif, a tree, a compass rose, or simply his name in a font that suits him.
After burning, apply a coat of oil to restore the handle's finish. The oil also creates a slight contrast that makes burned marks more visible.
This gift works because it takes something he already loves and makes it definitively, permanently his.
Project 6 · Wooden Couch Arm Caddy
For the workshop dad who also enjoys watching the game, a custom couch arm caddy — a wooden tray that drapes over the arm of a sofa and holds a drink, a remote, and a phone — is a weekend project that earns permanent residence in the living room.
Materials
- →Pine or plywood, 12 mm thick
- →A hole saw bit (for the cup holder)
- →Sandpaper and finishing oil
- →Optional: felt lining for the base to prevent scratching the sofa arm
The Process
The design is a flat tray with a raised lip on three sides and an opening that slides over the sofa arm. The top face features a drilled circle (sized for a standard cup or can) and a flat area for the remote or phone. The underside has a channel cut to the width of the sofa arm so it sits securely without sliding.
Personalise with engraved initials or a simple phrase on the tray surface. Finish with oil for a natural feel or with paint if the living room's aesthetic calls for something specific.
A Note on Finishing
The difference between a good DIY gift and a great one often comes down to finishing. No matter which project is chosen, these three finishing principles apply across all of them:
- →Sand progressively. Start with 120-grit for shaping and removing tool marks, move to 180-grit for refinement, and finish with 220-grit for a smooth, tactile surface. Skipping grits leaves visible scratches in the final finish.
- →Wipe before finishing. A clean, dry cloth wiped firmly across the surface after final sanding removes dust that would otherwise get sealed into the finish and create a gritty texture.
- →Apply multiple thin coats rather than one thick one. Whether the finish is oil, wax, stain, or paint, thin coats build up evenly and dry without runs. A single thick coat traps bubbles, drips, and uneven colour.
Conclusion
A workshop dad does not need more stuff. He needs things that mean something — objects that reflect the time, care, and knowledge that went into making them. Every project above can be completed with basic tools, a few hours of focused effort, and materials that cost far less than a comparable store-bought item. What cannot be bought is the decision to make something rather than purchase it, and that decision is what turns a Father's Day gift into something he keeps for the rest of his life.