What You'll Need
I've been obsessed with fermentation for about a decade now. Put out countless videos, racked up over 50 million views. But the last six months? I took it to another level. I'm writing a fermentation book, and every bubbling jar in my kitchen taught me something new. So here's my master class on fermenting vegetables.
Let's start simple. Two ingredients: vegetables and salt. Water too if you count it. No kimchi, no kombucha, no koji. Just basic veggie ferments that every home cook should know how to make.
Every vegetable part works — stalks, pods, stems, leaves, flowers, fruits. And everything you see here came from my garden. That's the whole point of fermentation: taking summer's abundance and preserving it for winter.
Jars — Glass jars work best because you can watch your ferments develop. I prefer wide-mouth Ball jars. A 32-ounce jar is the most versatile, but I also use 16-ounce and 8-ounce jars for smaller batches. Le Parfait jars are great too — they seal tight but release gas so you don't get explosions.
Weights — Glass weights keep your veggies submerged under the brine. Get a bunch in different sizes.
Lids — You've got options:
- Standard mason jar lids (tight seal, need burping)
- One-way airlock lids (let CO2 out, keep oxygen out)
- Spring-loaded lids (keep veggies submerged without weights)
- Classic water-seal lids (same effect as airlocks)
Scale — Any accurate kitchen scale works. This is non-negotiable.
The Salt Equation
Here's the most important thing to understand: salt percentage. I tested this endlessly for the book, and here's what I found.
2% to 5% salt of the total weight (vegetables + water) gives you a great ferment. Anywhere in that range works. But how do you choose?
Four factors to consider:
- Timing — Higher salt = longer fermentation. Planning to let something go for months? Go higher. Quick ferment? Go lower.
- Texture — Salt breaks down cell walls. Soft vegetables like radishes need lower salt to stay crispy. Dense vegetables like carrots and beets can handle higher salt.
- Flavor — Lactobacillus bacteria prefer lower salt levels, which builds more fermented flavor. Higher salt makes things taste saltier, but the sourness balances it out.
- Safety — Higher salt = less risk of spoilage. Beginners should start higher and work their way down.
Step 1: Prep Your Vegetables
For this first ferment, I'm combining carrots and beets. They have similar texture and the flavors work together.
Since these are young garden vegetables with delicate skin, I just trim off blemishes. If you're using store-bought veggies, peel them — you don't know what they've been treated with.
Chop everything into bite-sized pieces.
Step 2: Calculate Your Salt
Put your clean jar on the scale. Tare it to zero. Load in all the vegetables, then cover with water. That total weight is what you'll use for your calculation.
For a short ferment with dense vegetables, I'm going with 3.5%. Multiply your total weight by 0.035. Weigh that amount of salt separately.
Step 3: Mix and Submerge
Dump the salt into the jar. Put the lid on and shake it. The salt will dissolve over time.
Add your glass weight to keep everything submerged. This is crucial — any vegetable floating above the brine is exposed to oxygen, and that's where mold grows. If you see mold, throw it out and start over.
Step 4: Lid and Store
I love one-way airlock lids. As CO2 builds up, it pushes out the remaining oxygen. That empty space in the jar becomes oxygen-free, which is much safer.
Store your jars away from sunlight. Room temperature (60°F to 75°F) works perfectly. Cooler temperatures slow fermentation and give different flavors. Higher temperatures speed things up but can get away from you.
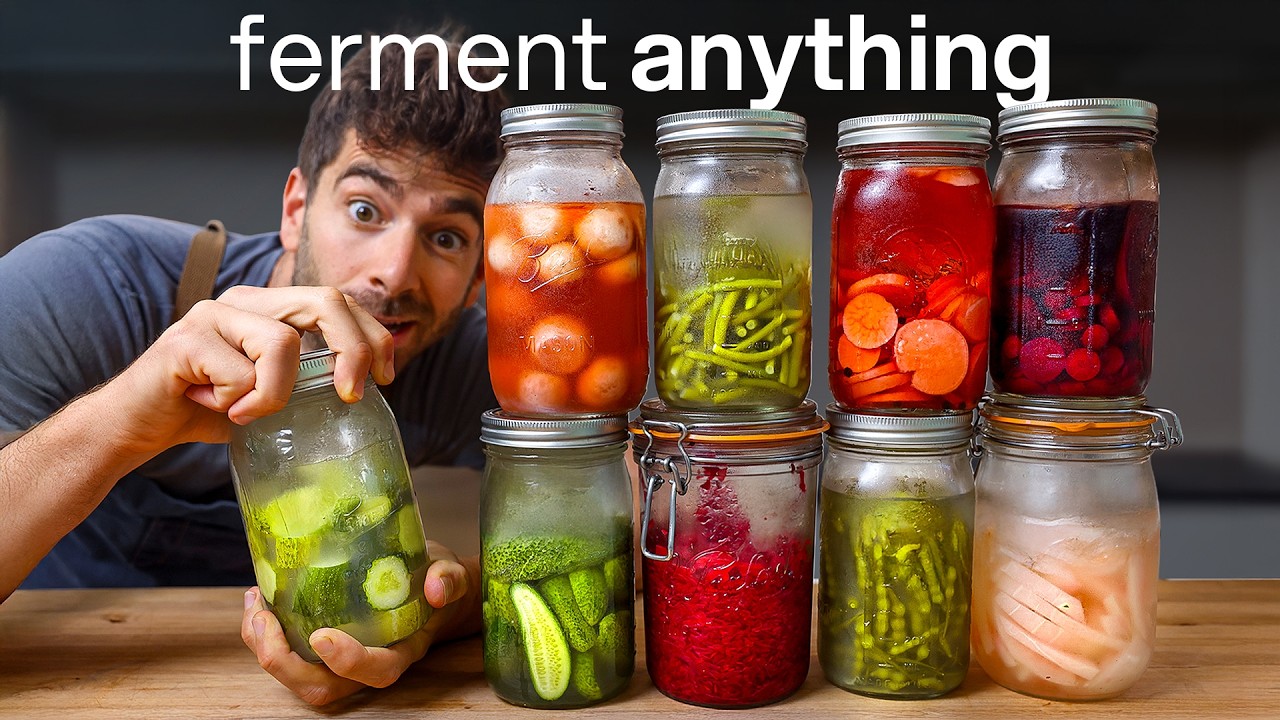
The Other Ferments I Made
Garlic scapes — Cut into pieces, 4% salt ratio. These are tender, garlicky, sweet stalks from the top of garlic plants.
Hakurei turnips — Fermented whole at 4%. Super juicy and sweet with almost no bite.
Radish pods — When radishes bolt in heat, they produce flowers and then pods. I cleaned them and used 4% salt. Great example of fermenting more than just the vegetable you're used to.
Sauerkraut — Cabbage chopped fine. Since I'm relying on the cabbage's water content, I used 2.5% salt. Massage the salt in to break down cell walls. If there's not enough liquid after an hour, add clean water with a pinch of salt to even out the ratio.
Timing and Taste
The first few days won't taste great. The lactic acid hasn't developed yet. After about 5 days at room temperature, things start getting better. They'll continue improving over time.
Taste Test Results
Hakurei turnips at 4% — 1 month old: slightly salty upfront, then sour. Juicy texture. 7-8/10. 3 months old: salt mellowed way down. Much better. 8.5-9/10.
Beets and carrots at 3.5% — Younger batch: still tasted raw. Older batch (from May): tasted like roasted beets. Sweet, amazing texture. 10/10.
Garlic scapes at 3% — Perfect salt level. Great blended into salsas and relishes. 8.5-10/10.
Radish pods at 4% — Smell like radish farts (that's normal). Fun texture, pop when you bite them. Better at 1 month than 2 weeks. 8/10.
Red cabbage sauerkraut with caraway at 4% — 2 months old. Fermentation intensifies spices. Tastes like rye bread. Perfect on pastrami. 9/10.
Curitido (cabbage, carrot, jalapeño) — Greatest condiment. Works as salsa, sauerkraut, slaw. Spicy, sweet from carrots. 10/10.