What You'll Need
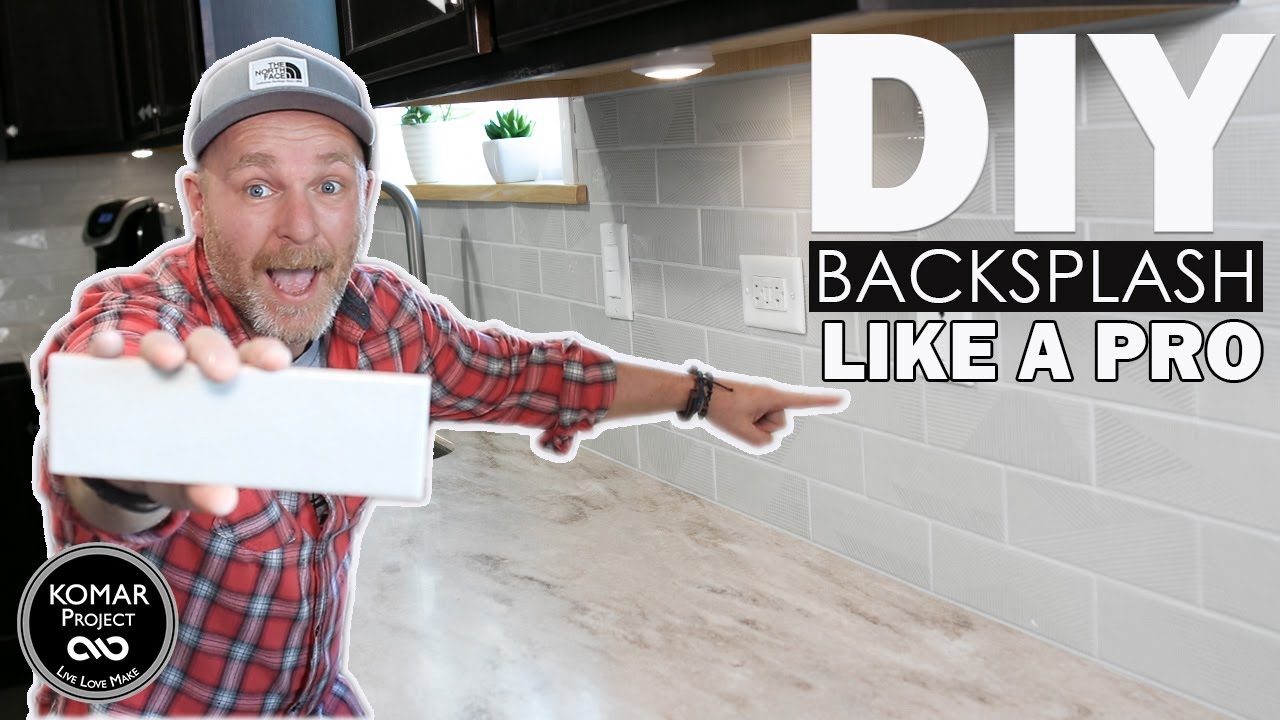
I'm going to show you exactly how we transformed this builder-grade kitchen with a subway tile backsplash. Total cost was around $500 for materials, and it took us a weekend. If you've never tiled before, this is the project to learn on — subway tile is basically impossible to screw up.
Let's get into it.
Tools:
- Wet tile saw (or angle grinder with diamond blade, or even a score-and-snap cutter)
- V-notch trowel (3/8 inch)
- Rubber grout float
- Tile sponge
- Pry bar and hammer
- Razor blade scraper
- Level
- Sharpie
- Square
- Tile spacers (1/8 inch)
- Clamps
Materials:
- Subway tile (we used 2.5 x 8 inch textured tiles)
- Pre-mixed mortar (or powder if you prefer mixing)
- Unsanded grout (we used Silver Bullet — a light grey)
- Grout caulk
- 1-1/4 inch #6 screws for outlets
- Cardboard or plastic for counter protection
- Scrap wood for a ledger
Step 1: Remove the Old Backsplash
Find your stud locations first. Use the pry bar at those stud points to pull the old backsplash away from the wall. It'll come off in pieces — that's fine.
Next, scrape off all the old caulking with a razor blade scraper. The disposable blades are cheap, so swap them out when they get dull.
Pro tip: Cover your countertops with cardboard or plastic before you start. This process gets messy, and you don't want to scratch up your counters.
Step 2: Prep the Electrical
Turn off the power at the breaker. Not the switch — the breaker. Pull every single outlet out from the wall so they're clear of where the tile will go. If the outlet touches the box while the power's on, you'll get a short. So yeah, shut it off.
If you're not comfortable working with outlets, call an electrician.
Step 3: Figure Out Your Layout
Start at the outside corner where your cabinets end. You want a full tile there, not a cut piece. Work your way toward the corner.
Figure out how many rows you're going up. The last thing you want is a tiny sliver of tile at the top or bottom. Adjust with your spacers so everything lands evenly.
Step 4: Cut Your Tiles
Straight cuts: Measure your tile, mark it with a sharpie (pencil won't show up), and line the mark up with the blade. For repetitive cuts, clamp a scrap piece of wood to the saw table as a stop block.
L-shaped cuts (for outlets): Make your straight cut, but stop before you hit the perpendicular line. Rotate the tile and cut the shorter end. The blade won't cut all the way to the corner because it's circular, so lift the tile slightly while the blade is spinning to finish the cut. Clean it up with the grinder.
U-shaped cuts: Make end cuts on both sides of the U, then cut between them every 1/8 inch. Tilt the tile up and break out the rest. If this makes you nervous, flip the tile over and cut from the back — just don't go past your mark.
No tile saw? No problem. Clamp your tile to the edge of your work surface with the waste hanging off. Cut it with an angle grinder. The grinder can even do curved cuts, which is useful for showers around drains.
Step 5: Install the Tile
Spread mortar on the wall using your notched trowel. Hold it at 90 degrees to the wall and scrape — you should hear it scratching the wall. If you're just floating it at an angle, you're putting too much on.
Here's the trick: the notches on the trowel control how much mortar you spread. As long as you're scraping all the way down to the wall surface, you're getting the right amount every time.
Place spacers on the countertop and start your first row with a full tile. Second row starts with a half tile. Alternate from there. Put two spacers on each tile and one between them.
For cut edges: Factory edge goes on the outside where it shows. Cut edge goes to the inside.
For small areas (like beside a cabinet): Don't put mortar on the wall. Back-butter the tile piece and stick it directly on.
Around outlets: Hover the tile where it'll go, mark it, then cut it to where the drywall ends and the box begins. This makes reinstalling the outlet way easier.
For the gap where the stove goes: Screw a ledger board to the wall across the empty space. Use a level. Then tile over it just like you would over the counter. Remove the ledger after the mortar sets.
Step 6: Grout
Wait about 4 hours after installing before grouting. Pull your spacers out — if the mortar's dry enough, they'll come out clean.
Which grout to use: Spacers 1/8 inch or smaller = unsanded grout. Bigger = sanded grout.
Mix your grout to a consistency between ketchup and peanut butter. Push it into the lines with your rubber float. Let it sit for 30 minutes, then start wiping with a damp sponge.
You won't get it all on the first pass. The tile will have a hazy film — that's normal. We did four wipe-downs total before the haze was gone.
Step 7: Finish Up
Caulk the top and bottom of the tile with grout caulk.
Reinstall the outlets with longer screws (1-1/4 inch #6). Put the cover plates back on.
Install your window sill if you made a new one.
That's it. Weekend project, $500, and your kitchen looks completely different.