What You'll Need
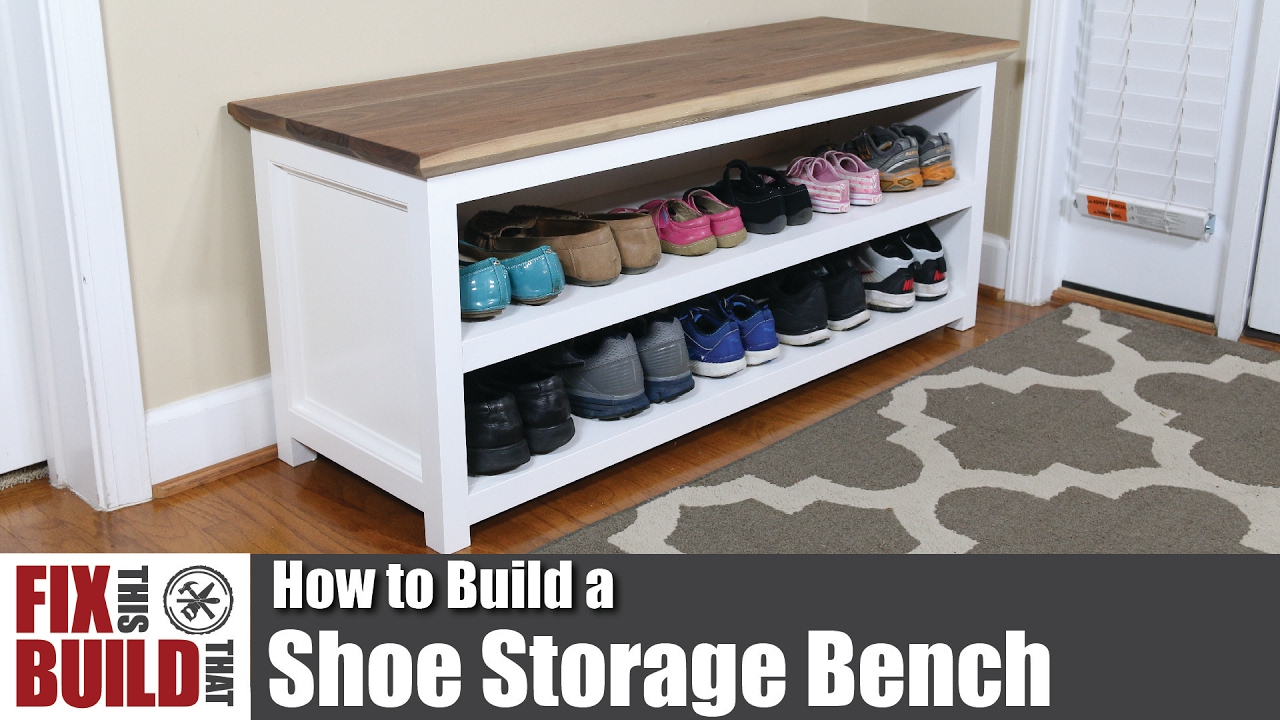
This DIY shoe storage bench is the perfect solution for organizing shoes in your entryway. With a painted plywood base and a beautiful walnut top, it combines functionality with great looks. Follow this step-by-step guide to build your own!
Materials
- 2x2 lumber (for legs)
- 1x4 lumber (for rails and shelf trim)
- 3/4-inch plywood (for side panels, shelves, and back panel)
- 1/4-inch plywood (for back panel)
- Walnut board (for top, approximately 12 feet long)
- Wood glue
- Pocket hole screws
- Adjustable shelf pins
- Cove molding
- 2-part epoxy (for filling holes)
- Satin polyurethane finish
- Semi-gloss latex paint
- Sandpaper (150 and 220 grit)
Tools
- Miter saw
- Table saw
- Jointer
- Planer
- Drum sander (optional)
- Pocket hole jig
- Shelf pin jig
- Brad nailer
- Clamps (various sizes)
- Block plane
- Card scraper
- Orbital sander
- Drill
- Forstner bit
- Twist drill bits
- Foam roller
- Spring clamps
Step-by-Step Guide
Step 1: Cut the Legs and Create Rabbets
Cut the legs to size from 2x2 material. Since the bench will have a 1/4-inch plywood back, cut a rabbet (recess) into the back legs to hold the plywood. Make one cut to define the depth of the rabbet, then raise the blade and clear out the remaining material with a second cut.
Step 2: Prepare the Side Rails
Cut 1x4s to length for the side rails. Rip them down on the table saw to get two rails from each piece (resulting in 1x2 rails). Drill pocket holes in the ends of all rails.
Step 3: Assemble the Side Panels
Cut the side panels to size from 3/4-inch plywood. Lay the legs and rails face down, securing the top rail with screws. Use the panels to position the lower rail—this eliminates measurement errors and ensures an exact fit. Secure the lower rails.
Step 4: Attach the Panels to the Legs
Drill pocket holes in the sides of the panels to join the legs, plus one pocket hole on the top of each panel for attaching the walnut seat later. Use playing cards as shims to make the panels flush with the inside face of the legs (since 3/4-inch plywood isn't exactly 3/4 inch). Lock everything in place with pocket screws.
Step 5: Fill Pocket Holes and Finish Side Assemblies
Fill the pocket holes with wooden plugs. Cut the plugs flush after the glue dries, then use a block plane and sandpaper to smooth everything. Add a small chamfer on the bottom of the legs to prevent chipping when sliding the bench. Drill adjustable shelf pin holes on both sides using a shelf pin jig. Sand the entire side assemblies to 150 grit.
Step 6: Cut and Assemble the Shelves
Cut the lower and adjustable shelves from 3/4-inch plywood. Cut 1x4 trim to size on the miter saw, then rip it down to 1x2 strips. Use the trim to measure the crosscut on the lower shelf for an exact match. Drive pocket holes along the front of the lower shelf to attach the trim and along the sides to attach the side assemblies. Clamp the plywood firmly and attach the trim with pocket screws.
Step 7: Prepare the Stretchers
Cut a back stretcher from plywood. Drill three large counterbore holes with a Forstner bit in the underside of the front and back stretchers, stopping 3/4 inch from the other side. Use a twist bit to drill all the way through. Oversize these through holes to allow for wood movement later.
Step 8: Assemble the Base
Use a makeshift clamping strip with F-clamps to pull the sides together. Attach the front and back stretchers, then flip the base over and attach the lower shelf. Use spring clamps to position the shelf, then check the distance between the bottom of the shelf and the bottom of the legs to ensure everything is even. Secure the shelf with pocket screws.
Step 9: Cut and Install the Adjustable Shelf
Cut the adjustable shelf plywood to width, factoring in the shelf pins. Cut and attach the trim the same way as the lower shelf. Test fit the shelf to make sure it slides in properly.
Step 10: Add Trim and Back Panel
Cut cove molding to fit around the inside of the side panels using mitered corners. Tack it in place with a pin nailer. Cut the back panel from 1/4-inch plywood.
Step 11: Paint the Base
Sand everything to 150 grit. Apply three coats of semi-gloss latex paint. Use a foam roller for the final two coats to achieve a much smoother finish.
Step 12: Prepare the Walnut Top
Break down the walnut board into three 4-foot sections. Clean the boards and remove dirt and bark. Face join each board to get one smooth, flat side, then run them through the planer to flatten the other side. Mill a flat edge on each board using the jointer, then rip them all to the same width on the table saw.
Step 13: Glue Up the Top
Join the boards together using wood glue and plenty of clamps. Use a few small clamps on the glue joints at the ends to keep everything aligned. Fill any bug holes with two-part epoxy using a popsicle stick. When dry, use a card scraper to level the repairs.
Step 14: Final Shaping and Sanding
Use a drum sander or orbital sander to flatten the top. Cut the top to its final size on the miter saw. Cut a 45-degree bevel on the underside of the front edge to lighten the look and deal with bark voids. Cut side bevels as well. Use a block plane and card scraper to remove any burning from the cuts. Sand the entire top to 220 grit.
Step 15: Apply Finish
Apply satin polyurethane finish for protection and durability. Apply two thin coats (thinned 25%), then two more coats thinned 50/50 with mineral spirits.
Step 16: Attach the Top and Back
Place the finished top on the base, positioning it for a consistent reveal around the front and sides. Clamp it down and secure it to the base through the oversized holes drilled earlier (this allows for seasonal wood movement). Flip the bench over and nail on the back panel with a brad nailer.
Step 17: Install the Adjustable Shelf
Install the adjustable shelf using shelf pins with holes. Secure the shelf with screws since it will see a lot of activity from shoes going in and out.
Tips for Success
- Use playing cards as shims – Since 3/4-inch plywood isn't exactly 3/4 inch, playing cards are perfect for making panels flush with leg faces.
- Cut angled plugs for easier installation – Instead of cutting straight plugs, cut them at an angle so you can tap them in with a hammer. This saves time and prevents injury from using a scratch awl.
- Oversize screw holes for wood movement – When attaching the top to the base, drill oversized through holes to allow the walnut top to expand and contract with seasonal changes.
- Use a foam roller for paint finish – For the final coats of paint, switch from a nap roller to a foam roller. This gives a much smoother, more professional finish.
- Let the trim guide your cuts – When cutting shelf trim to match the shelf length, use the trim itself to mark the cut. This eliminates measurement errors and ensures a perfect fit.
