What You'll Need
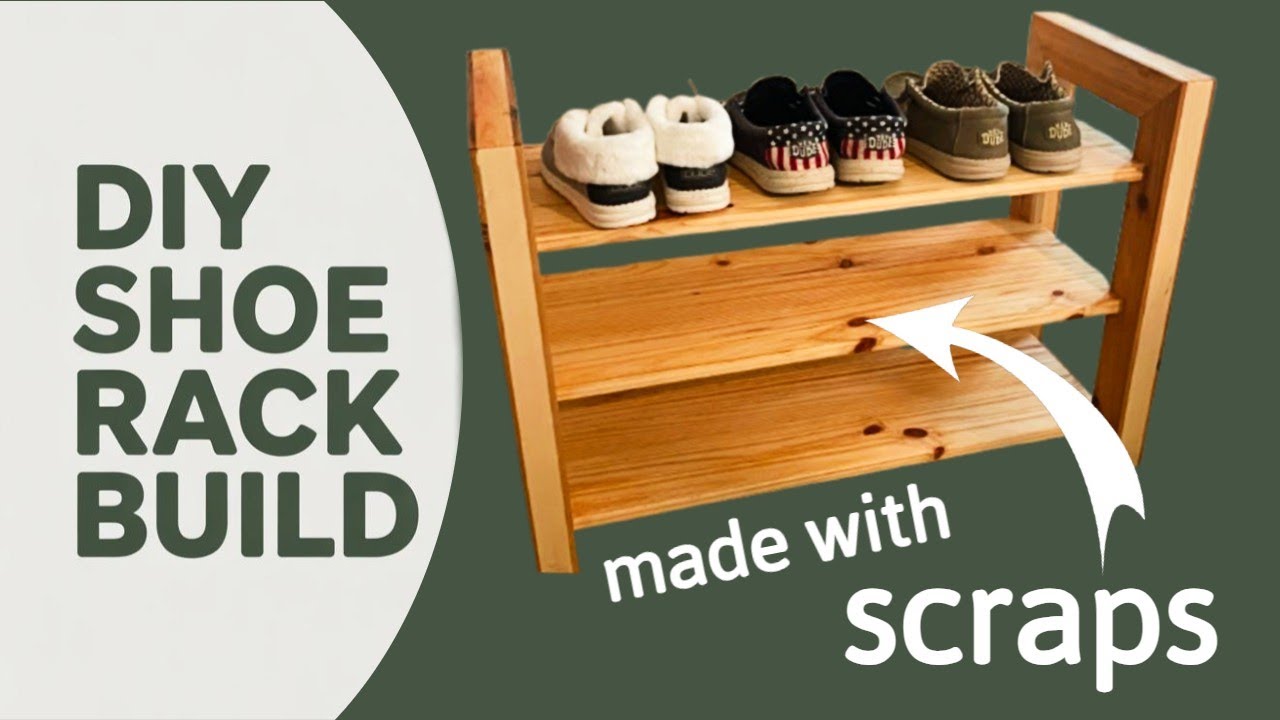
Turn your leftover lumber pile into a beautiful, functional shoe rack that will look great at your front door. This project combines cedar, pine, and spruce scraps into a sturdy piece with stunning wood contrast.
Materials:
- Cedar 1x4 boards (8 pieces at 24 inches + 4 pieces at 15 inches)
- Pine shelf board (cut into 3 equal lengths at 31 7/8 inches each)
- 2x4 cutoffs for inlays
- Wood glue
- Teak oil finish
- 150-grit sandpaper
Tools:
- Table saw with 45° blade capability
- Miter saw
- Router
- Clamps (at least 4-6)
- Masking tape
- Measuring tape
- Square
Step-by-Step Guide
Cut All Cedar Pieces to Size
Start by cutting your cedar 1x4 boards. You'll need eight pieces at exactly 24 inches long and four pieces at 15 inches long. These will form the leg assemblies for your shoe rack.
Prepare the Pine Shelves
Take your old pine shelf board and break it down into three equal lengths. Measure and cut each piece to exactly 31 7/8 inches. These will become your three shelves.
Create Beveled Edges on Cedar
Set your table saw blade to 45 degrees. Rip a clean bevel along both edges of all your cedar pieces. Safety warning: Always use a push stick when ripping narrow pieces on a table saw.
Note: If you're using a left-tilt table saw like the one in this build, be extra careful with your hand placement as the blade angles toward the fence differently than right-tilt models.
Glue Up the Leg Assemblies
Apply wood glue to the inside flats of your cedar pieces. Pair them up to create four 24-inch lengths and two 15-inch pieces. These will form the two leg assemblies for the rack. Clamp them together and let dry completely.
Cut and Install the Inlays
From your 2x4 cutoffs, cut triangular inlays that will fit into the seated grooves between your glued cedar pieces. Make a few test passes on scrap wood to dial in the perfect fit. Apply glue to each inlay and press them into the grooves.
Pro tip: If you don't have enough clamps (and who ever does?), use masking tape to hold everything tight while the glue dries. Wrap it firmly around the pieces to create even pressure.
Reveal the Contrast
Once the leg pieces are fully dry, run them through the table saw and take off about 1/4 inch from each side. This exposes the darker cedar edge against the lighter spruce, creating that beautiful two-tone look. You can take off more if you want a wider cedar reveal.
Square Up and Miter the Ends
Use your miter saw to square up both ends of each leg piece and bring them to a clean final length of 23 inches. Then add a 45-degree miter on:
- One end of each of the four upright legs
- Both ends of the two 15-inch horizontal pieces
This creates the leg structure for each side of your shoe bench.
Route the Shelf Slots
Mark your pine shelves with these measurements:
- First shelf: 2 inches up from the bottom
- Third shelf: 2 inches down from the top
- Middle shelf: centered exactly between the first and third shelves
Use your router to cut out these sections where the shelves will sit.
Assemble the Leg Frames
Glue the mitered leg pieces together. Check that the miters are tight on both sides. While the glue is still wet, sand the miters lightly. The sanding dust mixes with the glue and helps the joints disappear when you apply finish.
Pro tip: Check for level while clamping. If it's slightly off, you can sand it down later.
Add Bottom Support Strips
Cut 1-inch-wide strips and glue them to the bottom of each leg assembly. Angle screws into the legs from the underside for extra strength. This is the only spot in the build where screws are needed—everything else is just glue.
Final Assembly
Slide your three shelves into their routed slots. Check for square—there should be no wobbling. Once everything lines up, apply glue to all joints and clamp the entire assembly together. Let dry completely.
Apply the Finish
Sand everything lightly with 150-grit sandpaper. Remember, cedar is soft, so don't over-sand. Apply teak oil with a clean cloth, working it into the wood grain. Teak oil penetrates deep and provides a protective layer that's perfect for a shoe rack that will see wet shoes from outdoors.
Tips for Success
- Test your cuts on scrap first – Especially when setting up the 45-degree bevels and miter joints. A test piece saves you from ruining your good materials.
- Work in stages – Let each glue-up dry completely before moving to the next step. Rushing leads to weak joints and misaligned pieces.
- Use tape when clamps run out – Masking tape works surprisingly well for holding glue joints together, especially on smaller pieces.
- Sand miters while glue is wet – This trick helps the joint disappear by mixing sanding dust into the glue for a seamless look.
- Teak oil works on any wood – Don't let the name fool you. It penetrates deep, protects against moisture, and brings out rich color in pine, cedar, and spruce alike.
