What You'll Need
Materials:
- Modular closet system (cabinets, shelving, drawers)
- 3/4" pre-finished plywood (for island carcass)
- Walnut boards (for island top)
- Oak boards (for interior box)
- Maple 2" face framing (for drawer fronts)
- Blum undermount drawer slides
- Sit-stand desk lift mechanism (two columns, no rod)
- Steel plate (5" wide)
- LED light tracks with diffusers
- Leather or faux leather (for watch pillows)
- High-density foam (for watch inserts)
- Small magnets (for knife and watch holders)
- Wood glue
- Exterior screws
- Edge banding
- Primer and paint (green for closet, black for island interior)
- Clear lacquer (for walnut top)
- Cable management supplies (zip ties, switches)
- Wood filler
- Sandpaper (various grits, up to 120 grit)
Tools:
- Table saw
- Router with bits (including slot-cutting bit)
- Miter saw
- Drill/driver
- Brad nailer
- Clamps
- Sander (belt sander, random orbital)
- Measuring tape
- Level
- Stud finder
- Welding equipment (for bracket fabrication)
- Shaper (for shaker-style profiles)
- Paint sprayer (or brushes/rollers)
- Screwdrivers
- Utility knife
Step-by-Step Guide
Step 1: Remove Old Closet and Prep Walls

Clear out all existing wire racking and shelving. This can be time-consuming, especially if racks are nailed into studs. Be prepared for wall damage—you'll need to patch holes and repair drywall. Remove any unsafe electrical work (like an outlet moved without a cover). Patch holes with drywall compound, let dry, sand smooth, and apply primer.
Step 2: Paint the Closet

Choose a color that suits your mood. A moody green works well for a closet—it's warm and makes you look good in any lighting. Apply two coats of paint, allowing adequate drying time between coats. This step can take a full day depending on room size.
Step 3: Install Modular Closet System

Mount the modular closet cabinets and shelves using the provided cleats and hardware. Find studs and secure everything level. You may need to make minor adjustments as you go—this is normal with prefab systems. Work methodically, hanging one cabinet at a time and checking for plumb. Expect this to take 1–2 days.
Step 4: Build the Island Carcass

Cut your pre-finished plywood into four sides (top, bottom, left, right) and two back stretchers. Rip all pieces to width, then cut to length. Assemble boxes using glue and countersunk exterior screws. Add stretchers to the back for stability. Build 6 total carcasses—this should take about 1.5 hours.
Step 5: Build Drawer Boxes

Measure your cabinet openings. Use a spacer block (3/8" thick) to determine drawer width—this accounts for the 3/16" gap on each side needed for undermount slides. Cut drawer box pieces from plywood. Assemble with glue and screws. Build all 18 drawer boxes.
Step 6: Create Drawer Fronts

Use maple face framing to create shaker-style drawer fronts. Cut rails and styles, then route the shaker profile using a shaper or router table. Glue up the panels with center panels. Let dry overnight.
Step 7: Mill and Glue Up Walnut Island Top

Select walnut boards with sapwood intentionally placed on the outside. Cut boards slightly longer than 6 feet. Mill them flat and to final thickness. Glue up three boards side by side, clamping overnight. The next day, cut to final dimensions and sand to 120 grit.
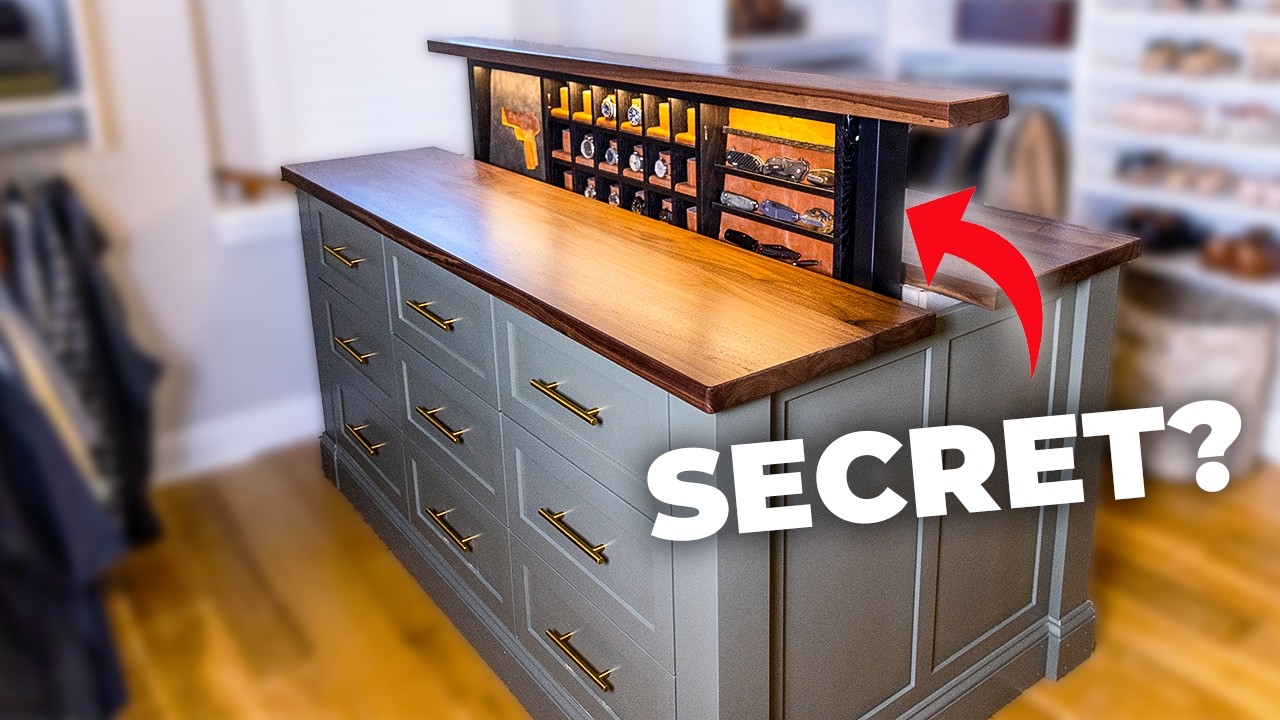
Step 8: Build the Secret Lift Mechanism

Fabricate a steel mounting plate to attach the sit-stand desk columns to the island base. Weld brackets onto the plate to secure the columns. Build a platform to raise the mechanism to counter height (36"). Test the lift to ensure smooth operation.
Step 9: Construct the Hidden Interior Box

Build a 55" x 15" tall interior box from oak. Rabbet the back panel. Assemble with glue and screws. This box will house the secret compartments for watches, knives, and other valuables.
Step 10: Create Watch Display Inserts

Cut walnut blocks to size. Wrap high-density foam in leather and attach to the blocks. Install small magnets on the back of each block and inside the compartment. This allows watches to sit securely without falling out when the lift is raised.
Step 11: Build Knife Shelving

Cut leather-wrapped boards for knife shelves. Install magnets behind each shelf to prevent items from swaying during movement. Paint these shelves black to match the interior.
Step 12: Install LED Lighting

Route channels into the top of the interior box for LED track lighting. Install diffusion panels over the tracks. Wire the lights to a switch that will be hidden in a drawer.
Step 13: Assemble the Island

Mount the lift mechanism platform inside the island carcass. Install drawer slides. Attach drawer fronts with screws from inside the drawer boxes. Install drawer pulls. Cap the ends with custom panels built by your cabinetmaker.
Step 14: Apply Finish

Spray clear lacquer on the walnut top for protection. Paint all black components (interior box, panels, trim) with a sprayer for speed. Apply edge banding to all exposed plywood edges.
Step 15: Install Island in Closet

Move the assembled island into the closet. Level the base (this floor was dead level, which was lucky). Anchor to the wall or floor as needed. Connect power to the lift mechanism and LED lights. Hide cables in a drawer with zip ties.
Step 16: Final Adjustments

Test the lift mechanism—ensure it rises and lowers smoothly. Adjust drawer gaps. Tidy all cables. Install any remaining trim. Do a final cleanup.
Tips for Success
- Plan for wall damage when removing old racks. Wire shelving is often nailed into studs, leaving large holes. Have drywall patch and compound ready before you start demolition.
- Use a spacer block for drawer measurements. Instead of calculating gaps manually, use a 3/8" spacer to measure drawer width. This accounts for the 3/16" gap needed on each side for undermount slides and reduces errors.
- Pre-finished plywood saves finishing time. Single-side finished plywood costs about $50–$60 per sheet and eliminates the need to paint or stain interior cabinet surfaces. Check local lumber distributors for availability.
- Test your lift mechanism before final assembly. Mock up the sit-stand desk columns with your platform to ensure proper height and stability. The columns in this build were linked digitally, not mechanically, which simplified installation.
- Use magnets to secure items in moving compartments. When building hidden drawers or lift-up sections, small magnets prevent knives, watches, or other valuables from shifting during movement. Combine with foam or leather for protection.
