What You'll Need
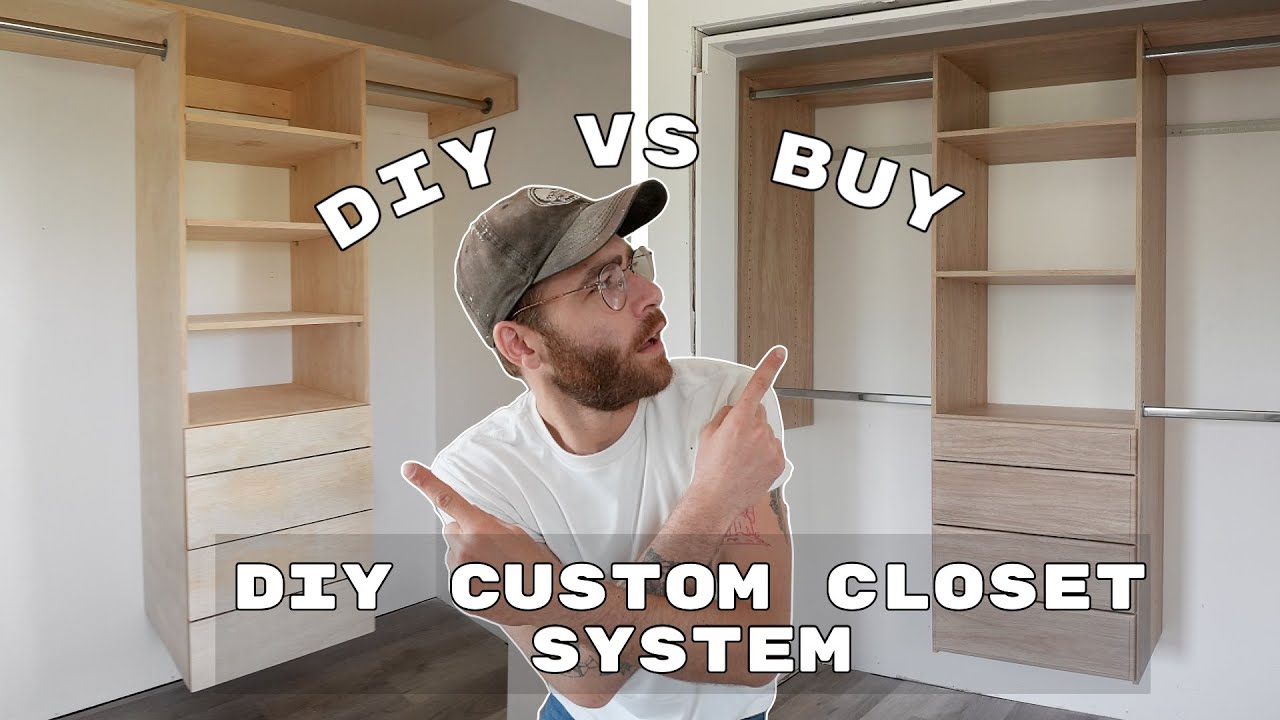
Looking to upgrade your closet storage? In this tutorial, we'll compare buying a pre-built closet system versus building one from scratch. We'll cover the full process for both options, including materials, tools, time, and cost so you can decide which route is best for you.
For the Pre-Built System:
- Pre-built closet organizer kit (available at Home Depot)
- Stud finder
- Level
- Drill/driver
- Angle grinder (for cutting metal rails)
- Circular saw (for cutting closet rods and shelves)
- 12-inch speed square
- Tape measure
- Pencil
- Screws (included with kit)
- Safety glasses
For the DIY Build:
- 3/4-inch plywood (approx. 1.5 sheets)
- 1/2-inch birch plywood (for drawers)
- Wood glue
- 18-gauge brad nailer with 1.5-inch nails
- Table saw or circular saw
- Iron-on edge banding
- Utility knife with sharp blade
- 220-grit sandpaper
- Wood putty
- Drawer slides (bottom mount, 50 lb capacity)
- Shelf pins
- Closet rods
- Screws for mounting to studs
- Hot glue gun
- Painter's tape
- Roller stands (for cutting large sheets)
- Safety glasses and hearing protection
Step-by-Step Guide
Step 1: Plan Your Layout
Before starting, measure your closet space carefully. Note the width, depth, and height. Decide if you want a center tower that floats off the ground (recommended) or one that sits on the floor. Mark stud locations using a stud finder – you'll need at least two screws per bracket going into studs.
Step 2: Install the French Cleat (Pre-Built System)
The pre-built system uses a metal French cleat rail that mounts to your wall studs. Position the cleat at your desired height and check it's level. The cleat comes with pre-drilled holes – use these to mark screw locations. If needed, cut the cleat to length using an angle grinder. Make sure at least two screws per section go into studs. If studs don't line up, the kit includes heavy-duty toggle bolts.
Step 3: Assemble the Center Tower (Pre-Built)
Unbox all components and organize them. The center tower assembles using shelf pins for the adjustable shelves. The top shelf comes in three sections – cut the left and right pieces to fit your closet width using a circular saw and speed square. The center tower should be centered in the doorway, not necessarily centered in the closet.
Step 4: Cut and Assemble the DIY Center Tower
For the DIY version, cut three 18-inch wide pieces from 3/4-inch plywood for the tower sides and shelves. Cut the vertical pieces to 72 inches tall (matching the pre-built height). Cut the bottom piece and middle divider to 22.5 inches. Cut three adjustable shelves to the same length. Assemble the case using wood glue and 18-gauge brad nails. Use a speed square to mark nail locations on the outside of the cabinet to avoid missing the mark.
Step 5: Install Shelf Pins (DIY)
Drill holes for shelf pins using a drill bit 1/64 inch smaller than the pin diameter for a snug fit. Wrap painter's tape around the drill bit to mark depth so you don't drill too deep. Position holes 1 inch from the front edge and 2 inches from the back for a clean look. This allows adjustable shelving without visible pre-drilled holes.
Step 6: Build Drawers (Both Versions)
Pre-Built: The kit includes drawers with a clever folded miter design using veneer – this gives continuous grain around the drawer. Follow the included templates for mounting hardware. Screw drawer slides into the same holes used for shelf pins.
DIY: Cut drawer pieces from 1/2-inch birch plywood. For a 6-inch tall drawer side, cut front/back pieces to match. Create a rabbet joint by lowering the table saw blade to half the material thickness and making multiple passes. Cut drawer bottoms from 1/4-inch plywood. Assemble with butt joints and brad nails – sides go on the outside so visible rabbet grooves face front and back.
Step 7: Apply Edge Banding (DIY)
Use iron-on edge banding on all exposed plywood edges. Find the right iron temperature – hot enough to melt adhesive but not so hot it damages the veneer. Trim excess with a sharp utility knife. Fill all nail holes with wood putty and sand the entire case with 220-grit sandpaper.
Step 8: Install Drawer Slides (DIY)
Mount bottom-mount drawer slides to the drawer boxes and inside the tower. These are affordable and easy to align – they have a positive stop for lining up. They hold 50 lbs per drawer, which is plenty for clothing.
Step 9: Mount the Tower to the Wall (DIY)
Install a cleat on the wall screwed into studs. Mount the tower to this cleat. Add a support brace at the bottom, also tied into studs. Screw through the plywood for extra security.
Step 10: Install Closet Rods (Both Versions)
Cut closet rods to length. For the pre-built, drill through the bracket and sink a screw into the rod. The design features two levels of hanging storage – great for shirts and jackets. For the DIY version, install rods so they put slight pressure on the plywood, keeping everything square. The DIY rod is much sturdier – you could do chin-ups on it.
Step 11: Install Drawer Fronts (DIY)
Cut drawer fronts to size. Save the narrow top drawer front for last – cut it to width after installation for a perfect fit. Use 1-inch spacer blocks to align drawers evenly. Brad nail drawer fronts from the back, then sink screws. Use hot glue to temporarily hold the top drawer front in place before brad nailing.
Step 12: Final Assembly (Pre-Built)
Install adjustable shelves in the center tower. The top shelf should hide the French cleat behind it. Install handles if desired – or skip them for a cleaner look.
Tips for Success
- Measure twice, cut once – This old woodworking adage saved me when I cut a shelf 1/2 inch too short. If you make a mistake, you can sometimes glue on a thin strip and hide it with edge banding, but it's better to avoid the error entirely.
- Use a finish blade on your circular saw – A blade designed for clean cuts will reduce tear-out on plywood, saving you sanding time and giving a more professional look.
- Invest in roller stands – Breaking down full sheets of plywood is nearly impossible without support. Roller stands make the job safe and accurate, especially when working alone.
- Keep your utility knife blade sharp – When trimming edge banding, a dull blade will tear the veneer. Change blades frequently for clean results.
- Account for drawer hardware when cutting – Your drawer width needs to be 1 inch less than the cabinet opening to accommodate the slides. Double-check your measurements before cutting.
