What You'll Need
Here is a DIY tutorial based on the video transcript provided.
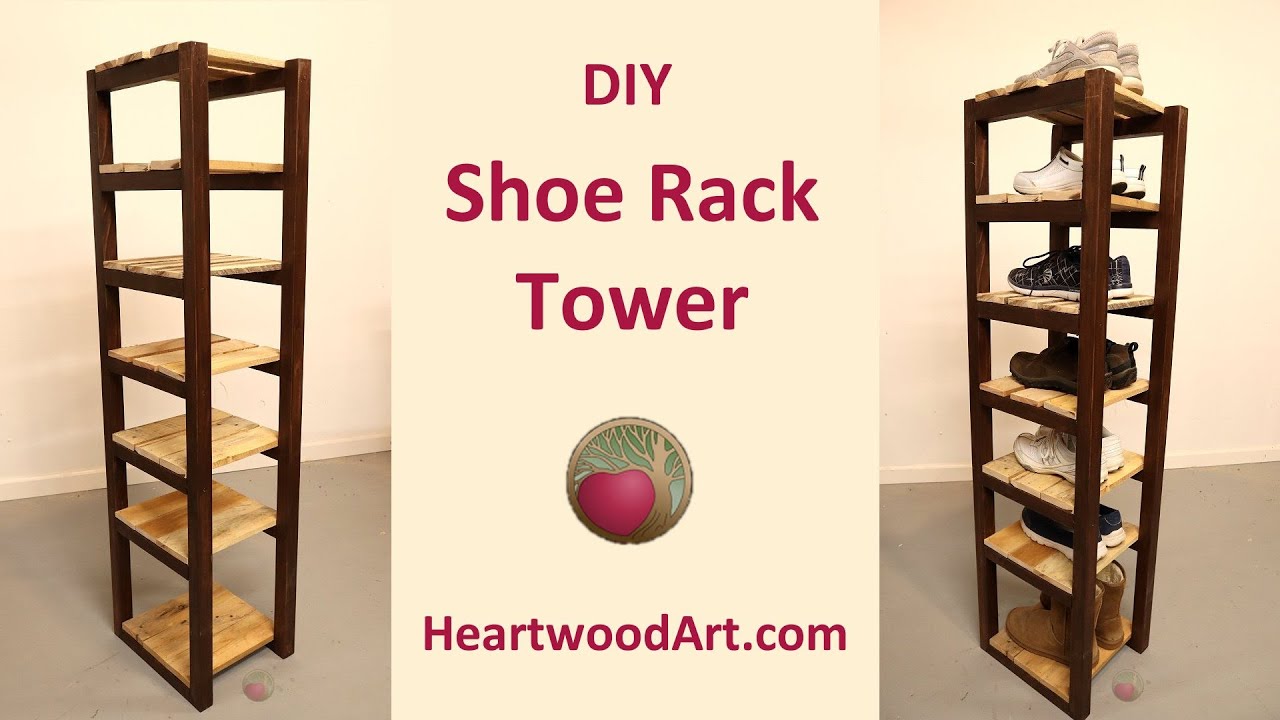
# How to Build a Rustic Tower Shoe Rack
This project creates a sturdy, rustic tower shoe rack using 2x2 lumber for the frame and reclaimed wood (or new 1x4s) for the shelves. The key detail is the use of through dowel joinery, which is surprisingly simple and adds a great visual touch. The design is tall and narrow, perfect for a closet or mudroom.
Materials:
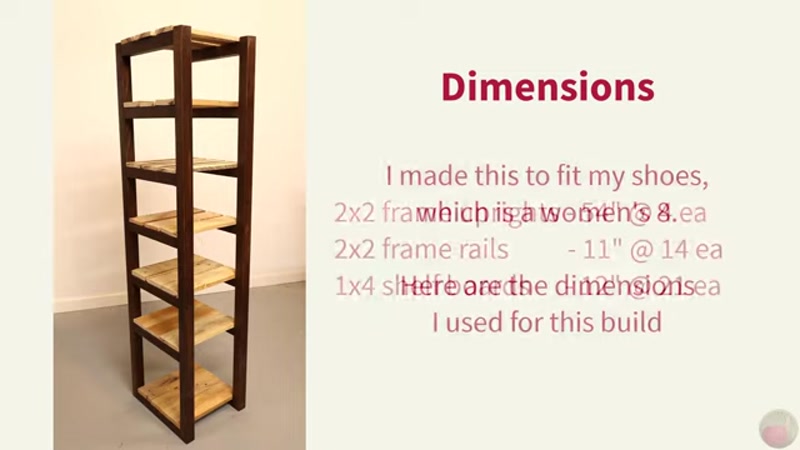
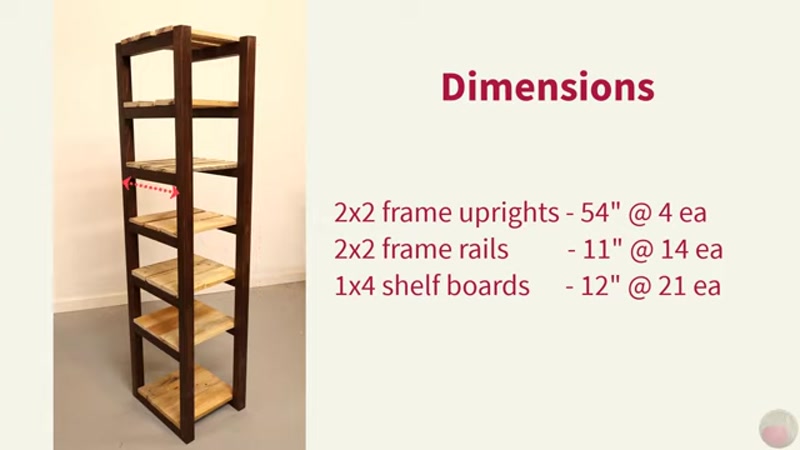
- 2x2 Lumber (Frame):
- 4 pieces @ 54 inches (Uprights)
- 14 pieces @ 11 inches (Rails)
- 1x4 Lumber or Pallet Wood (Shelves):
- 21 pieces @ 12 inches long (Shelf Boards)
- Wood glue (Titebond 3 or similar)
- 3/8" or 1/2" fluted dowels (with at least one tapered end)
- Gel stain (or your preferred finish)
- 1-inch brad nails
Tools:
- Miter saw (or circular saw with speed square)
- Drill with brad point bit (matching dowel size)
- Dowel jig (or homemade jig for 2x2s)
- Clamps (4 long bar clamps, plus smaller ones)
- Mallet (rubber or wood)
- Brad nailer (pneumatic or electric)
- Sandpaper (various grits)
- Foam brushes and rags
- Carpenter square
- 2x4 scrap block (for alignment)
Step-by-Step Guide
Step 1: Sand and Cut All Lumber
Sand the 2x2 lumber before cutting. This makes finishing much easier later. Set up a stop block on your miter saw to ensure all cuts are identical.
- Cut four 2x2s to 54 inches (the uprights).
- Cut fourteen 2x2s to 11 inches (the rails).
- Cut twenty-one 1x4s to 12 inches (the shelf boards).
- Note: The dimensions in this guide fit a women's size 8 shoe. Adjust the depth of the rails (11 inches) if you have larger feet.
Step 2: Build and Clamp the First Frame
Lay two of the 54-inch uprights on a flat surface. Place a 2x4 block under the bottoms to keep them perfectly even. Position the 11-inch rails between the uprights. Use four long clamps to hold the entire frame together tightly, alternating the clamp handles for even pressure. Check that the frame is square using your carpenter square.
Step 3: Glue the Frame Rails

Loosen one clamp at a time to remove a rail. Apply a small amount of wood glue to each end of the rail using a popsicle stick. Reinsert the rail and tighten the clamp. Repeat this process for all seven rails on one side. Let the glue cure for at least 4 hours or overnight.
Step 4: Drill Dowel Holes

Once the glue is dry, you can remove the clamps. Use a dowel jig to drill centered holes through the upright and into the rail. A brad point bit works best for clean holes.
- Attach your jig to the upright, aligned with the center of the rail.
- Drill a hole through the upright and into the rail to a depth of about 1.5 to 2 inches.
- Remove the jig and use the hole in the upright as a guide to drill deeper into the rail if needed.
Step 5: Insert the Dowels
Apply glue to the inside of the dowel hole and to the fluted dowel. Use a popsicle stick to spread the glue. Tap the dowel in with a mallet until it is flush with the surface of the upright. Wipe away any excess glue immediately. Repeat this for every rail joint on the first frame.
Step 6: Build the Second Frame

Build the second frame right next to the first one. Use a 2x4 block to keep the bottoms even. Clamp the two frames together to ensure the rails on both sides are perfectly aligned. Use your square to check alignment. Repeat the gluing and doweling process for the second frame. Let the glue cure fully.
Step 7: Sand and Apply Finish

Give both frames a light sanding to remove any dried glue residue. Apply your chosen finish. A gel stain is a great choice for this project as it is thick, won't drip, and is very forgiving. Apply it with a foam brush and wipe off the excess. Allow the stain to dry completely.
- Safety Warning: If using an oil-based stain or gel stain, lay rags and brushes flat to dry on a non-flammable surface. They can spontaneously combust if balled up.
Step 8: Attach the Shelf Boards
Clamp one of the finished frames on its side to your workbench. Place a 2x4 block at the bottom to keep the frame straight. Clamp the second frame to the first, ensuring they are square and the rails are aligned.
- Start at the bottom. Lay a shelf board across the bottom rail and nail it in place with 1-inch brad nails.
- Clamp a board at the top of the frame and nail it in place.
- Now, place a board in the middle, spacing it evenly between the top and bottom boards. Nail it in place.
- Continue adding the remaining shelf boards, working your way up the frame.
- Once the piece is stable enough to stand on its own, you can unclamp it and finish nailing the remaining boards.
Tips for Success
- Adjust for Your Shoes: The 11-inch rail depth is for a women's size 8. Measure your largest pair of shoes and add 1-2 inches for overhang. Adjust the rail length accordingly.
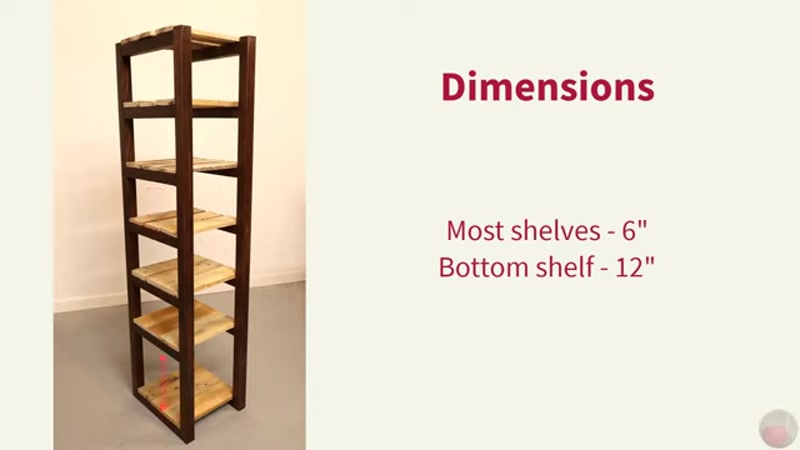
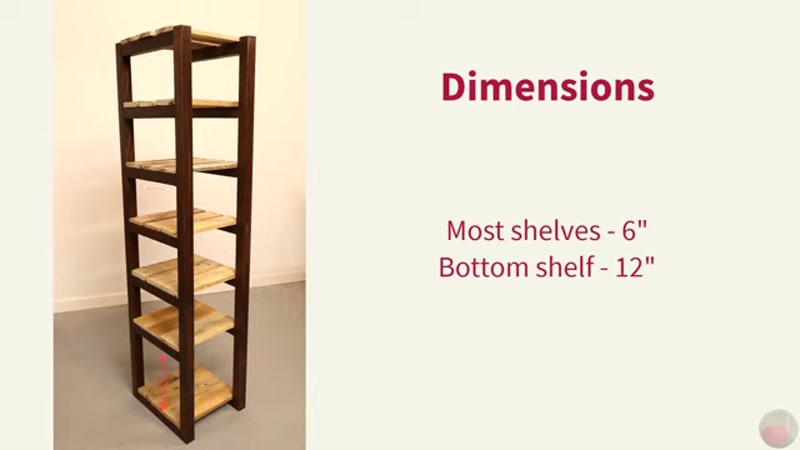
- Spacing is Key: The tutorial uses a 12.5-inch space for the bottom shelf (for boots) and 6.5-inch spaces for the rest. Adjust these heights to fit your specific footwear.
- Use a Stop Block: When cutting your lumber, always use a stop block on your miter saw. This ensures every single rail and shelf board is exactly the same length, which is critical for a square and stable frame.
- Go Slow with the Dowels: If your dowels don't have two tapered ends, make sure you insert the tapered end first. If it's too tight, don't force it—slightly sand the end of the dowel.
- Embrace Imperfection: If you are using reclaimed wood for the shelves (like the pallet wood in the video), don't worry about gaps or uneven widths. This adds to the rustic charm of the finished piece.
