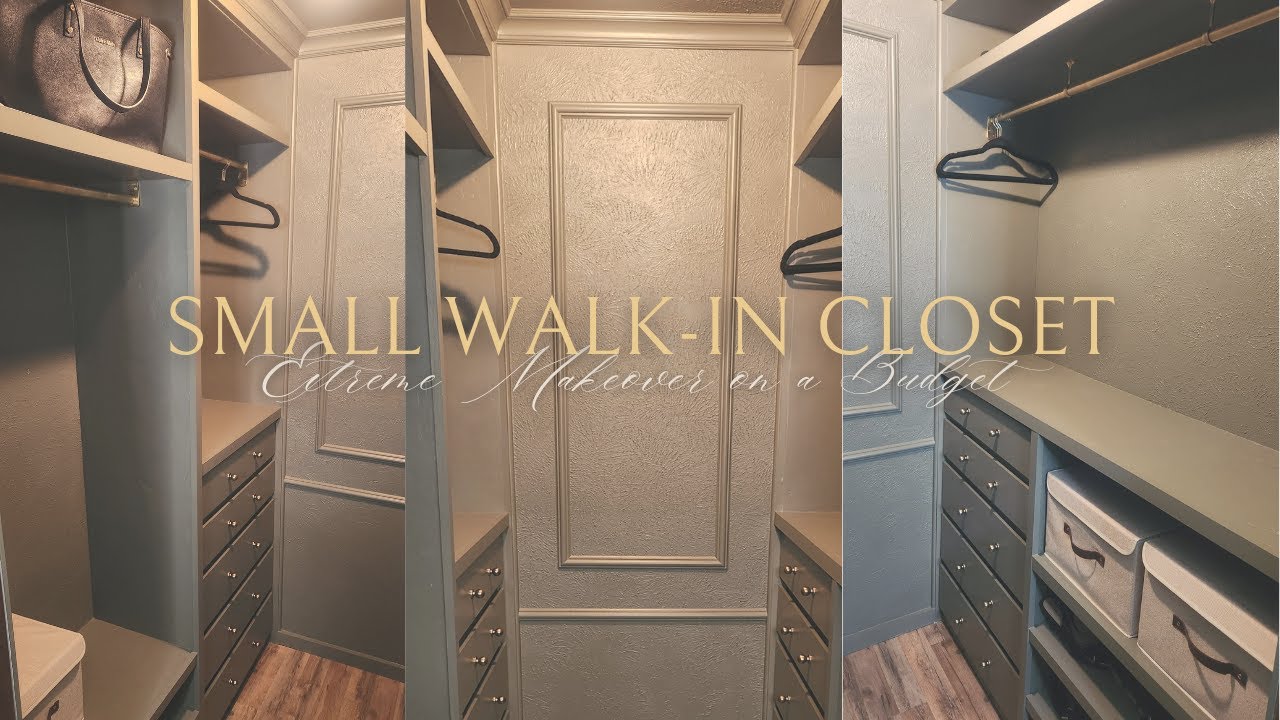
How to Build a Custom Closet System with Built-In Dresser
Here is the DIY tutorial based on the video transcript you provided.
This guide will walk you through turning a cluttered, unorganized closet into a functional, beautiful space. We’ll cover building custom shelving, integrating an IKEA dresser for drawers, and adding professional-looking trim and paint.
What You'll Need
Materials:
- 1 sheet of 3/4" plywood (23" x 32" or similar, unsanded to save money)
- 1x3 Pine boards (for supports and framing)
- 1x4 Pine boards (for ceiling trim)
- 1x2 Pine boards (for shelf edge trim)
- IKEA Cullen dresser (or similar dimensions)
- 1 1/4" fine-thread pocket hole screws
- 2" wood screws
- 1 1/4" wood screws
- Wood glue
- Spackle
- Caulk (painter's caulk)
- Shellac-based primer (for MDF)
- Water-based primer (for plywood)
- Paint (e.g., Sherwin-Williams "Cocoon" in Satin)
- Gold spray paint (for closet rods)
Tools:
- Jigsaw
- Drill/Driver
- Kreg Pocket Hole Jig (or similar)
- Stud finder
- Level
- Tape measure
- Sandpaper (60-grit and 220-grit)
- Orbital sander (recommended)
- Paintbrushes and rollers
- Caulking gun
- Clamps
Step-by-Step Guide
Step 1: Clear and Prep the Space
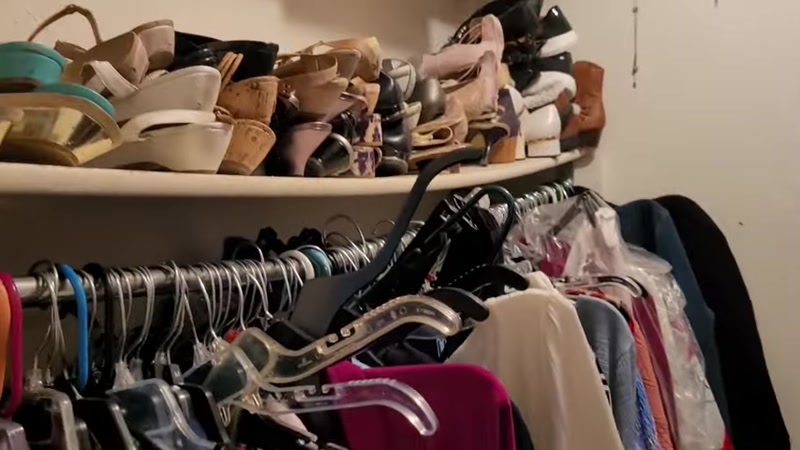
Start by removing everything from the closet. This includes all clothes, shoes, boxes, and any existing shelving or rods you won't be reusing. This gives you a clean, empty canvas to work with. Measure the width, height, and depth of your closet carefully.
Step 2: Plan Your Layout and Integrate the Dresser

Decide where you want your shelves and hanging space. In this project, the builder used an IKEA Cullen dresser in the center for drawers. This is a great time-saver. Position the dresser in the closet to ensure it fits, but do not permanently attach it yet. The layout included shelves on both sides of the dresser and a section for hanging clothes above.
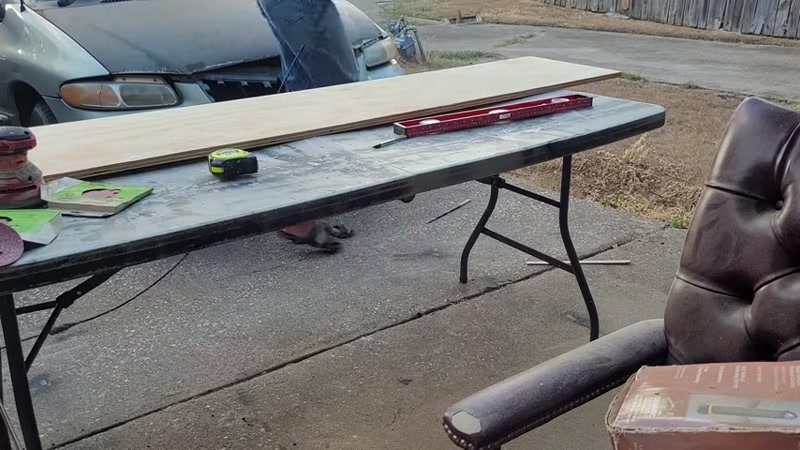
Step 3: Cut and Sand the Plywood
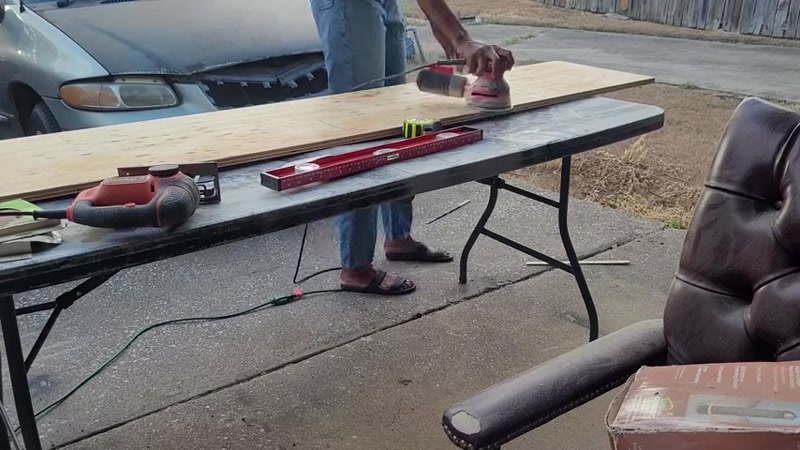
You will use plywood to create the main side panels and shelves. If you bought unsanded plywood, sand it thoroughly. Start with 60-grit sandpaper to remove rough spots, then finish with 220-grit to get a smooth surface. Use a jigsaw to cut the plywood to the correct height. Since the ceiling was slightly less than 8 feet, the builder cut the top of the plywood down to match.
Step 4: Build the Support Frame

Cut your 1x3 Pine boards to length. These will act as supports between the two plywood side panels. Use your pocket hole jig to drill two pocket holes on each end of a 1x3 board. Apply wood glue to the ends, then use 1 1/4" fine-thread screws to attach the 1x3 to the inside face of one plywood panel. Repeat for the other side. This creates a sturdy, box-like frame for each section of shelves.
Step 5: Install the Frame to the Wall

Use a stud finder to locate the studs in your closet walls. Mark their locations on the wall. Position your assembled plywood and 1x3 frame. Drill 2" screws through the 1x3 supports and into the wall studs to secure the frame. If there are studs on the side walls, screw the plywood directly into those as well. For extra stability, also screw the plywood into the 1x3 supports using 1 1/4" screws.
Step 6: Install the Dresser
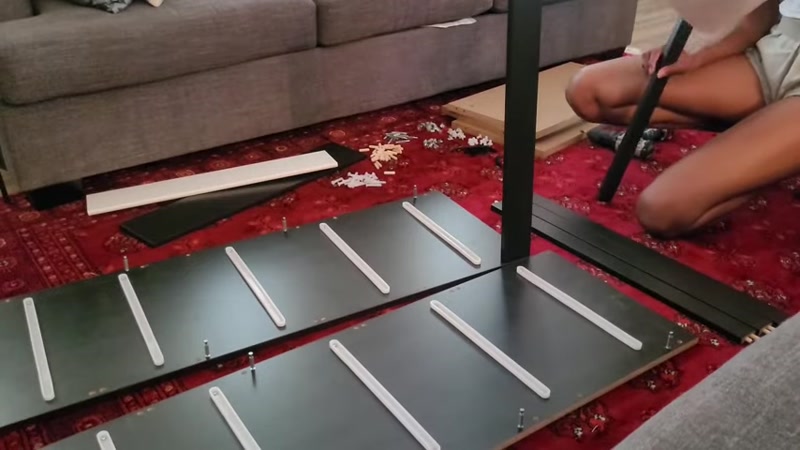
Slide the IKEA dresser into its final position. Secure it by driving a few screws through the side of the dresser into the wall studs on the side wall. Also, drive a couple of screws through the back of the dresser into the back wall. This prevents the dresser from moving.
Step 7: Cut and Install the Shelves

Measure and cut your plywood pieces for the shelves using a jigsaw. For shelves that are not above the dresser, drill two pocket holes in each corner (8 total per shelf). For shelves above the dresser, one pocket hole per corner is sufficient. Position the holes so they face up or down depending on whether they will be visible at eye level. Secure the shelves in place using 1 1/4" pocket hole screws.
Step 8: Add the Trim and Molding
This step gives the project a built-in, professional look.
- Ceiling Trim: Use 1x4 Pine boards to create a top trim piece that covers the gap between the plywood and the ceiling.
- Base Trim: Use 1x3 Pine boards for the baseboard at the bottom.
- Shelf Trim: Use 1x2 Pine boards to trim the front edges of the plywood shelves. This hides the raw plywood edge.
Step 9: Caulk, Fill, and Prime

Use painter's caulk to fill all the gaps between the trim, the wall, and the plywood. Fill all nail holes with spackle. Let everything dry, then sand the spackle smooth.
- Prime the Dresser: Use a shellac-based primer on the IKEA dresser because it is made of MDF. This prevents the MDF from bubbling.
- Prime the Wood: Use a water-based primer on all the pine and plywood surfaces.
Step 10: Paint and Final Details

Apply your chosen paint color. The builder used Sherwin-Williams "Cocoon" in a satin finish. Apply two coats for a smooth, even finish.
- Add Molding Detail: To add visual interest, the builder added a simple molding design to the back wall.
- Update the Rods: Spray paint the existing closet rods gold to give them a fresh, modern look.
- Install Knobs: Finally, install the knobs on the dresser drawers.
Tips for Success
- Save Money on Plywood: Buying unsanded plywood is much cheaper. Just be prepared to spend extra time sanding it smooth.
- Plan for Pocket Holes: Always think about where your pocket holes will be. Facing them up or down can hide them from view, making the project look cleaner.
- Secure the Dresser: An IKEA dresser is not heavy enough to stay put on its own. Always screw it into the wall studs for safety and stability.
- Don't Skip the Primer: Using the correct primer (shellac for MDF, water-based for wood) is crucial for a professional, long-lasting paint finish.
- Caulk is Your Friend: Caulking all the seams between the trim and the wall hides imperfections and gives the built-in a seamless, custom look.
