What You'll Need
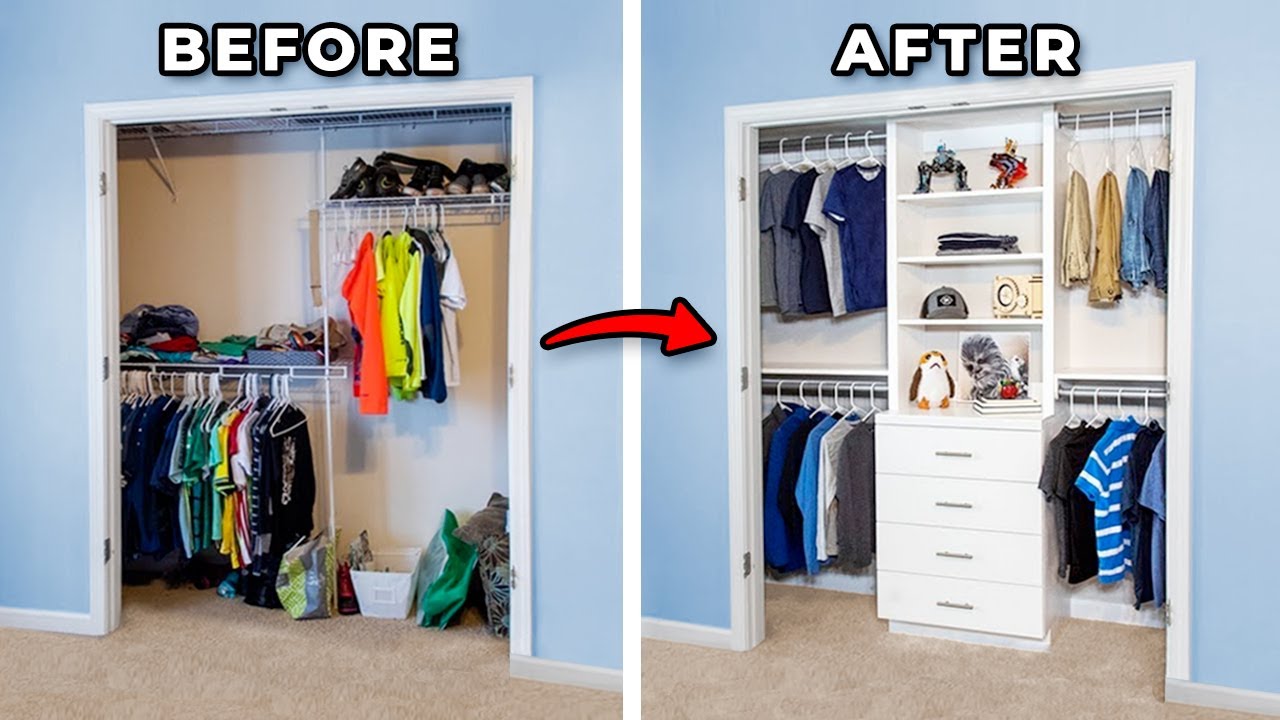
Transform your cluttered closet into an organized space with this step-by-step guide to building a custom closet system featuring a center dresser unit, upper hutch, and adjustable shelving.
Materials:
- 3 sheets of 3/4" radiata pine plywood (or sanded plywood if painting)
- 1 sheet of 1/4" plywood for drawer bottoms
- Poplar or other solid wood trim for face frames and top edge
- 4 sets of full-extension drawer slides (for 4 drawers)
- Drawer pulls/hardware
- 2 metal closet rods
- Shelf brackets
- Wall anchors (for 32" on-center studs)
- Wood glue
- 1 1/4" pocket screws
- Wood putty
- White paint (for interior and exterior)
- Wax paper
- 3/8" dowel pin (for alignment)
- Sandpaper (various grits)
Tools:
- Track saw or circular saw
- Table saw (recommended but optional)
- Jigsaw with thin blade
- Pocket hole jig (Kreg K5 or similar)
- Drill/driver
- Belt sander
- Clamps (large and small)
- Nail gun with brad nails
- Router with 45° chamfer bit
- Combination square
- Tape measure
- Pliers
- Putty knife or screwdriver
- Level
- Compass (for scribing)
- WD-40 Specialist Dry Lube (for hinges)
Step-by-Step Guide
Step 1: Remove Existing Wire Shelves
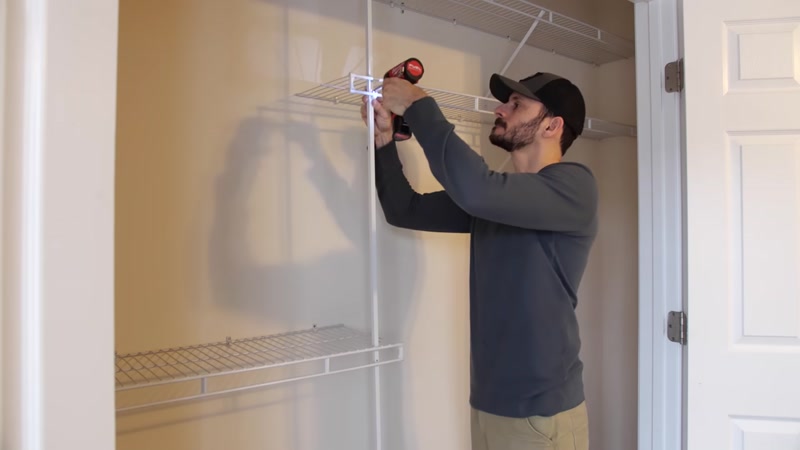
Start by emptying the closet completely. Remove all clothes, shoes, and junk from the corner.
Important: Do not rip the wire shelves out forcefully. This will leave large holes in the wall.
First, remove any vertical supports by unscrewing the clips. Then remove the angled supports below the shelves.
The trick for easy removal: Use a pair of pliers to grip the nail head and pull it out. Then do the same for the wall anchor. Since the nail isn't expanding the anchor anymore, it will come out cleanly.
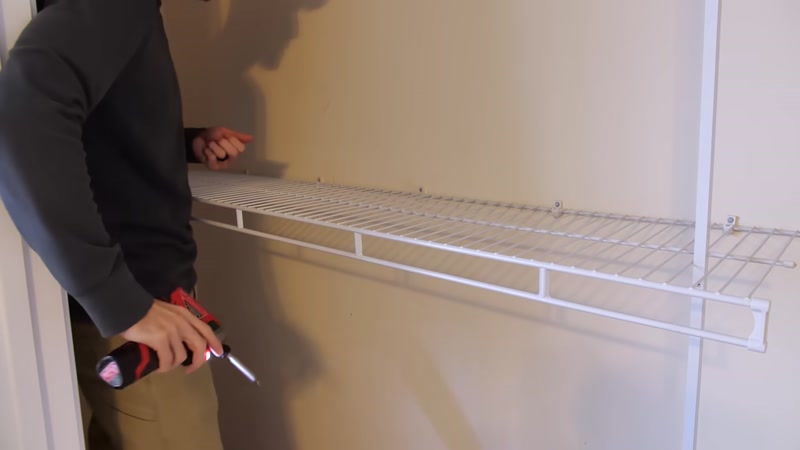
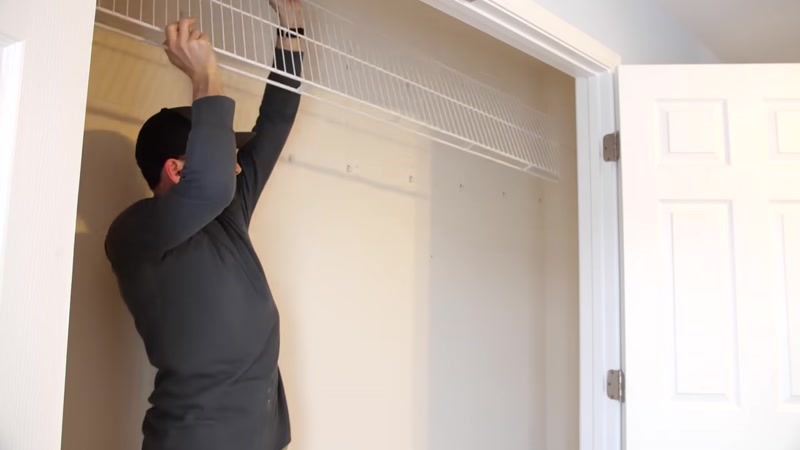
Remove any clips screwed into studs. For the open J-style clips along the back, pop the wire shelving out with a few quick pulls or use a mallet.
For J-clips that don't have exposed nail heads, use a putty knife or screwdriver to pry the nail out of the recess first, then grab the nail head with pliers and remove the wall anchor.
After removal, patch and sand the small holes left behind.
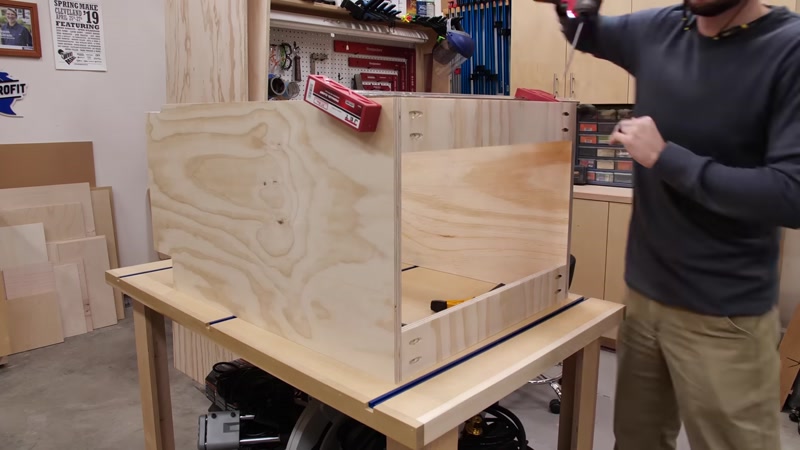
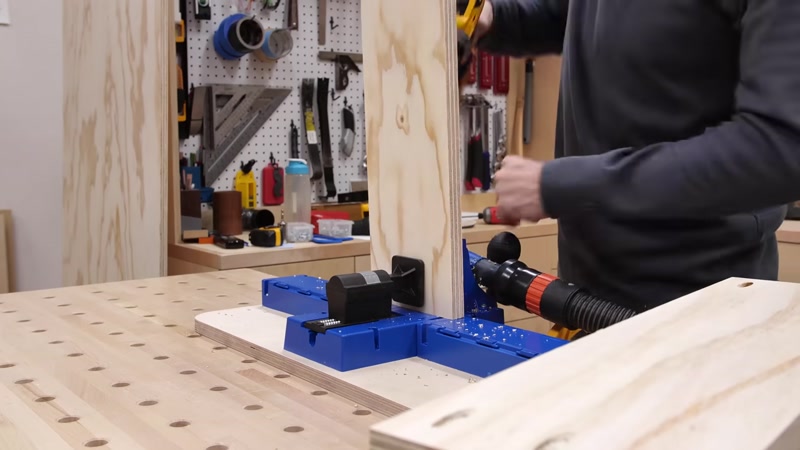
Step 2: Cut Plywood and Build the Base Cabinet Carcass
Select your plywood carefully. If you're painting the final project, save money by choosing radiata pine plywood (around $27-29 per sheet) instead of more expensive options. For this project, you'll need three sheets of 3/4" plywood.
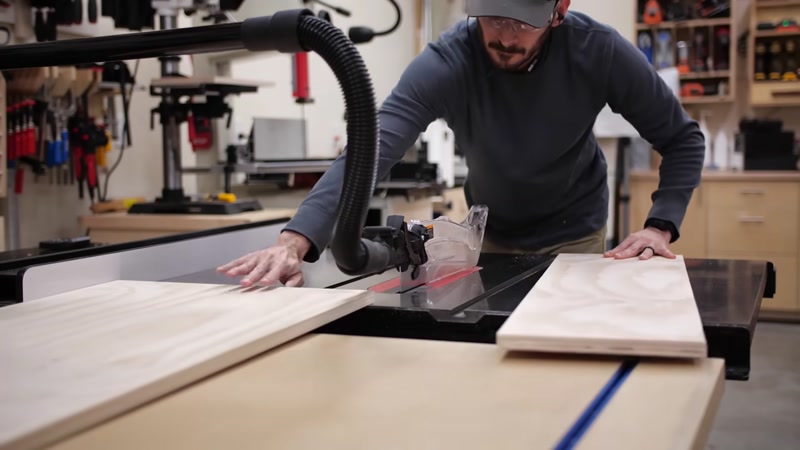
Break down large sheets using a track saw or circular saw with rigid foam insulation underneath for support. For cleaner cuts, use a table saw if available.
Cut the parts for the base cabinet carcass (the center unit that will hold four drawers).
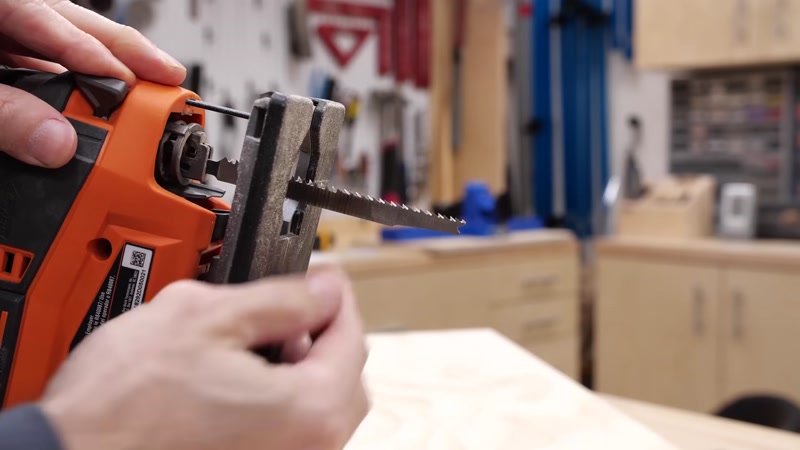
For the toe kick: Mark layout lines on the front of the cabinet sides. Cut a notch in the back to go around baseboards instead of removing them. Use a jigsaw with a thin blade for tight curves.
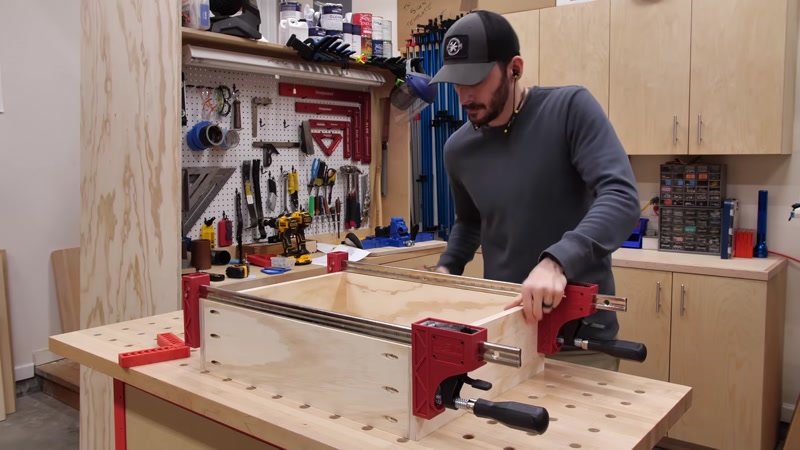
Join the sides using the bottom piece and four supports (top and bottom). Use pocket holes for quick, sturdy joints. Attach the bottom with pocket screws, then flip the cabinet and attach the top supports using large clamps to hold everything tight.
Attach back supports to the sides with two screws through the top and bottom to prevent bowing when securing to the wall.
Step 3: Build the Drawers
Cut drawer parts to size, accounting for full-extension drawer slides. Assemble drawers with pocket screws into the 3/4" plywood.
Cut four drawer bottoms from 1/4" plywood. Glue and nail the bottoms in place to strengthen the drawer and lock everything together.
Route a 45° chamfer on the bottom edges of each drawer to hide the 1/4" plywood bottom and create a floating panel look.
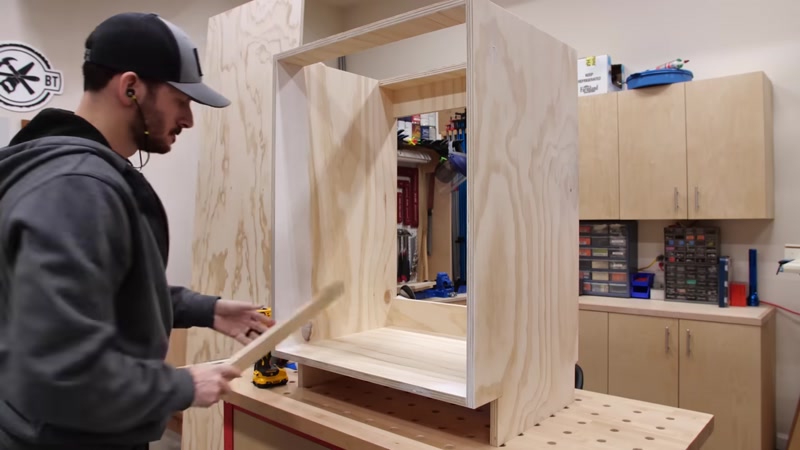
Step 4: Paint and Install Drawer Slides
Apply two coats of white paint to the first several inches inside the cabinet (the only visible area when drawers are installed).
Install full-extension drawer slides using a small spacer for the bottom slide. Use an offcut of the drawer parts to space the remaining slides on both sides.
Install the drawers and attach them to the slides directly in the cabinet.
Step 5: Add Drawer Fronts and Cabinet Top
Cut drawer fronts to size. Cut the cabinet top from plywood with a solid wood trim on the front edge for a custom look.
Mark the trim length using the panel, cut to size, and attach with pocket screws (or glue and brad nails).
Paint the cabinet and top before moving to the hutch.
Step 6: Build the Upper Hutch
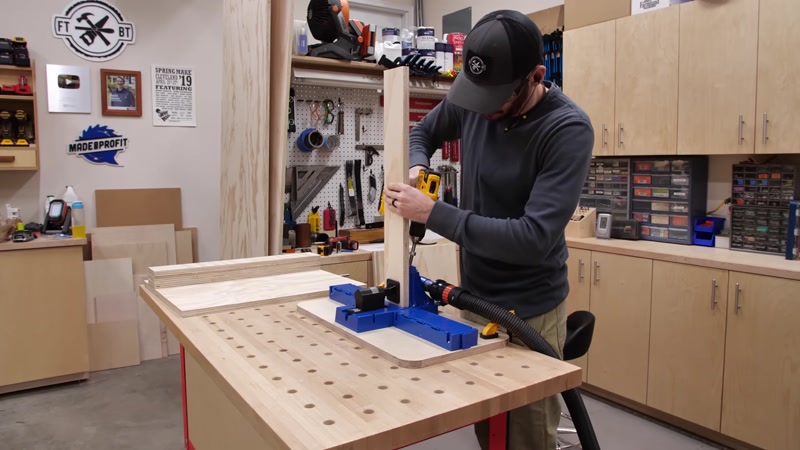
Cut the hutch sides from your plywood. The hutch is just under 4 feet tall, so cut the plywood sheet in half, then rip the sides down.
Cut the top, back supports, and three adjustable shelves to size.
For long sides that won't fit on a table saw with a stop block, stack the two pieces together, flush up the opposite end, and cut both at once based on a mark on the top panel. This gives you two identical pieces.
Attach back supports with pocket holes (these face the back of the closet and won't be visible).
Drill shelf pin holes for adjustable shelves.
Step 7: Paint and Assemble the Hutch
Paint the sides and top before assembly. Rolling paint on panels is much easier than brushing into corners.
Once dry, clamp the top between the sides and secure with pocket screws. Use wax paper between clamps and painted surfaces to prevent sticking.
Add one back support to the top of the hutch and another at the bottom. These will secure the hutch to the wall.
Step 8: Add Face Frame Trim
Cut 1.5" poplar trim to finish the front of the hutch. Cut the top trim with overhang on each side and attach with glue and brad nails.
For the side trim, use a long piece, mark and cut to length. Use a combination square to measure and set the distance between the top trim piece and side panel. Evenly space the trim down the length of the panel.
Repeat on the other side. Fill nail holes with wood putty and paint the trim to match.
Step 9: Install Drawer Fronts and Hardware

Attach the cabinet top from underneath. Mount drawer fronts by drilling holes for hardware first.
Start from the top to ensure proper reveal with the top trim. Use a 1/8" spacer on top of the drawer front, then temporarily screw the front to the drawer box with pocket screws.
Open the drawer and permanently secure the front from inside through pre-drilled holes. Remove temporary screws, drill through the drawer box, and install drawer pulls.
Step 10: Create Alignment for Hutch on Cabinet
Test-fit the hutch on the cabinet. You'll notice the front of the hutch needs support to prevent movement.
Drill a 3/8" dowel pin hole: align the hutch with the back and side of the cabinet, place tape on both pieces, and draw a line across. Measure 3/8" in and drill a hole using blue tape to mark depth.
Use a small square to check the hole is straight. The dowel pin will keep the hutch from shifting if bumped.
Step 11: Install the System in the Closet
Move the base cabinet into the closet. Level it and secure to the wall using wall anchors (especially if studs are 32" on center).
Fix squeaky hinges: Use WD-40 Specialist Dry Lube on closet hinges. It repels dirt and dust and lasts longer than regular lubricants.
Install the hutch. If there's a hump in the wall, use a compass to match the gap between wall and hutch. Run the compass along the edge to mark where to remove material. Sand to the line with a belt sander.
Line up the dowel pin holes and ensure the hutch is flush to the back wall. Level and secure to the wall with wall anchors.
Step 12: Install Shelves and Closet Rods
Attach upper and lower shelves using cleats on the hutch back wall and side wall. Make the top shelf flush with the top of the hutch for continuous upper storage.
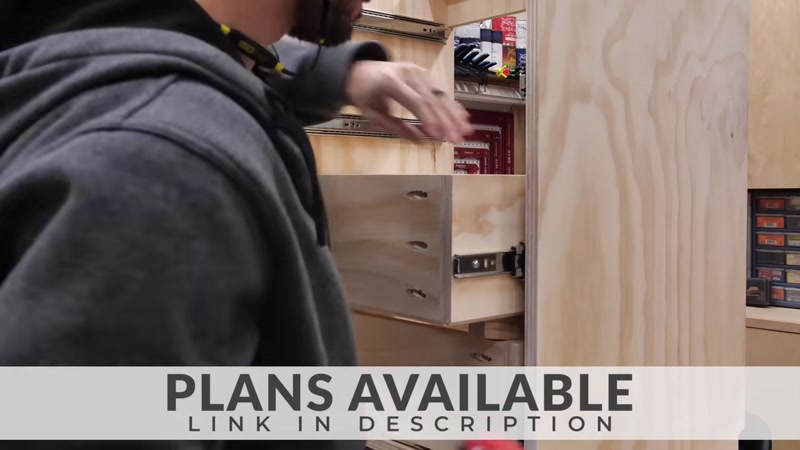
Install two bays of short hanging on each side of the hutch (adjustable for long hanging if needed). Install brackets for metal rods, cut rods to size, and place them in position.
Tips for Success
- Save money on plywood: If you're painting the final project, choose cheaper radiata pine plywood ($27-29 per sheet) instead of expensive hardwood plywood. For this project, saving $20 per sheet means $60 total savings.
- Always test-fit before final installation: The hutch may need scribing to fit uneven walls. Use a compass to mark gaps and sand to the line for a perfect fit.
- Paint panels before assembly: Rolling paint on flat panels is much easier and gives better results than brushing into corners after assembly.
- Use wax paper under clamps: When clamping painted pieces, place wax paper between the clamp heads and the finish to prevent sticking and marring.
- Drill dowel holes carefully: When aligning the hutch to the cabinet, use a small square to check that your drill is going straight. Slightly angled holes will throw off alignment.
